Jump to content


Photo
- - - - -

UWQHD (3440x1440) 21:9 Playfield Cabinet Build Log

21:9 UWQHD Cabinet Build Log

  • Please log in to reply
100 replies to this topic

#81 BoltBait

BoltBait

    Software Developer

  • Members
  • PipPipPip
  • 456 posts
  • Location:Sacramento, CA

  • Flag: United States of America

  • Favorite Pinball: Elvira, Whitewater, Big Bang Bar, Fun House and All the old EM tables of the 70s that I played as a kid (including Buccaneer, Spirit of 76, and King Kool)

Posted 14 January 2026 - 06:25 PM


Anyone want to see pictures of my game room and how the pinball looks in the room?


Yes, I do!


OK, here's the arcade room:


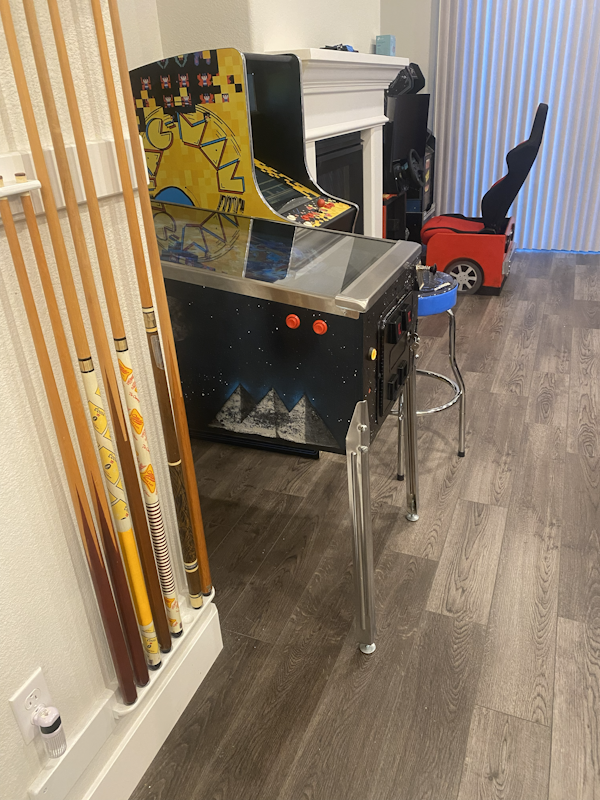
As you walk into the room, you see the pinball machine peeking out from around a corner:


Peeking.png


That's why I painted the pyramids toward the front of the cab.


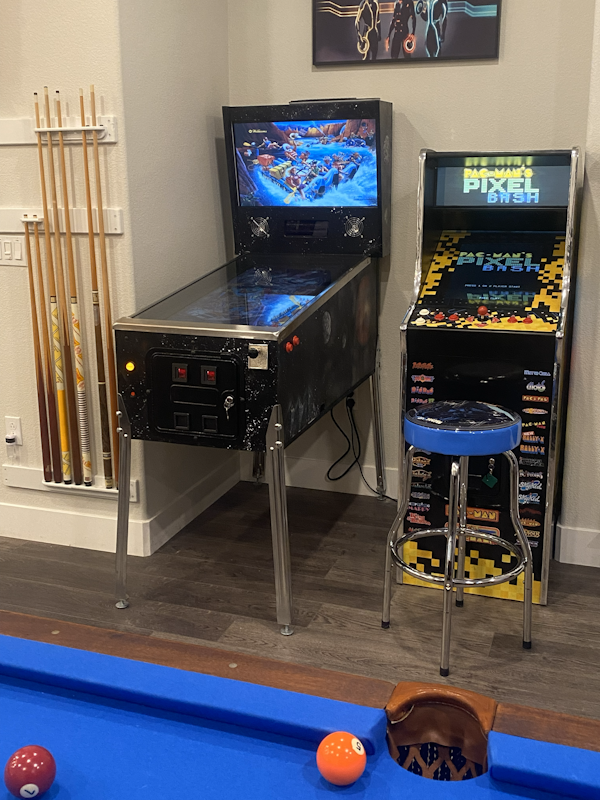
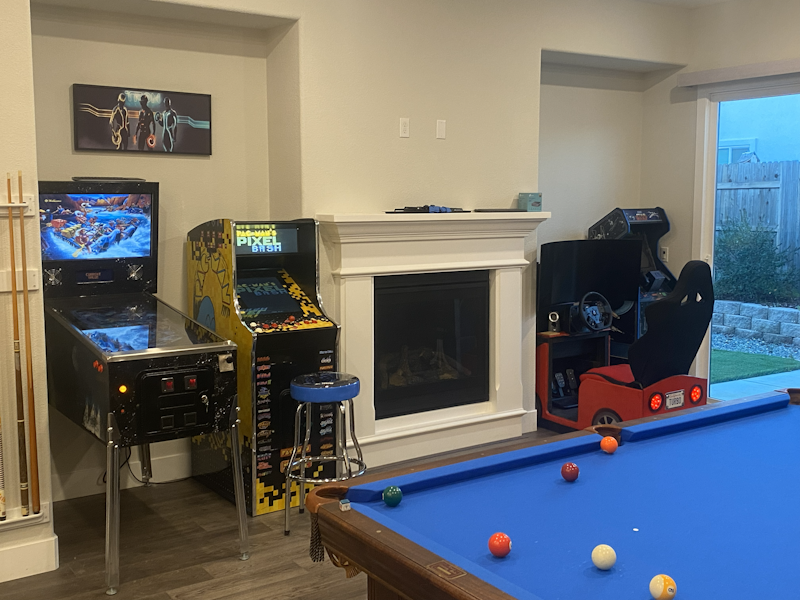
The pinball machine sits next to a multi-arcade machine called Pixel Bash:


GameRoom1.png


Honestly, I never play that one, but my grandkids love it!


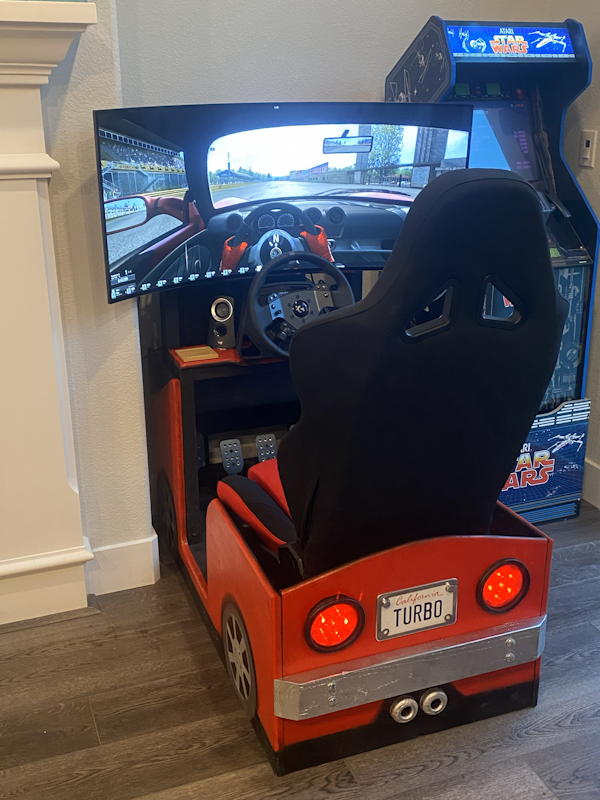
Then comes the fireplace (gas) and after that...


GameRoom2.png


The car racing simulator that I built!  Details here: https://boltbait.com/racecar/


Next to that is the Star Wars (Arcade1Up) machine. I love that machine and play it once in a while.  I'm still no good at it :D


Turning around I have another Arcade1Up multi-arcade machine:


GameRoom3.png


This one has lots of great games in it. But, mostly I play Centipede.


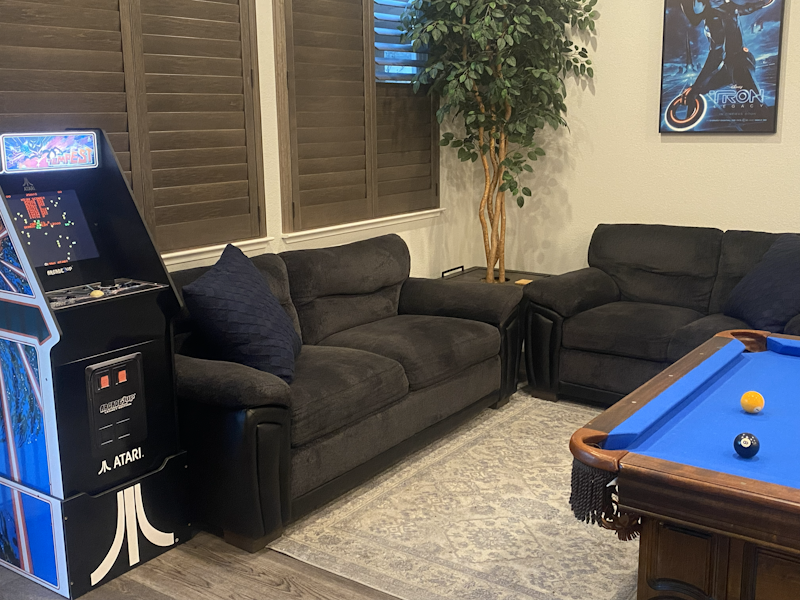
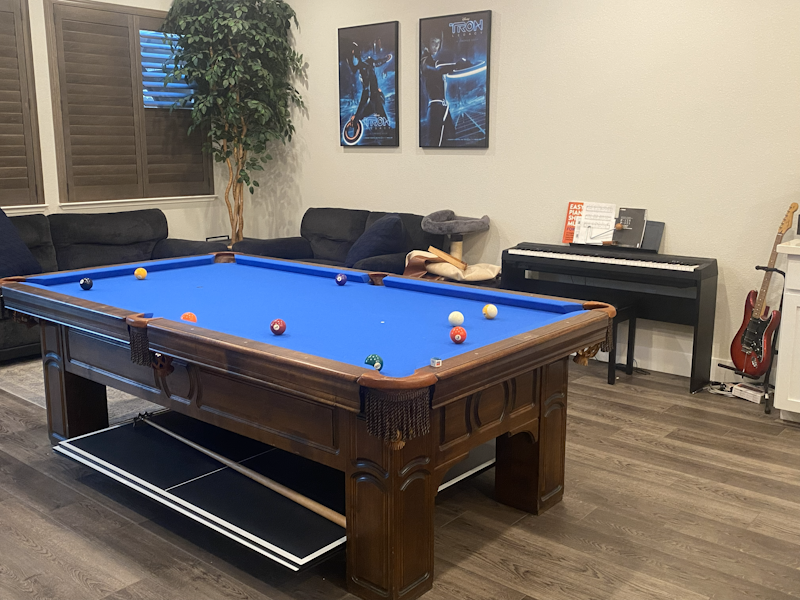
To the right of that, there's the pool table:


GameRoom6.png


With a ping pong topper below.


Feel free to drop by any time!


TLDR:


GameRoom5.png


So, what do you think... how does the new cab look?


You can see the backyard through the glass door.  If you want to see more pictures of it, check here: https://boltbait.com/backyard/


Edited by BoltBait, 15 January 2026 - 11:48 PM.

How I built my B2S Pinball Cabinet, step-by-step, with pictures!  Full-sized cabinet for ~$700. Believe me, if I can do it, so can you!

"Making anything with your hands goes wonderfully with whatever in your life you would consider your grind." ~Nick Offerman


#82 rickh

rickh

    Enthusiast

  • Gold Supporter
  • 436 posts
  • Location:Raleigh

  • Flag: United States of America

  • Favorite Pinball: I love them all

Posted 23 January 2026 - 01:19 PM

Boltbait,


When I go out to Cali next week, I'm going to your place to play! ;-)


Rick


Rickey

Intense Arcade

http://www.intensearcade.com


#83 rickh

rickh

    Enthusiast

  • Gold Supporter
  • 436 posts
  • Location:Raleigh

  • Flag: United States of America

  • Favorite Pinball: I love them all

Posted 23 January 2026 - 01:38 PM

Boltbait,


Tell us how many hours do you have into this cabinet?  I'm asking soup to nuts. 


Thanks in advance,


Rick


Rickey

Intense Arcade

http://www.intensearcade.com


#84 BoltBait

BoltBait

    Software Developer

  • Members
  • PipPipPip
  • 456 posts
  • Location:Sacramento, CA

  • Flag: United States of America

  • Favorite Pinball: Elvira, Whitewater, Big Bang Bar, Fun House and All the old EM tables of the 70s that I played as a kid (including Buccaneer, Spirit of 76, and King Kool)

Posted 24 January 2026 - 09:10 AM

Boltbait,


When I go out to Cali next week, I'm going to your place to play! ;-)


Rick


You're welcome anytime!


Boltbait,


Tell us how many hours do you have into this cabinet?  I'm asking soup to nuts. 


Thanks in advance,


Rick


Probably more than I'd like to admit.  It was spread out over 2 months.  So, not too much on any single day.


How I built my B2S Pinball Cabinet, step-by-step, with pictures!  Full-sized cabinet for ~$700. Believe me, if I can do it, so can you!

"Making anything with your hands goes wonderfully with whatever in your life you would consider your grind." ~Nick Offerman


#85 rickh

rickh

    Enthusiast

  • Gold Supporter
  • 436 posts
  • Location:Raleigh

  • Flag: United States of America

  • Favorite Pinball: I love them all

Posted 24 January 2026 - 02:12 PM


Boltbait,


When I go out to Cali next week, I'm going to your place to play! ;-)


Rick


You're welcome anytime!


Boltbait,


Tell us how many hours do you have into this cabinet?  I'm asking soup to nuts. 


Thanks in advance,


Rick


Probably more than I'd like to admit.  It was spread out over 2 months.  So, not too much on any single day.


Looking back in retrospect I have over 50 hours for each finished VP cabinet.   I have a CNC router and it obviously saved me a lot of time cutting the wood, but finishing the cabinet, such as sanding, filling, and painting consumed a lot of time.  So did the electrical assembly such as mounting speakers, exciters, PC, terminal blocks, buttons, ball plunger, PSU, 2.1 amplifier and wiring harnesses.  Last, is the fit and finish.  All said and done, it took much longer than the guy in the "Way Of The Wrench" YouTube video.  DIYer should have a reasonable expectation on how much time it takes to fully build a functional VP machine.  The raw cabinet is only the ante.  What do you think?      


Rickey

Intense Arcade

http://www.intensearcade.com


#86 BoltBait

BoltBait

    Software Developer

  • Members
  • PipPipPip
  • 456 posts
  • Location:Sacramento, CA

  • Flag: United States of America

  • Favorite Pinball: Elvira, Whitewater, Big Bang Bar, Fun House and All the old EM tables of the 70s that I played as a kid (including Buccaneer, Spirit of 76, and King Kool)

Posted 25 January 2026 - 06:14 PM


Boltbait,


Tell us how many hours do you have into this cabinet?  I'm asking soup to nuts. 


Thanks in advance,


Rick


Probably more than I'd like to admit.  It was spread out over 2 months.  So, not too much on any single day.


Looking back in retrospect I have over 50 hours for each finished VP cabinet.   I have a CNC router and it obviously saved me a lot of time cutting the wood, but finishing the cabinet, such as sanding, filling, and painting consumed a lot of time.  So did the electrical assembly such as mounting speakers, exciters, PC, terminal blocks, buttons, ball plunger, PSU, 2.1 amplifier and wiring harnesses.  Last, is the fit and finish.  All said and done, it took much longer than the guy in the "Way Of The Wrench" YouTube video.  DIYer should have a reasonable expectation on how much time it takes to fully build a functional VP machine.  The raw cabinet is only the ante.  What do you think?      


Yeah, 50 hours is pretty accurate. Gotta figure in all the trips to the hardware store...


I would say that, plus all the software setup of the individual tables, PinballY, and capturing all the attract videos, etc.


How I built my B2S Pinball Cabinet, step-by-step, with pictures!  Full-sized cabinet for ~$700. Believe me, if I can do it, so can you!

"Making anything with your hands goes wonderfully with whatever in your life you would consider your grind." ~Nick Offerman


#87 Smitty2k1

Smitty2k1

    Hobbyist

  • Members
  • PipPip
  • 29 posts

  • Flag: ---------

  • Favorite Pinball: test

Posted 26 February 2026 - 12:48 AM

Have you been playing? How do you find the 21:9 in practice?

#88 SmedleyB

SmedleyB

    Enthusiast

  • Members
  • PipPipPip
  • 56 posts

  • Flag: ---------

  • Favorite Pinball: Theatre of Magic

Posted 26 February 2026 - 12:40 PM

Sorry, I'm several months late finding this thread, but if it helps anyone considering the Innocn, I,LL copy and paste what I wrote on Discord in Nov 2023:

OK, for posterity, here's my INNOCN 40" 21:9 monitor review:
-I had high hopes but I ripped it out of my setup after 3 days.
-Ultimately I couldn't handle the washed out blacks and not-so-great viewing angles you get when lying this monitor on its back. It was just a step back compared to the image quality of my previous monitor.
-Being able to dial in a 1:1 POV was great and I really enjoyed the size. It really, really, really sucks to go back to a squished 16:9 playfield.
-Ultimately you will be taking on extra admin work if you use a 21:9 playfield. For tables that have VR built in, I edited the table scripts to make the cab parts like rails, lockdown bar and rear of cab / backbox visible. This filled in the spaces not covered by the playfield. There is actually a lot of room left over on the 21:9 format.
-I never got around to this, but I planned to try using the Other2 screen in Popper to show a top-of-cab image to fill in the gap left by tables that don't have a cab / backbox image to show. I think you would have to create custom pup packs and custom pinupplayer.ini's to really dial in the location of that image per table, though.
-I used the Other2 screen in Popper to fill in the playfield menu gap with a backglass video. This worked well and looks pretty cool.

#89 Smitty2k1

Smitty2k1

    Hobbyist

  • Members
  • PipPip
  • 29 posts

  • Flag: ---------

  • Favorite Pinball: test

Posted 26 February 2026 - 04:43 PM

Sorry, I'm several months late finding this thread, but if it helps anyone considering the Innocn, I,LL copy and paste what I wrote on Discord in Nov 2023:

OK, for posterity, here's my INNOCN 40" 21:9 monitor review:
-I had high hopes but I ripped it out of my setup after 3 days.
-Ultimately I couldn't handle the washed out blacks and not-so-great viewing angles you get when lying this monitor on its back. It was just a step back compared to the image quality of my previous monitor.
-Being able to dial in a 1:1 POV was great and I really enjoyed the size. It really, really, really sucks to go back to a squished 16:9 playfield.
-Ultimately you will be taking on extra admin work if you use a 21:9 playfield. For tables that have VR built in, I edited the table scripts to make the cab parts like rails, lockdown bar and rear of cab / backbox visible. This filled in the spaces not covered by the playfield. There is actually a lot of room left over on the 21:9 format.
-I never got around to this, but I planned to try using the Other2 screen in Popper to show a top-of-cab image to fill in the gap left by tables that don't have a cab / backbox image to show. I think you would have to create custom pup packs and custom pinupplayer.ini's to really dial in the location of that image per table, though.
-I used the Other2 screen in Popper to fill in the playfield menu gap with a backglass video. This worked well and looks pretty cool.


Surprised you found the colors washed out. It's an IPS screen so should have great viewing angles. Was it this exact model? https://innocn.com/e...-gaming-monitor

#90 BoltBait

BoltBait

    Software Developer

  • Members
  • PipPipPip
  • 456 posts
  • Location:Sacramento, CA

  • Flag: United States of America

  • Favorite Pinball: Elvira, Whitewater, Big Bang Bar, Fun House and All the old EM tables of the 70s that I played as a kid (including Buccaneer, Spirit of 76, and King Kool)

Posted 26 February 2026 - 10:35 PM

Have you been playing? How do you find the 21:9 in practice?

 
TLDR: I will never go back to 16:9...  21:9 is where it's at!!!
 
I had no trouble at all adjusting all the tables to 21:9.  I have installed PinballY front-end and captured attract video for all 55 tables.  There are a few tables that weren't able to make the trip from VPX10.6 to VPX10.8, but for the most part, the upgrade went pretty smooth.  Having a separate DMD screen is way better than I imagined--Just Do It!!!
 
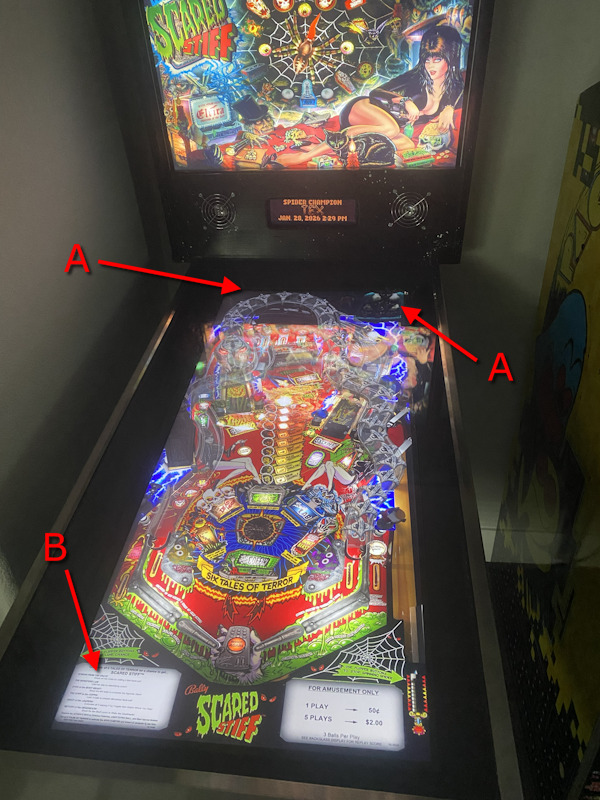
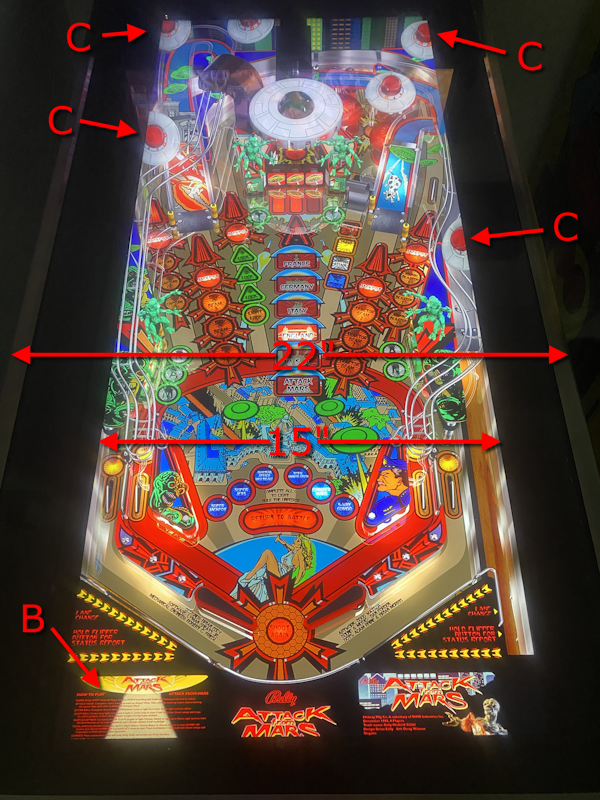
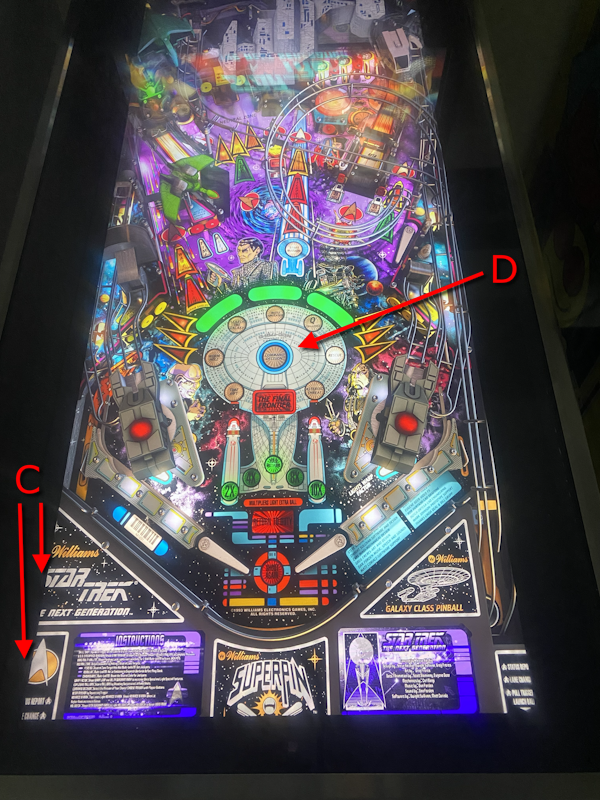
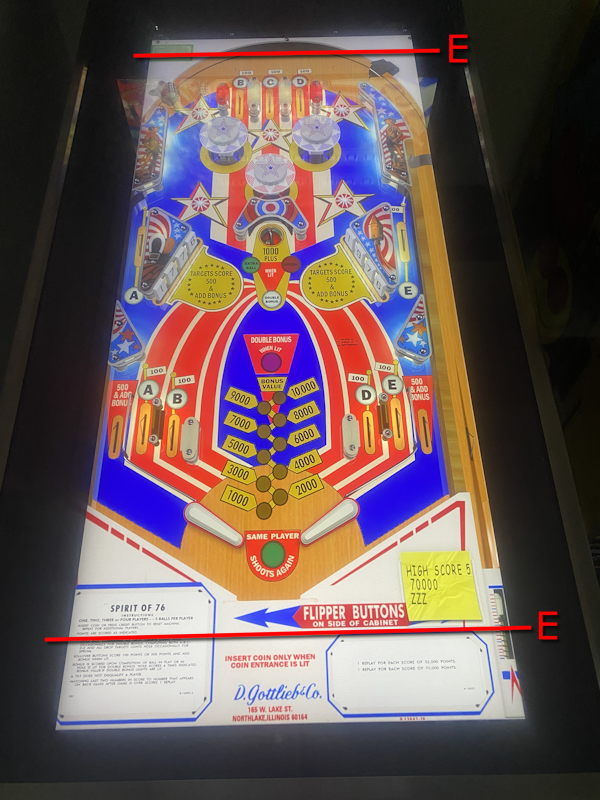
Here's how it looks with various tables:
 
Results1.png
 
A) I like the fact that you can see the entire playfield including the upper dragon ramp and the back wall of skulls.
 
B) You can also see the entire instruction card.
 
Of course, there are some compromises I had to make:
 
Results2.png
 
C) Some of the enemy space ships (toys) are cut off slightly. I don't think it affects the game at all, but a purest may disagree.
 
The monitor is 15 inches wide, so it fits comfortably withing the standard 22 inch width of the pinball machine. This allows me to use a standard lockdown bar and mechanism.
 
Results3.png
 
D) Some wide tables look a little cutoff, but the circles still look like circles!
 
Results4.png
 
E) When I had my 16:9 TV monitor, the top and bottom of many tables were cutoff at about where the lines are shown.  I much prefer the full view of the tables.
 
Bottom Line: I'll never go back to 16:9.  21:9 is where its at!
 
EDIT: All that said, it wasn't all bunnies and rainbows.  Here are some troubleshooting threads I started while setting up my latest cabinet:


One critical piece of advice I forgot to mention: Be sure to have all 3 monitors hooked up and working BEFORE you install VPX!  The installer for VPX prompts you to drag-and-drop a playfield window to your playfield monitor, your backglass window to the backglass monitor, and the DMD window to the DMD monitor. 


Edited by BoltBait, 13 March 2026 - 05:46 AM.

How I built my B2S Pinball Cabinet, step-by-step, with pictures!  Full-sized cabinet for ~$700. Believe me, if I can do it, so can you!

"Making anything with your hands goes wonderfully with whatever in your life you would consider your grind." ~Nick Offerman


#91 SmedleyB

SmedleyB

    Enthusiast

  • Members
  • PipPipPip
  • 56 posts

  • Flag: ---------

  • Favorite Pinball: Theatre of Magic

Posted 27 February 2026 - 12:40 AM


Surprised you found the colors washed out. It's an IPS screen so should have great viewing angles. Was it this exact model? https://innocn.com/e...-gaming-monitor


Yes, that's the one. I usually play on a VA panel, so blacks are super black. The INNOCN was a step down when it came to that, and just got even worse when you lay it on it's back at that viewing angle, especially at parts of the screen farthest from your eyes.

I've also spent a lot of time understanding how VPX's window POV works and optimizing my settings for best immersion. Windows POV draws the table such that you should think of your monitor as the glass and it sinks the rest of the table down into your screen. So that means I need the sidewalls visible and ideally the monitor placed at 10-15 degrees for most modern style tables. And having the sidewalls visible causes you to end up with a lot of empty space top and bottom on a 21:9 monitor. Ideally we would have a 18:9 or 19:9 monitor to make things nice and tidy for Windows POV and sidewalls.


#92 BoltBait

BoltBait

    Software Developer

  • Members
  • PipPipPip
  • 456 posts
  • Location:Sacramento, CA

  • Flag: United States of America

  • Favorite Pinball: Elvira, Whitewater, Big Bang Bar, Fun House and All the old EM tables of the 70s that I played as a kid (including Buccaneer, Spirit of 76, and King Kool)

Posted 27 February 2026 - 02:42 AM

Thanks for the build details so far. I was planning a 32" build with a 16:9 but now you have me thinking a 40" build with 21:9. Same width as the 32" but longer playfield. The MSI monitor you used and the INNCON 40C1R seem to be reasonable display choices.


Now that you've seen my build... are you ready to get started?!


(I want to see pictures!)


How I built my B2S Pinball Cabinet, step-by-step, with pictures!  Full-sized cabinet for ~$700. Believe me, if I can do it, so can you!

"Making anything with your hands goes wonderfully with whatever in your life you would consider your grind." ~Nick Offerman


#93 Smitty2k1

Smitty2k1

    Hobbyist

  • Members
  • PipPip
  • 29 posts

  • Flag: ---------

  • Favorite Pinball: test

Posted 27 February 2026 - 04:59 PM


Thanks for the build details so far. I was planning a 32" build with a 16:9 but now you have me thinking a 40" build with 21:9. Same width as the 32" but longer playfield. The MSI monitor you used and the INNCON 40C1R seem to be reasonable display choices.

 
Now that you've seen my build... are you ready to get started?!
 
(I want to see pictures!)

I'm still finishing my 24" pincab, which is a wedding gift for a friend. I'm likely building a "3/4" size cab with a 32" monitor (the equivalent width of yours). Not a full size. So my decision is 32" vs 40", not 40" vs 43".

Is there a reason you don't just shrink the "wider" tables so they fit and leave a little black space at the back of the playfield instead of cutting off the sides?


 Surprised you found the colors washed out. It's an IPS screen so should have great viewing angles. Was it this exact model? https://innocn.com/e...-gaming-monitor
 

Yes, that's the one. I usually play on a VA panel, so blacks are super black. The INNOCN was a step down when it came to that, and just got even worse when you lay it on it's back at that viewing angle, especially at parts of the screen farthest from your eyes.

I've also spent a lot of time understanding how VPX's window POV works and optimizing my settings for best immersion. Windows POV draws the table such that you should think of your monitor as the glass and it sinks the rest of the table down into your screen. So that means I need the sidewalls visible and ideally the monitor placed at 10-15 degrees for most modern style tables. And having the sidewalls visible causes you to end up with a lot of empty space top and bottom on a 21:9 monitor. Ideally we would have a 18:9 or 19:9 monitor to make things nice and tidy for Windows POV and sidewalls.

I'm still confused - a VA panel should look bad when viewed off axis, the colors should be all washed out. The INNOCN (or MSI equivalent) IPS panel should look much better than the VA panel when viewed off axis. I won't argue the point about deeper blacks on VA (when viewed straight on).

That said, I hadn't considered your point about needing to leave space on the screen to show the "sides" of the table. Maybe 16:9 is where it is at after all...

#94 BoltBait

BoltBait

    Software Developer

  • Members
  • PipPipPip
  • 456 posts
  • Location:Sacramento, CA

  • Flag: United States of America

  • Favorite Pinball: Elvira, Whitewater, Big Bang Bar, Fun House and All the old EM tables of the 70s that I played as a kid (including Buccaneer, Spirit of 76, and King Kool)

Posted 27 February 2026 - 06:09 PM

Is there a reason you don't just shrink the "wider" tables so they fit and leave a little black space at the back of the playfield instead of cutting off the sides?


Yes, there is.  I prefer to maximize the width of the playfield in regards to the ball path itself. That is, I tend to cut off the side rails a bit so that the x:y ratio is normal (circles look like circles) and the playfield part that actually matters is maximized.  In other words, my cabinet has side rails, so I don't need to see them in the render on the screen.


If you look at this screenshot, you'll see that the left and right sides are VERY close to the ball path and the sides are cutoff just a little bit. That's just my preference and can be easily adjusted if you prefer it the other way.


Results4.png


There are side rails and side walls in the actual table, but like I said, I don't need them to be shown.


I mostly play the older EM tables and it really isn't an issue. I prefer to see the entire table, from the top to the bottom of the instruction card.


Edited by BoltBait, 27 February 2026 - 06:14 PM.

How I built my B2S Pinball Cabinet, step-by-step, with pictures!  Full-sized cabinet for ~$700. Believe me, if I can do it, so can you!

"Making anything with your hands goes wonderfully with whatever in your life you would consider your grind." ~Nick Offerman


#95 BoltBait

BoltBait

    Software Developer

  • Members
  • PipPipPip
  • 456 posts
  • Location:Sacramento, CA

  • Flag: United States of America

  • Favorite Pinball: Elvira, Whitewater, Big Bang Bar, Fun House and All the old EM tables of the 70s that I played as a kid (including Buccaneer, Spirit of 76, and King Kool)

Posted 13 April 2026 - 07:26 AM

During the upgrade process that I described in this thread, I transferred almost all the hardware from my old cabinet to my new cabinet.
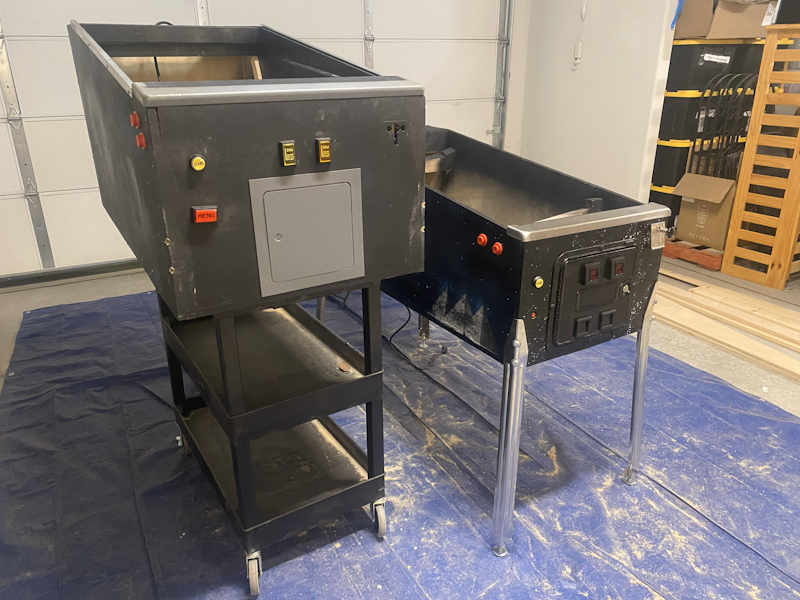
 

spare01.png


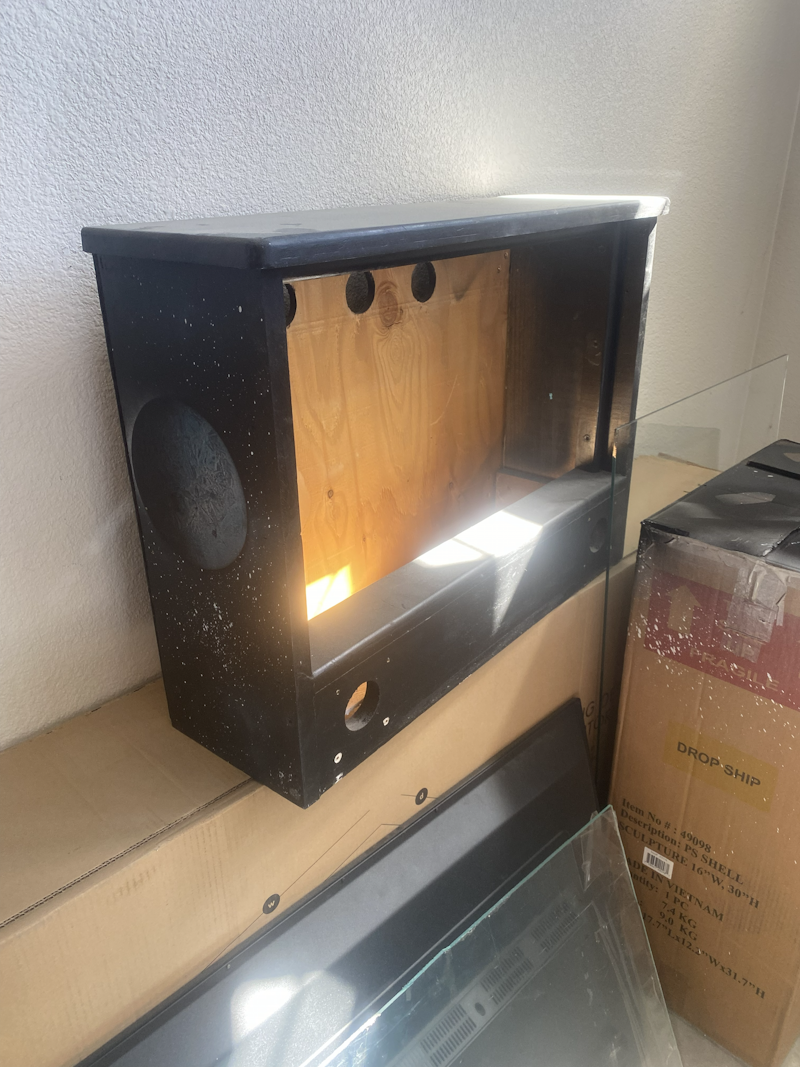
Above, you can see when I removed the legs and transferred them to the new cabinet.  After I took everything out of the old cabinet, I just put the old box in a corner of the garage.  It still had a pretty cool paint job and I wondered what I could do with it. I was thinking of cutting out the sides and making wall hangings of a spacescape... It seemed like a waste to just cut the box up and throw it in the trash.


Well, I started taking the old cabinet apart to deal with it some way...
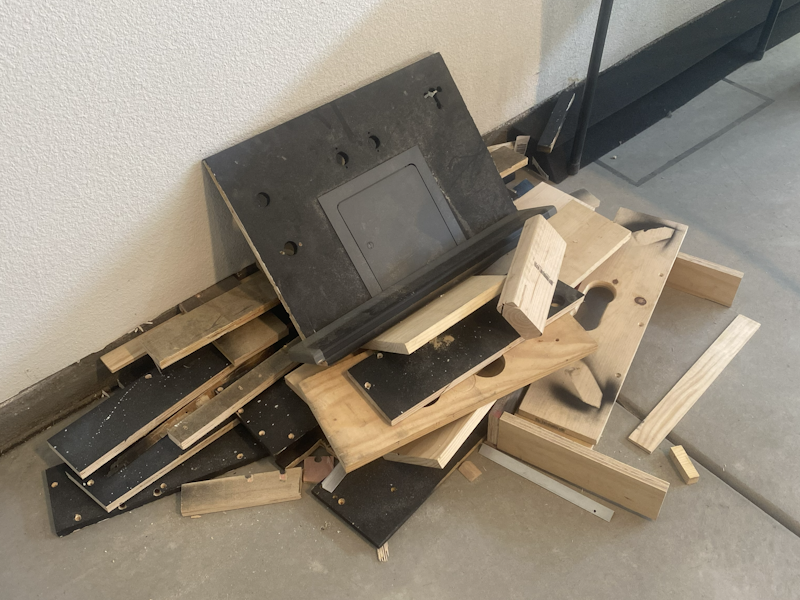
 

spare02.png


spare03.png


As I was taking it apart, I realized that I had replaced so much stuff during my upgrade... other than the legs and the plunger/controller, I still had enough spare parts to build an entire pinball cabinet.


So, on a Friday night, I got busy and starting assembling everything I'd need to make a new B2S pinball cabinet.


I didn't want to use my old TV, so I grabbed an old 32" 16:9 monitor I had in my closet--I'll use that as a playfield.


I worked all weekend cutting down my old cabinet to fit the 32" monitor and by Monday this is what I had:
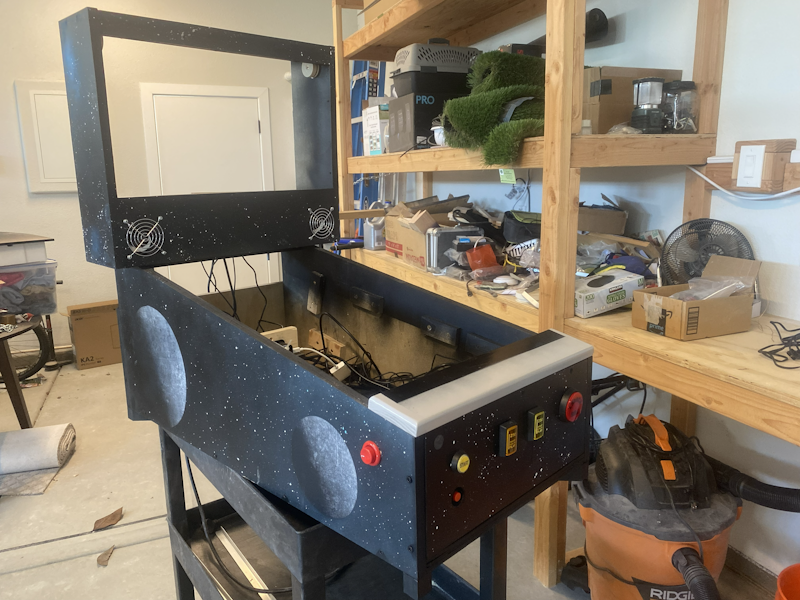
 

spare04.png


Instead of proper legs, I used a one inch piece of wood with felt pads underneath.  This will be the perfect height once placed on a dining room table.


This was a quick build, so it wasn't as polished as my new cabinet. You can see visible screws, etc.


While I was digging through my box of spare pinball parts, I realized that I had an old controller!


In my original cabinet, I had blown out a channel of my original controller and ordered a replacement. I kept the old controller, just in case I ever needed it. The problem with that old controller is that one of the Mag Save buttons was blown out--it just didn't work.  But, as long as I don't include Mag Save buttons on this build, it should work fine!
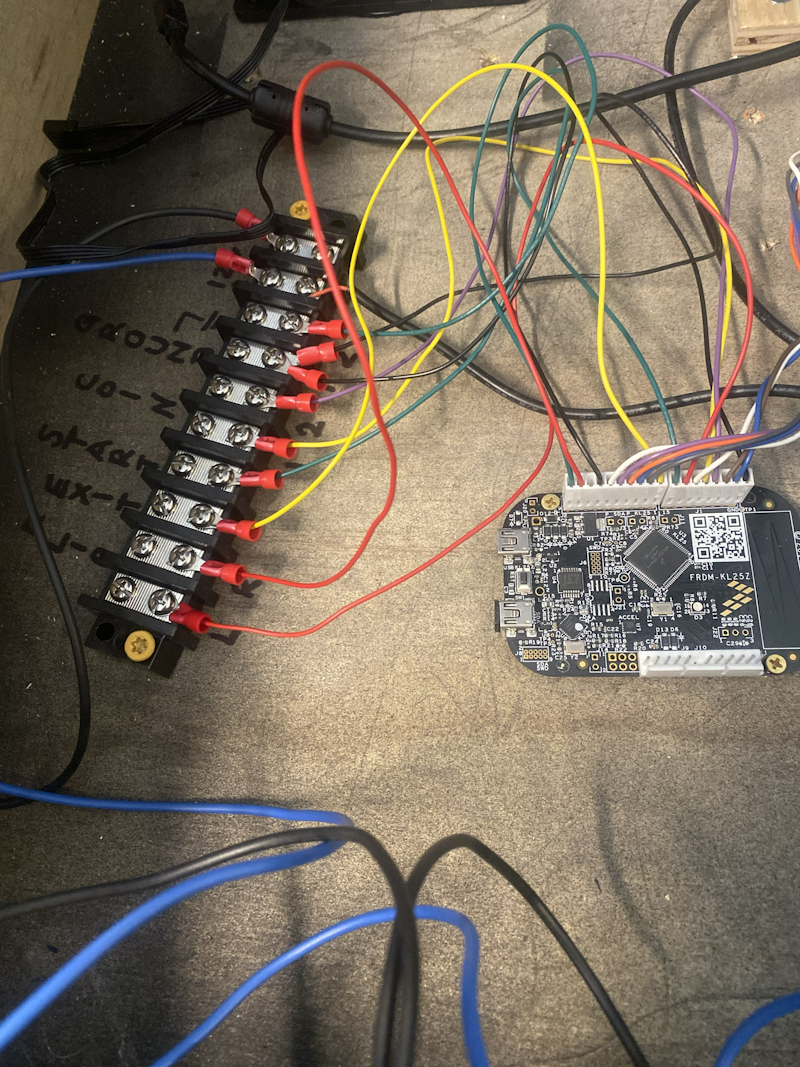
 

spare05.png


On Monday, I did all the wiring and by the end of the night, it looked like this:
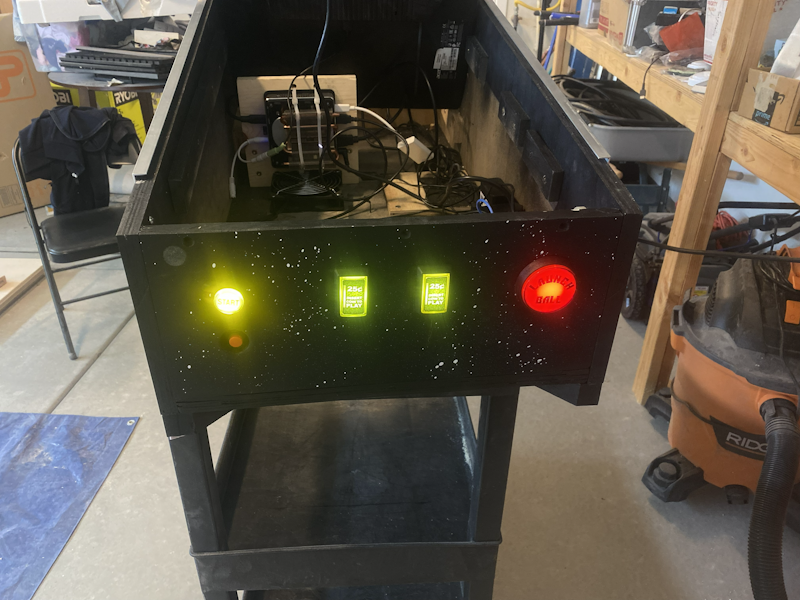
 

spare06.png


Now, I didn't have a spare plunger, so I just installed the Launch Ball button.


Of course, having a launch ball button isn't quite as nice as a plunger, but it will work!


Here's what the inside looked like by Monday night:
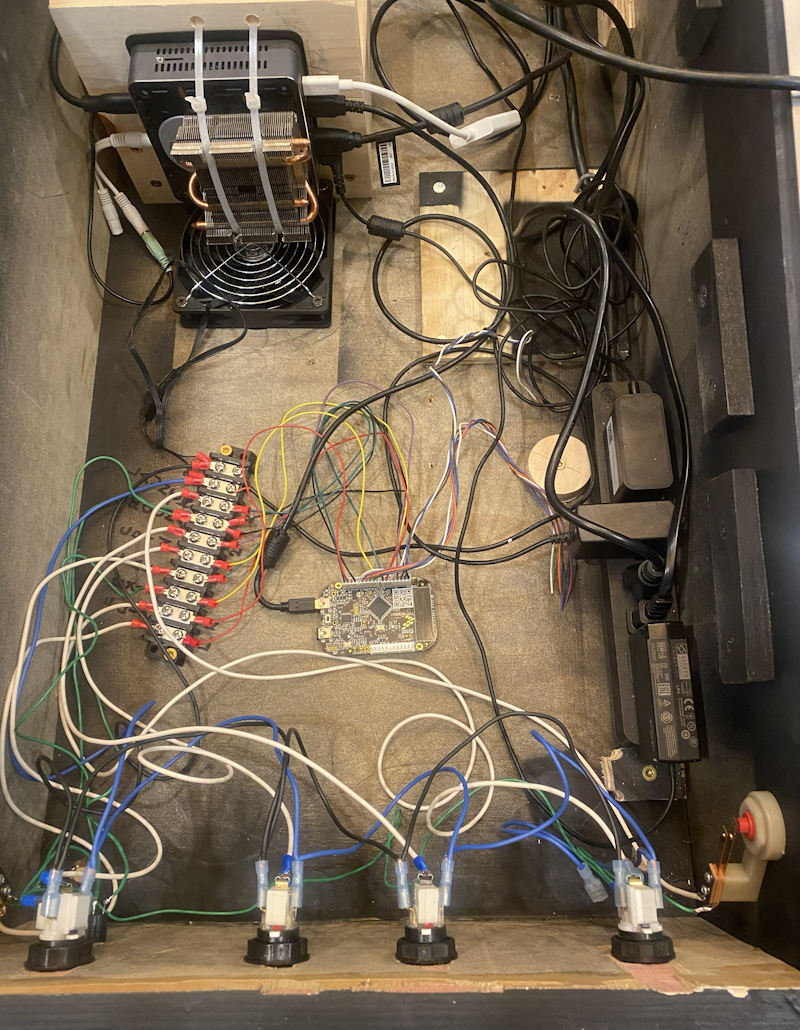
 

spare07.png


No sub woofer on this build, just two regular speakers in the back box.


On Tuesday, I installed the side rails from the old cabinet (had to cut them down to size) and I purchased a piece of Lexan for the playfield protector.


I installed the two screens and set it up on the dining room table to finish with the software install.
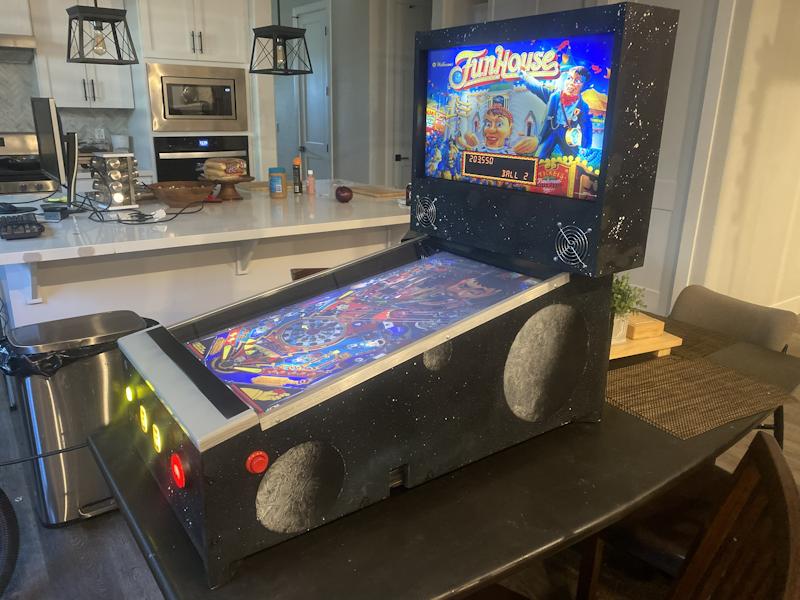
 

spare10.png


Really, the only thing I had to purchase for this build was the piece of Lexan.  Everything else was spare parts I had laying around.


Oh, I also had to buy some wood to create a new back box and a couple of eye bolts to hold it all together.  All told, less than fifty bucks.


Here's a view of the back:
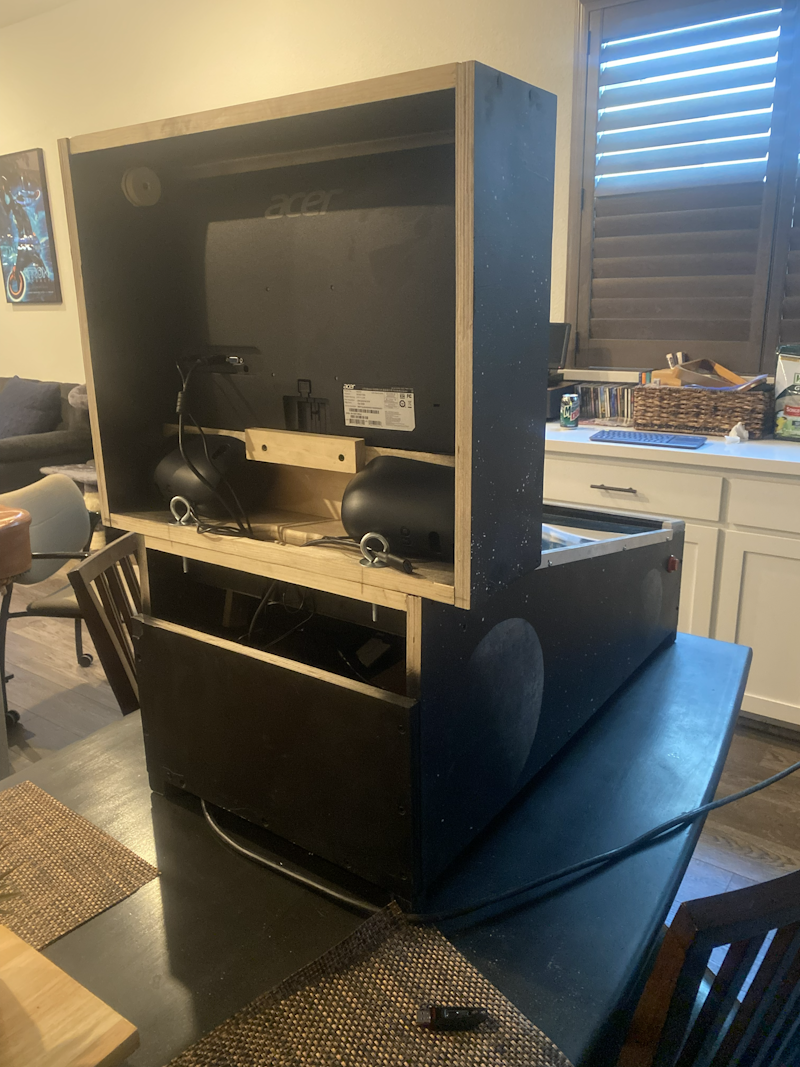
 

spare11.png


The bulbs I used in the buttons are super bright (LED).  Here's what the front panel looks like when turned off:
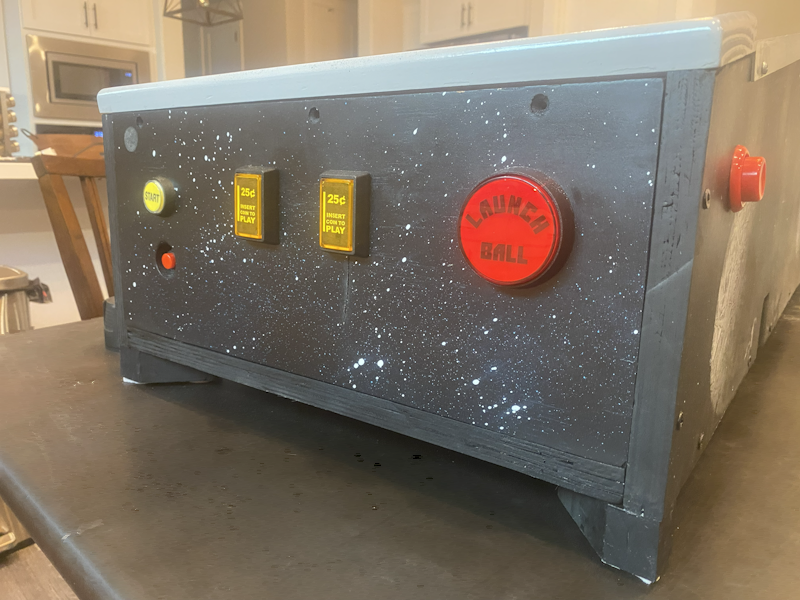
 

spare13.png


I installed the latest Visual Pinball, VPinMame, and PinballY versions.


Now, the computer is from my previous pinball cabinet, so it already had 55+ tables installed in it. But, since the screen is different, I had to configure it to work.  That took some time, a couple of days.
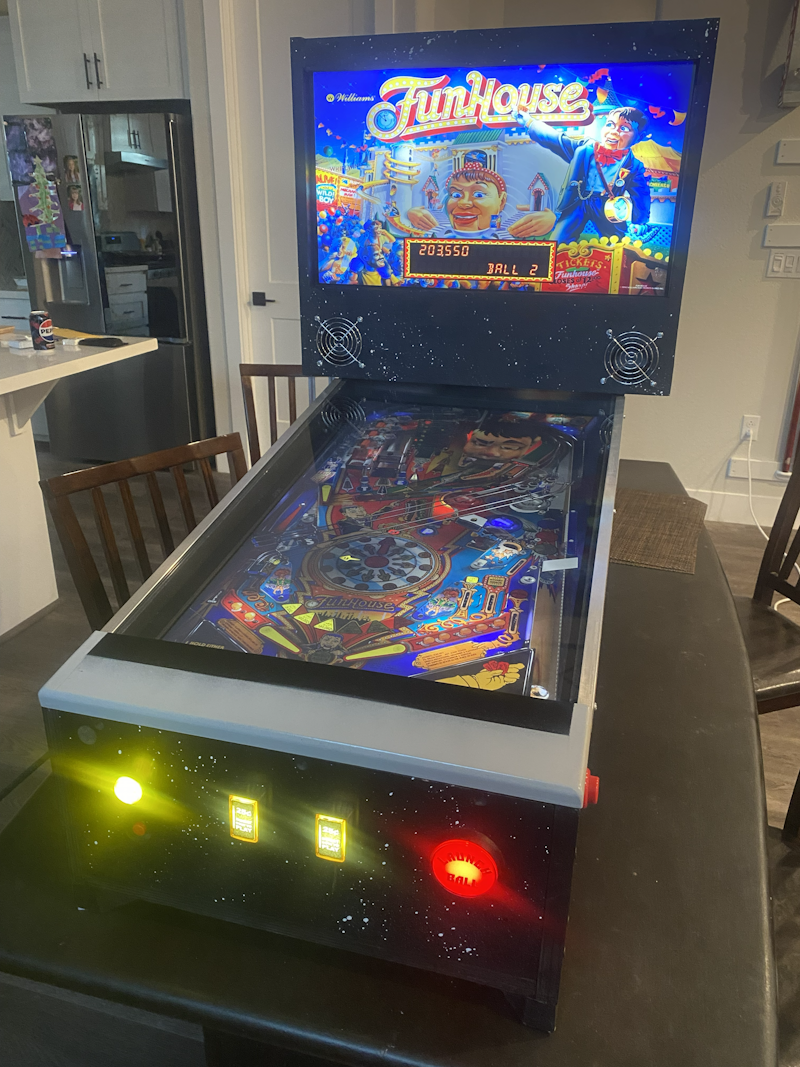
 

spare12.png


My friend, Jason, was a huge help to me when building MY latest cabinet. He helped me with some wood working and computer setup.  He was the one who gave me the Motherboard/Processor I used in the upgrade.  So, on Friday, after one week, I gifted him the pinball machine!
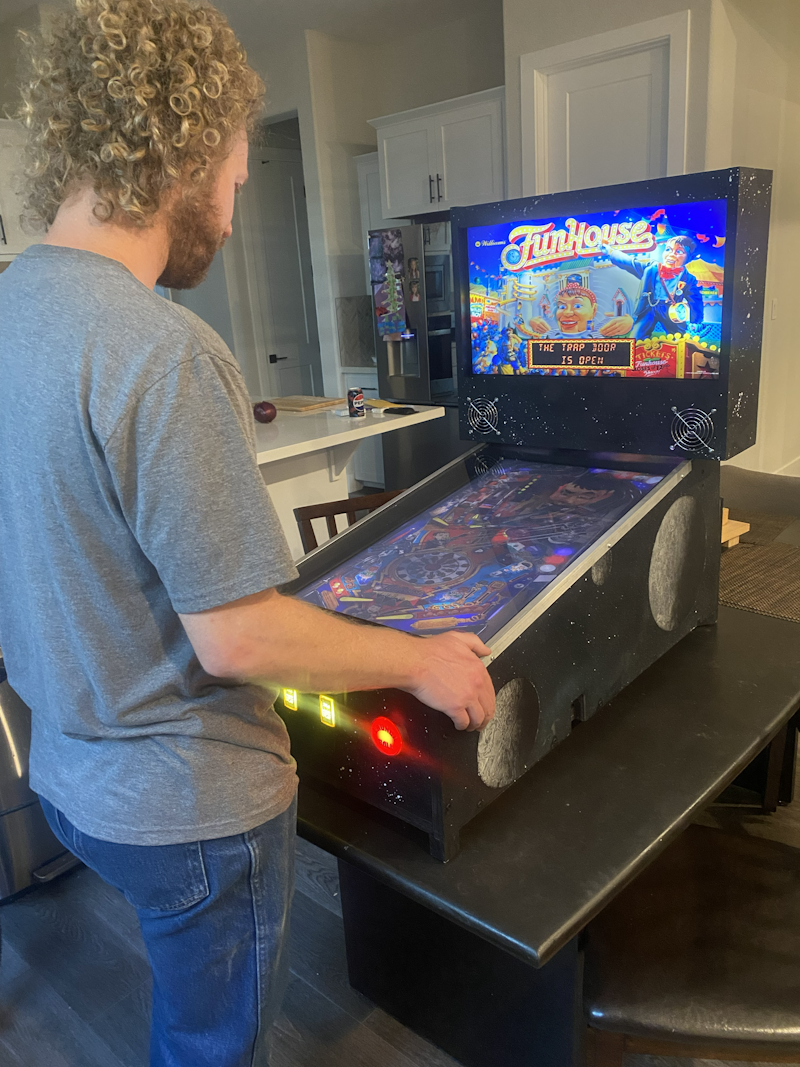
 

spare14.png


He took it home and he's having a ton of fun playing pinball and tinkering with the software to eek out the max framerates and screen details.


I showed him how everything works together and how to maintain it.


He hasn't tried to load a new table yet, but he'll get there eventually.


BTW, I just bought the wood for a MAME cabinet, my next project.  He is already helping me get the MAME software up and running while I have started the cabinet design... 


more later!


EDIT: After struggling to hit 60fps using the old NUC, he replaced it with a proper PC and NVidia video card. He's now getting 100fps+ on all his tables and no flipper delay at all.


Edited by BoltBait, 10 June 2026 - 09:02 PM.

How I built my B2S Pinball Cabinet, step-by-step, with pictures!  Full-sized cabinet for ~$700. Believe me, if I can do it, so can you!

"Making anything with your hands goes wonderfully with whatever in your life you would consider your grind." ~Nick Offerman


#96 barneyrfd

barneyrfd

    Enthusiast

  • Members
  • PipPipPip
  • 147 posts

  • Flag: Canada

  • Favorite Pinball: Too hard to pick just one...

Posted 13 April 2026 - 03:34 PM

Fantastic !  Thanks for sharing this.  This is similar to how I built my first cabinet.  It just shows ta go ya that with a few skills and some spare parts you can put together a functioning cabinet in a short period of time and start to learn and enjoy the visual pinball world without spending a fortune while you save up for that "bells and whistles"  cabinet. 


But perhaps the most impressive thing about it is that (unless you live alone), your partner/GF/wife actually allowed to you put the cabinet on the dining room table...lol


#97 BoltBait

BoltBait

    Software Developer

  • Members
  • PipPipPip
  • 456 posts
  • Location:Sacramento, CA

  • Flag: United States of America

  • Favorite Pinball: Elvira, Whitewater, Big Bang Bar, Fun House and All the old EM tables of the 70s that I played as a kid (including Buccaneer, Spirit of 76, and King Kool)

Posted 14 April 2026 - 03:00 AM

Fantastic !  Thanks for sharing this.  This is similar to how I built my first cabinet.  It just shows ta go ya that with a few skills and some spare parts you can put together a functioning cabinet in a short period of time and start to learn and enjoy the visual pinball world without spending a fortune while you save up for that "bells and whistles"  cabinet. 


Thanks! 


But perhaps the most impressive thing about it is that (unless you live alone), your partner/GF/wife actually allowed to you put the cabinet on the dining room table...lol


Haha!  My wife and I are separated--we live in separate houses.  So, yeah, the dining room table is mine.


How I built my B2S Pinball Cabinet, step-by-step, with pictures!  Full-sized cabinet for ~$700. Believe me, if I can do it, so can you!

"Making anything with your hands goes wonderfully with whatever in your life you would consider your grind." ~Nick Offerman


#98 BoltBait

BoltBait

    Software Developer

  • Members
  • PipPipPip
  • 456 posts
  • Location:Sacramento, CA

  • Flag: United States of America

  • Favorite Pinball: Elvira, Whitewater, Big Bang Bar, Fun House and All the old EM tables of the 70s that I played as a kid (including Buccaneer, Spirit of 76, and King Kool)

Posted 15 April 2026 - 06:12 AM

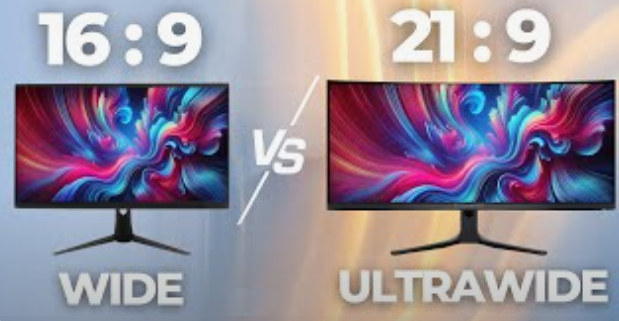
I talked earlier about the difference between a 16:9 screen and a 21:9 screen.
 
UltraWide.png


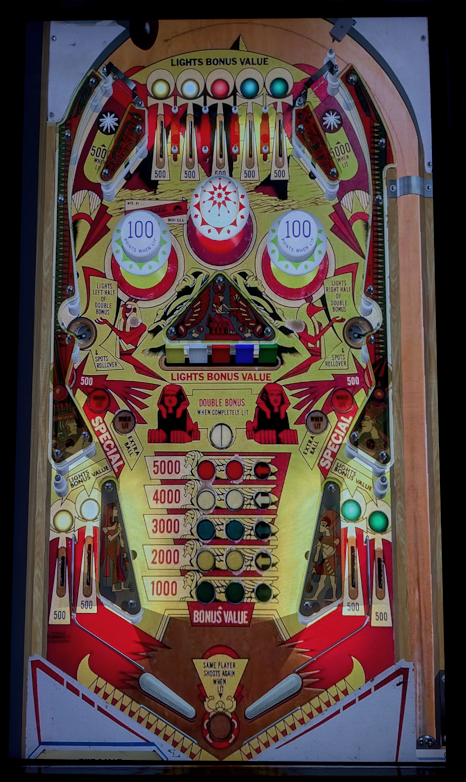
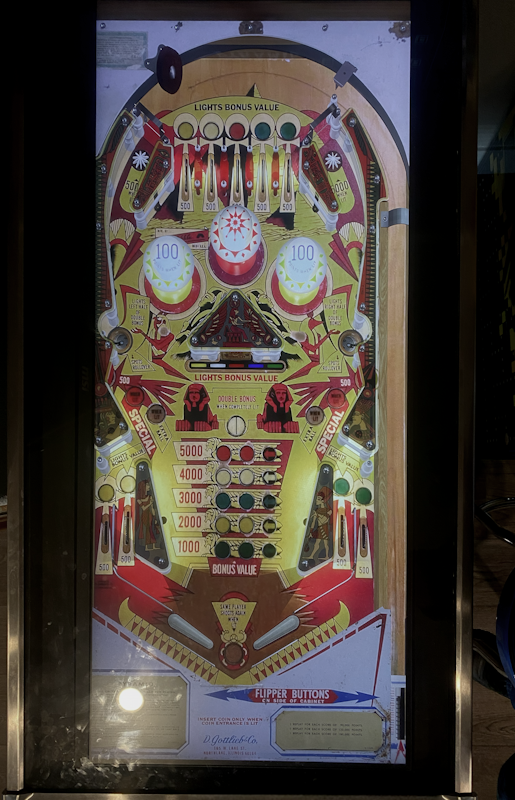
Here they are, side-by-side, an old EM table called Pyramid (←old vs. new→)
 
Pyramid169.png   ← 16:9    21:9 →     Pyramid219.png
 

(Please ignore the color differences between the images, they were taken of different screens using different cellphone cameras.)


Notice how on the 16:9 screen, the table is cutoff on the top and bottom when compared to the 21:9 screen.  In fact, you can't even see the plunger on the 16:9 table.
 
I know it doesn't affect playability at all, I just prefer the full view of the apron and top of the playfield.
 
One looks like a video game and one looks like a pinball machine.  And, that's why I'll never go back to 16:9!
 
21:9 playfield FOREVER!!!


Edited by BoltBait, 15 April 2026 - 08:32 PM.

How I built my B2S Pinball Cabinet, step-by-step, with pictures!  Full-sized cabinet for ~$700. Believe me, if I can do it, so can you!

"Making anything with your hands goes wonderfully with whatever in your life you would consider your grind." ~Nick Offerman


#99 SmedleyB

SmedleyB

    Enthusiast

  • Members
  • PipPipPip
  • 56 posts

  • Flag: ---------

  • Favorite Pinball: Theatre of Magic

Posted 09 May 2026 - 02:16 PM

Your build is great and I probably seem like a grouchy old man, but wanted to make a couple points for anyone considering a 21:9 build....there are tradeoffs.

-Dialing in the POV so you crop the sides means you've got a nice big 1:1 playfield but the tradeoff is that you lose a lot of the depth and visual immersion that the VPX pov system is capable of.
-Dialing in the POV to optimize that feeling of depth and immersion on a 21:9 means a smaller play field drawn on your monitor as well as empty space at top and/or bottom of screen.

I'd like to switch over to VR but do a smaller separate 21:9 tabletop build someday. I think the trick to maximizing the VPX depth/pov is to bring your eyes closer to the machine as your screen shrinks. Meaning if you do a 3/4 build, your eyes should be 3/4 as far as they'd be when playing on a fullsize machine. This is how you avoid the screen appearing as you are a giant towering over the machine instead of looking back into the playfield as on a fullsize.

Not everyone cares about POV as much as I do, but personally I'm no longer able to enjoy playing a table that doesn't have a good 3d/depth look.

#100 htamas

htamas

    Pinball Wizard

  • VIP
  • 2,230 posts
  • Location:California

  • Flag: Hungary

  • Favorite Pinball: cannot pick just one, and they change anyway


Posted 09 May 2026 - 06:41 PM

It is easy to set the POV on a 16:9 monitor, so that the table isn't cut off on the top or bottom (full view of apron and plunger), and keep the circles being circles, instead of stretching the view sideways to fill up the whole width of the screen like many people appear to be doing. Of course you end up with some unused, black area on the sides, but I don't mind that. Still way better than the stretched look.

Besides, then you will not have a problem with wider tables like STTNG, which for you was cut off on the sides or AFM where you had to adjust the view to cut off the enemy saucers. 16:9 playfield is fine when set up properly.