Jump to content


Photo
* * * * * 1 votes

Rook's 42/27/17 Big Bang Bar cabinet project...


  • Please log in to reply
84 replies to this topic

#1 Rook

Rook

    Enthusiast

  • Silver Supporter
  • 269 posts
  • Location:Northern Minnesota

  • Flag: United States of America

  • Favorite Pinball: Indiana Jones

Posted 08 November 2010 - 06:49 AM

Since I finally started working on this, I thought I'd start a little build thread to document the thing.

This will be a Visual Pinball/Future Pinball conversion cab with a Capcom Big Bang Bar theme.

I don't have my monitors yet or PC. I'm basing my plans on what others here have done because
it seems to work. smile.gif

I started down this path about 5 years ago. Sort of... smile.gif

I picked up a gutted Bally Doctor Who cabinet off ebay for shipping cost only.
It cost about $150 to get it shipped to me.

So far I have invested:

$185 - gutted Doctor Who pinball cab (Actually, found an old note and it was $30 for the cab... and $150 shipping!)

$ 39 - Set of 4 legs (used, eBay)

$ 6 - hardware store leg bolts

$ 70 - 1 sheet 3/4" birch plywood, wood screws, glue, etc.

$ 20 - Cabinet buttons. Originally bought a few years ago when
I planned on redoing it as a Doctor Who. I'm uncertain if I'll actually be
using these OEM doctor who buttons or not.

$ 30 - Doctor Who pinball Apron. I'm not certain about the price of this one.
It's been at least 3 years now. Since my design has changed, I'll not be using it.

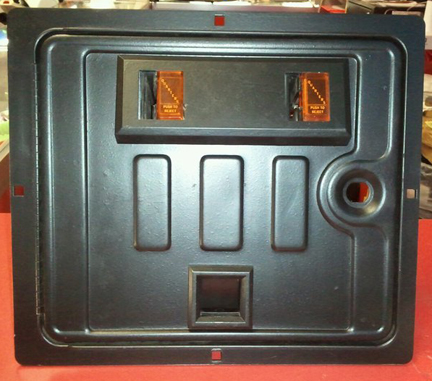
$FREE - Coin door. Came with the cabinet. Needs repainting and the coin slots need replacing,
but the interior is minty fresh and complete with no obvious damage.

$FREE - leg levelers (leftover scrap/spare parts)

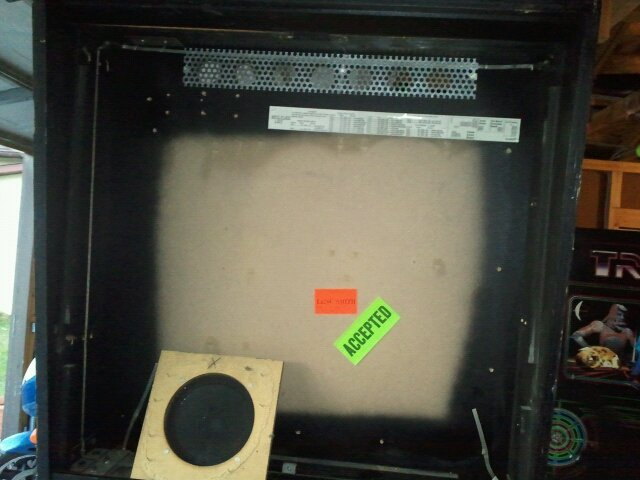
$FREE - DMD/speaker panel salvaged from a modification to my Indiana Jones pinball.
If you want to get technical, you COULD say it cost me $45 because that's how much the
replacement panel was.

$FREE - Widebody lockdown bar. The welds are broken, so I'll need to take it into
work and see if someone can't reweld it. It will work fine with the original cabs
locking mechanism, so score!

$50? - Ipac control encoder board. I had this mounted in a test pinball cab
controller I built out of scrap lumber. Can't let a good controller go to waste can we?

$600 - 42" Visio 1080p 120hz LCD (Playfield Monitor)

$40 - coin door repair parts and leg bolts/brackets.

$295 - Big Bang Bar Cabinet artwork.

$45 - New leg levelers, cab protectors and hang hooks for the DMD/speaker panel.

$75 - More tools (spade bits for the drill, new toolbox, hole cutting bit for the DMD plexiglass, etc, etc.)

$80 - Paint and paint supplies. Bought the wrong color ($35) so had to buy more ($35).

$85 - 17" Dell LCD monitor for the DMD! Yay eBay!

$98 - New Bally/Williams rails, DMD panel "H" channel and backglass lift channel, plus some Millwax for my real pinball machine and double sided tape to attach the rails to the cab when I have the art in place.

$FREE - Starter PC from a forum member! Dual core 2.6gig processor and a couple other bells and whistles. Thanks!

$400 - Motherboard, 3.3gig i3 processor and 1 gig GTX 560 video card.


--------


*New Updates 5/2019


$150 - 27" Backglass Dell monitor


$45 - Plexiglass x3 (Because I broke one and the hardware store can't cut plexi in the correct size the first time.)


$15 - Spraypaint/wood screws/misc.


$20 - Furniture mover caster wheels (x4)

=====
$2343.00

1ST Day (11/6/2010) - Pulled the cabinet out of the old garage into the new garage.
Attached the legs temporarily and started cleaning/stripping it down.

2nd day (11/7/2010) - Got the cabinet completely dissassembled today. Bought
wood and got it cut "close" to the correct size at Home Depot so I could fit it in
my wife's car. Just need to shave a little off to get it to fit. Would have gotten it
trimmed and started assembly... except I couldn't find my skillsaw. I know it was
here a minute ago... smile.gif

Work day 3 (11/8/2010) - Found the power tools and got the bottom panel, door panel
and back panel cut to the correct sizes. Had to make a new sawboard because my old one only
fit my old skillsaw. If you want to cut perfectly straight lines when making your arcade cabinets,
making a sawboard is the way to go. You can make it from scrap wood just as long as it's straight.

If you're not familiar with a sawboard, it's a long piece of wood on the base, wider than the width of
your skillsaw, with a narrower strip that runs along the top left edge. You nail or screw them togeather
making sure your screws aren't too long (so they don't break through the bottom. Then, fire up the
skillsaw and run it down the length of the base board, with the left side of the saw's bottom guide pushed
up against the narrow wood strip. You'll cut a long piece off the right side and when done, you have
a perfect guide to allow you to cut perfectly straight lines on pretty much any sheet or MDF or plywood.
Use some clamps to lock it in place and you're good to go. Ideally I would make one about 8 feet long, so
you can cut full length sheets of MDF, but my new one was made from scrap and is only about 48 inches in length.

I hope to start reassembling the cabinet in the next few days. I need to use the router to cut out the coin
door opening and the power cord/rear vents on the back panel.

Work day 4 (11/12/2010) - Finally broke out the router I bought over 2 years ago. I measured the original coin door/front panel and used it as a tracing template.
After my hole was marked, I used the router to cut out the hole for the coin door. Took about an hour and a half all told. I used the saw board so i was able to make nice
straight lines. The door fits in the hole just fine. I won't drill the holes for the plunger/start buttons until I get closer to having the cab assembled. I ripped a couple 2x2
boards to get some angle pieces to mount in the corners of the cabinet. It was... interesting... trying to get the table saw at work to do what I wanted, but in the end it finally
worked out okay. Dropped off my lockdown bar and one of the guys at work thinks he can reweld it. Score!

Work day 5 (11/14/2010) - This day I evened out the L/R side angles at the front and rear, making them a "perfect" 45 degree angle. Also had to shave off 4-5mm off
the bottom panel because, somehow, it ended up being too long. I then also angled the front and back panels. It was THEN that I discovered my original plan to have the bottom panel
sit on the recessed section in the bottom edges of the side panels wasn't going to work. Having the panel sit there would decrease the width of the cabinet from 25" to 24". However,
if I raise the bottom panel by only 3/4" the width will be fine. I hope to soon get the sides mounted to the bottom and mount the front/back panels in place.

I still need to route out the vent holes and power cord hole in the back panel, and fabricate the back panel rails as well as route out the grooves for the leg bolts in the new F/B panels.

It's coming slowly!

Work day 6/7 (12/18-19/2010) - Finally fired up the router again and cut out the holes for the power switch and rear bottom vent holes in the bottom panel.
Also finally routed out the rear vent holes and power cord hole in the back panel. Also used a dremmel tool and a sanding drum to route out the holes for the leg locking bolts.
Added two 45 degree wedges in the bottom rear of the cabinet to start attaching the bottom panel to the sides.

I've revised my design to use a 42" playfield monitor (and saved $300) instead of the larger 46". I hope to pick up the monitor this coming week as they were sold out on
Tuesday when I tried buying one. Doh.

Work Day 8 (1/6/2011) - Finally mounted the front coin door panel in place and mounted most of the interior leg bolt brackets.
I may order new brackets as the ones I have are a bit on the... corroded side. Last week I finally bought the playfield monitor.
I'm not sure how I'm going to make the panel that the backbox bolts to when in the upright position as I'll need to essentially route the 3/4"
plywood down to a 1/4" around the oputside edges like the original panel was. I plan on ordering some replacement parts so I can
refurbish my coin door.

Work day 9 (1/11/11) - stripped, sanded and repainted my coin door. It looks a ton better than it did! Ordered some missing coin slot inserts, leg bolts and a few other odds and ends.

Work day 10 (1/19/11) - Disassembled and installed the replacement coin door coin slots and push button face plates.
It looks pretty nice now! Now I just need to get back to working on the cabinet...

Work day 11 (1/30/11) - Added more corner brace wedges to the bottom of the cabinet and finally finished screwing the bottom togeather.
It seems pretty solid now. Replaced the original leg bolt brackets with the ones I bought from PinballLife.com. That took forever.

Work day 12 & 13 (2/12-2/13/2011) - Finally routed the edges of the under head panel. It fits like a dream. I suprised myself with how nice it turned out. smile.gif
Spent about 3-4 hours on Sunday getting the head fit correctly. I had to remove the internal metal corner brackets and redrill them and the
cabinet because the backbox hinges now mount into those brackets (because the cabinet is a couple inches wider than the original).
The left bracket mounted fine for some reason, but the right side was a real pain in the... But it's finally test mounted and seems to work just fine.
I'll need to remove it all however so I can bondo over the original holes, but that's in the future. I still need to cut out a hole for the DMD LCD
as well as permanantly mount the under box panel, but it's coming along.

Work day 14 (2/16/11) - Decided to test mount the coin door and lockbar locking mech in place. It went pretty
smoothly except for snagging my shirt with the drill and shredding it. Doh. Pretty soon I'll have to strip the original
cabinet art off and start bondoing the cabinet walls and backbox, removing all the dings and imperfections.

Work day 15 (2/26/11) - Picked up my rewelded lockdown bar (the locking pieces on the inside had busted loose from the top piece)
from a co-worker and got it test fitted. Fits great and the locking mech in the cab even works perfectly! I love it when things actually
do what they're supposed to. smile.gif

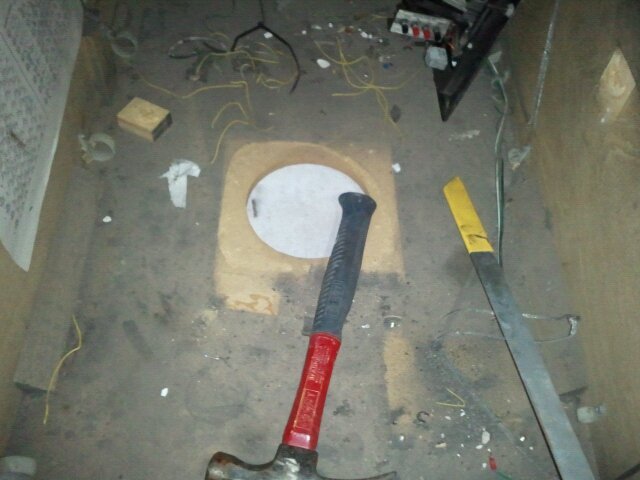
Work day 16-17 (4/15/11) - Cut and mounted speaker panel metal grill plates in the DMD panel. The stencils for the speaker panels
are also completed. Side art arrived finally last week and it looks great! This project is really starting to shape up!

Work day 18 (4/30/11) - Actually worked on this a couple days this week. Managed to score a
couple old pinball speakers for the DMD panel from work. One fit perfectly, the smaller one wasn't
small enough, so I had to drill new holes and add new screw post bases. Just got it all assembled!

Work day 19-23 (4/30/11) - Spent a couple weeks stripping the old side art, sanding, using a bondo-like
wood putty (twice, because I messed up the mix ratio), sanding some more. Very time consuming and slow going...
plus I was able to slice open two fingers with a shiny new razor blade scraper the first 5 minutes of stripping the
side art. Blood makes the games grow appparently...

Work Day 24-26 (5/31-6/5/2011) - Spent a few more days getting back at it. Finally finished the wood/bondo
puttying and sanding on both the cab body and backbox. It turned out pretty nice overall, even the larger areas
I filled due to chips/splinters in the wood. Got all the main bolt heads painted black. And THEN I took the leap and FINALLY
drilled the holes for my flipper buttons and game start/buy in. Next, the painting begins!

Work Day 27-28 (12/20/2011) - Painted the speaker grills and installed the DMD panel art.


Edited by Rook, 31 May 2019 - 02:54 PM.

My Big Bang Bar cab build...

#2 chriz

chriz

    Enthusiast

  • Platinum Supporter
  • 451 posts

  • Flag: ---------

  • Favorite Pinball: Funhouse

Posted 08 November 2010 - 09:33 PM

nice, plz post some pics

cheers
Chris


#3 Rook

Rook

    Enthusiast

  • Silver Supporter
  • 269 posts
  • Location:Northern Minnesota

  • Flag: United States of America

  • Favorite Pinball: Indiana Jones

Posted 08 November 2010 - 10:34 PM

Working on it. wink.gif

Just some basic day 1 pics. Things got ugly on day two. smile.gif

Sorry the image quality is bad. camera phone and "bright sun VS dark garage" deathmatch duel. wink.gif

Added front legs...


Look kids... tripod pinball!


Removed the lighting panel...


Removed the coin door...


And the speaker and transformer in the bottom...


And the PCB mounting plate (sensing a trend here?)


Knocked out the panel that is under the backbox. And that begins the rest of the cabinet breakdown...


...and was all I accomplished on the first day. smile.gif

Edited by Rook, 09 November 2010 - 08:03 AM.

My Big Bang Bar cab build...

#4 Rook

Rook

    Enthusiast

  • Silver Supporter
  • 269 posts
  • Location:Northern Minnesota

  • Flag: United States of America

  • Favorite Pinball: Indiana Jones

Posted 08 November 2010 - 11:20 PM

And on day two... the pinball god said... go break stuff! wink.gif


I made a run to Home Despot to buy some wood. Got a sheet of 3/4" birch and had it custom cut to close specs
so it would fit in the wife's car.

And then I searched for my cordless skillsaw... for an hour... and accomplished nothing more that day.

But I did finally find the saw. wink.gif


My Big Bang Bar cab build...

#5 Smeghead

Smeghead

    Enthusiast

  • Members
  • PipPipPip
  • 122 posts
  • Location:Arkansas USA (formerly UK)

  • Flag: United Kingdom

  • Favorite Pinball: Addams Family

Posted 09 November 2010 - 03:47 PM

I see some nice toys in the background! dblthumb.gif

#6 Rook

Rook

    Enthusiast

  • Silver Supporter
  • 269 posts
  • Location:Northern Minnesota

  • Flag: United States of America

  • Favorite Pinball: Indiana Jones

Posted 09 November 2010 - 05:06 PM

QUOTE (Smeghead @ Nov 9 2010, 09:47 AM) <{POST_SNAPBACK}>
I see some nice toys in the background! dblthumb.gif


yeah, I just need to find room in the house for the Tempest and Tron. Which is going to be... interesting since I'm NOT hauling anything downstairs.
I Sooooo want a house with a walkout basement.


My Big Bang Bar cab build...

#7 Rook

Rook

    Enthusiast

  • Silver Supporter
  • 269 posts
  • Location:Northern Minnesota

  • Flag: United States of America

  • Favorite Pinball: Indiana Jones

Posted 22 November 2010 - 09:18 PM

Updated my build status in the first post. Also think I've come to a decision as to what PC hardware I'll be using to run the works.

More pics when I'm able to get access to wifi and not through my phone. smile.gif

The hardware loadout I'm looking at is...

GeForce 9500 GT 1GB 128-bit DDR2 PCI Express 2.0 x16 HDCP Ready SLI Support Video Card (DMD & Backglass)
GeForce GTX 460 (Fermi) 1GB 256-bit GDDR5 PCI Express 2.0 x16 HDCP Ready SLI Support Video Card (Playfield)

AMD Phenom II X4 965 Black Edition Deneb 3.4GHz Socket AM3 125W Quad-Core Processor

ASUS M4A87TD EVO AM3 AMD 870 SATA 6Gb/s USB 3.0 ATX AMD Motherboard

G.SKILL Ripjaws Series 4GB (2 x 2GB) 240-Pin DDR3 SDRAM DDR3 1600 (PC3 12800) Desktop Memory

Western Digital Caviar Black WD5001AALS 500GB 7200 RPM SATA 3.0Gb/s 3.5" Internal Hard Drive -Bare Drive

SAMSUNG CD/DVD Burner Black SATA Model SH-S223C

I'm hoping that will be enough to run VP, VPM and FP for the next decade. wink.gif


Edited by Rook, 22 November 2010 - 09:41 PM.

My Big Bang Bar cab build...

#8 Rook

Rook

    Enthusiast

  • Silver Supporter
  • 269 posts
  • Location:Northern Minnesota

  • Flag: United States of America

  • Favorite Pinball: Indiana Jones

Posted 14 December 2010 - 08:49 PM

After doing some soul searching and project finance looking, I've decided to drop from the 46" playfield monitor to a 42" one instead.
The one I'm looking at is a 120mhz LCD and after viewing it on the TV display wall, it really has the best picture quality in that
size range.

Plus, it will only cost me about $550 or so, considerably less than the $900 i was expecting to pay for the 46" monitor.

I hope to pick up the TV this week! yay!

The cabinet is still unfinished. Temps dropped to the "freakin' cold" range, so working out in my unheated garage is not a
very attractive prospect right now. smile.gif

I plan to glue & screw the front, bottom and sides togeather in the coming weeks and install the corner angle woood brackets as well.


My Big Bang Bar cab build...

#9 Rook

Rook

    Enthusiast

  • Silver Supporter
  • 269 posts
  • Location:Northern Minnesota

  • Flag: United States of America

  • Favorite Pinball: Indiana Jones

Posted 24 December 2010 - 10:38 PM

Monday I finally fired up the router again and cut out the holes for the power switch and rear bottom vent holes in the bottom panel.
Also finally routed out the rear vent holes and power cord hole in the back panel. Also used a dremmel tool and a sanding drum to
route out the holes for the leg locking bolts.

Added two 45 degree wedges in the bottom rear of the cabinet to start attaching the bottom panel to the sides.

Also managed to step on a board that had a nail sticking out of it, and drove it into my right heel. When you see blood, you KNOW
you did something wrong. smile.gif

I've revised my design to use a 42" playfield monitor (and saved $300) instead of the larger 46". I hope to pick up the monitor this
coming week as they were sold out on Tuesday when I tried buying one. Doh.

My Big Bang Bar cab build...

#10 mameman23

mameman23

    Pinball Fan

  • Silver Supporter
  • 506 posts
  • Location:Farmington Hills, MI

  • Flag: United Kingdom

  • Favorite Pinball: Dr Who, robocop

Posted 24 December 2010 - 10:52 PM

ouch! the machine has draw first blood smile.gif

hurry up with that screen, i'm excited to see another Dr Who cabinet smile.gif
PM me for any CNC needs.
Find me on Facebook....Xtreme Pinball
Doctor Who Cabinet Build Thread Here
Tron Cabinet Build Thread Here
Big Bang Bar Build Thread Here
Mameman's cnc fun

#11 Rook

Rook

    Enthusiast

  • Silver Supporter
  • 269 posts
  • Location:Northern Minnesota

  • Flag: United States of America

  • Favorite Pinball: Indiana Jones

Posted 28 December 2010 - 07:52 PM

lol, I need to finish assembling the body before I get the screen in there. smile.gif


My Big Bang Bar cab build...

#12 Rook

Rook

    Enthusiast

  • Silver Supporter
  • 269 posts
  • Location:Northern Minnesota

  • Flag: United States of America

  • Favorite Pinball: Indiana Jones

Posted 08 January 2011 - 07:28 AM

Finally mounted the front coin door panel in place and mounted most of the interior leg bolt brackets.
I may order new brackets as the ones I have are a bit on the... corroded side. Last week in December I finally
bought the playfield monitor. I'm not sure how I'm going to make the panel that the backbox bolts to when in the
upright position as I'll need to essentially route the 3/4" plywood down to a 1/4" around the outside edges like the
original panel was, and I don't have a table router to do the deed. sad.gif I plan on ordering some replacement
parts so I can refurbish my coin door because someone did some... interesting... things to it.
And because my door Isn't a "modern" style like they pretty much all are now, I need specialty replacement parts.

I'll post updated pics... as soon as my phone has a charge on it. smile.gif

The back corners (all four corners actually...) of the side walls had to be cut at a
45 degree angle to attach the front and back panels to.


And the panels are in place! I need to flip it on its side and add a
couple support brackets to the bottom to securely anchor the bottom
panel to the sides. It's slowly coming along. If it wasn't zero degrees
in the garage you'd probably see a bit more progress. smile.gif

Edited by Rook, 08 January 2011 - 10:34 PM.

My Big Bang Bar cab build...

#13 Rook

Rook

    Enthusiast

  • Silver Supporter
  • 269 posts
  • Location:Northern Minnesota

  • Flag: United States of America

  • Favorite Pinball: Indiana Jones

Posted 09 January 2011 - 05:24 AM

Updated the pics and my build progress on the first post.
My Big Bang Bar cab build...

#14 Rook

Rook

    Enthusiast

  • Silver Supporter
  • 269 posts
  • Location:Northern Minnesota

  • Flag: United States of America

  • Favorite Pinball: Indiana Jones

Posted 12 January 2011 - 08:26 PM

Found out today that I CAN buy replacement cabinet art in the style I want!!! Yay!

Now to save $300 to pay for it...

My Big Bang Bar cab build...

#15 Rook

Rook

    Enthusiast

  • Silver Supporter
  • 269 posts
  • Location:Northern Minnesota

  • Flag: United States of America

  • Favorite Pinball: Indiana Jones

Posted 28 January 2011 - 09:08 PM

Received my parts order from Pinballlife and got the new coin slot inserts and reject button face plates
installed. The coin door looks a LOT nicer now that those are in place! I need to get back into the garage
and get working on the cabinet again. The winter cold hasn't been helping my build at all. smile.gif

Before...


After...


Edited by Rook, 29 January 2011 - 04:44 PM.

My Big Bang Bar cab build...

#16 Indy_Jones

Indy_Jones

    Hobbyist

  • Platinum Supporter
  • 19 posts
  • Location:Australia

  • Flag: Australia

  • Favorite Pinball: STTNG

Posted 29 January 2011 - 01:49 PM

Good work Rook, she coming together.

#17 Rook

Rook

    Enthusiast

  • Silver Supporter
  • 269 posts
  • Location:Northern Minnesota

  • Flag: United States of America

  • Favorite Pinball: Indiana Jones

Posted 31 January 2011 - 10:25 PM

Added more corner brace wedges to the bottom of the cabinet and finally finished screwing the bottom togeather.
It seems pretty solid now. Replaced the original leg bolt brackets with the ones I bought from PinballLife.com.
That took forever as the new ones were quite a bit longer so I had to widen the holes in the corner braces so they
would fit flush. If there's ever a "next time," I'll drill the holes in the corner braces AFTER I mount them in the cabinet!

Pulled the sawhorses out and gave the legs a test stand. smile.gif


Also recut the rear cap plate that sits under the backbox. I still need to route 2CM off of 3 sides.

It's getting there!
My Big Bang Bar cab build...

#18 mameman23

mameman23

    Pinball Fan

  • Silver Supporter
  • 506 posts
  • Location:Farmington Hills, MI

  • Flag: United Kingdom

  • Favorite Pinball: Dr Who, robocop

Posted 01 February 2011 - 12:58 AM

woo hooo, coming to life!!
PM me for any CNC needs.
Find me on Facebook....Xtreme Pinball
Doctor Who Cabinet Build Thread Here
Tron Cabinet Build Thread Here
Big Bang Bar Build Thread Here
Mameman's cnc fun

#19 Rook

Rook

    Enthusiast

  • Silver Supporter
  • 269 posts
  • Location:Northern Minnesota

  • Flag: United States of America

  • Favorite Pinball: Indiana Jones

Posted 01 February 2011 - 09:33 PM

Slowly, but it is coming along! I'm going to hold off on cutting the start and plunger holes until after I get my cab art so it matches up properly.

In retrospect I wish i'd taken more care when I removed the rails so I could reuse them. Sadly, I'll have to buy new ones. I also need to figure out where to mount my second set of flipper buttons.

Mameman, did you mount a speaker in the bottom of your DW cab like the original had?
My Big Bang Bar cab build...

#20 mameman23

mameman23

    Pinball Fan

  • Silver Supporter
  • 506 posts
  • Location:Farmington Hills, MI

  • Flag: United Kingdom

  • Favorite Pinball: Dr Who, robocop

Posted 02 February 2011 - 12:16 AM

QUOTE (Rook @ Feb 1 2011, 04:33 PM) <{POST_SNAPBACK}>
Mameman, did you mount a speaker in the bottom of your DW cab like the original had?


nope, but have been thinking about doing it when i redo the wiring and add the solenoids to that cab. I have an altec lansing system in the cab and there is a sub unit just sitting in the bottom of the cabinet. sounds good with great base. I planned on putting a decent sub enclosure in the cab with the woofer firing out the bottom like an original.
PM me for any CNC needs.
Find me on Facebook....Xtreme Pinball
Doctor Who Cabinet Build Thread Here
Tron Cabinet Build Thread Here
Big Bang Bar Build Thread Here
Mameman's cnc fun