

- View New Content
-
Getting Started
-
Tutorials
Tutorial Categories
Tutorials Main Page Installation and Setup Downloadable TutorialsROM Adjustments
Number of Balls Adjustments Volume Adjustments
-
Visual Pinball Tables
VP 8 Desktop Tables
All VPM Recreations VP Recreations VP/VPM MODs VP Originals ROMsVP 9 Desktop Tables
All VPM Recreations VP Recreations VP/VPM MODs VP Originals ROMsVP9 Cabinet Tables
All Full Screen Cabinet Full Screen B2S Cabinet Spanned Cabinet Tables Media Packs ROMsVPX Tables
All VPinMAME Recreations VPX- - /VPinMAME - MOD Tables VPX Recreations VPX Originals Media Packs ROMs VR
-
Frontend Media & Backglass
Media Packs
Complete Media Packs Wheel Logos VideosBackglasses
dB2S Animated Backglasses UVP Animated Backglasses Topper Images
- Future Pinball Tables
-
Design Resources
Main Resources
Table Templates Playfield Images Image Library Sound Library Key CodesVP Guides
VP8 Guide - English VP8 Guide - Deutsch VP9 Guide - English VP9.1.x Guide - English VP Object Guide VPM DocumentationFuture Pinball Resources
Playfield Images 3D Model LibraryFuture Pinball Guides
FP Script Guide Big Draco Script Guide FP Table Design Guide FP DMD Guide
- Other Features
- Bug Tracker
- Image Gallery
- Blogs
-
More
Time to join the ranks
Started By
zebulon
, Feb 21 2011 11:56 PM
160 replies to this topic
#121
Posted 27 August 2011 - 09:41 PM
The copper tubing is an awesome idea. Looks great, and the refraction it generates with the playfield lighting should really make it pop. Well done, sir!
#122
Posted 27 August 2011 - 09:48 PM
Thanks DF, Here's some video of it in action (one-armed of course...no really...lol)
Don't pm or expect an answer from me here ... the links above are my contacts.
I know so much about so little that I could teach you all there is to know about nothing......
#123
Posted 27 August 2011 - 10:14 PM
QUOTE (zebulon @ Aug 27 2011, 04:48 PM) <{POST_SNAPBACK}>
Thanks DF, Here's some video of it in action (one-armed of course...no really...lol)
That is awesome. At first glance I thought they were Star Wars light sabers.
#125
Posted 28 August 2011 - 04:50 AM
QUOTE (zebulon @ Aug 27 2011, 03:48 PM) <{POST_SNAPBACK}>
Thanks DF, Here's some video of it in action (one-armed of course...no really...lol)
Brilliant idea!
#126
Posted 28 August 2011 - 09:34 AM
Looks awesome.
I'm looking at the video, and it looks like your flashers are overlaid onto your DMD. I gather that I'm seeing a reflection of the flashers on the glass the covered the DMD, and the actual flashers are under that lip on the backbox, or something? It's hard to figure out what I'm looking at there. LOL.
#127
Posted 28 August 2011 - 02:07 PM
QUOTE (maxxsinner @ Aug 28 2011, 12:24 AM) <{POST_SNAPBACK}>
Looks brilliant Zeb!
Trouble playing one armed? Thought you would be used to that, unable to put the drink down and all.
Wouldn't want to spill the rum and coke...
QUOTE (Darkfall @ Aug 28 2011, 05:34 AM) <{POST_SNAPBACK}>
Looks awesome.
I'm looking at the video, and it looks like your flashers are overlaid onto your DMD. I gather that I'm seeing a reflection of the flashers on the glass the covered the DMD, and the actual flashers are under that lip on the backbox, or something? It's hard to figure out what I'm looking at there. LOL.
The DMD is in the back wall at the top of the playfield and the lighting is inset into the back box and angled forward to relect on the glass.
QUOTE (Arcade4 @ Aug 27 2011, 06:14 PM) <{POST_SNAPBACK}>
QUOTE (zebulon @ Aug 27 2011, 04:48 PM) <{POST_SNAPBACK}>
Thanks DF, Here's some video of it in action (one-armed of course...no really...lol)
That is awesome. At first glance I thought they were Star Wars light sabers.
I got the idea from the P2K Star Wars machine, it had a light saber for a shooter lane.
QUOTE (Rawd @ Aug 28 2011, 12:50 AM) <{POST_SNAPBACK}>
QUOTE (zebulon @ Aug 27 2011, 03:48 PM) <{POST_SNAPBACK}>
Thanks DF, Here's some video of it in action (one-armed of course...no really...lol)
Brilliant idea!
Thanks Rawd, I'm trying to come up with something to set it apart from the rest.
QUOTE (Rawd @ Aug 28 2011, 12:50 AM) <{POST_SNAPBACK}>
QUOTE (zebulon @ Aug 27 2011, 03:48 PM) <{POST_SNAPBACK}>
Thanks DF, Here's some video of it in action (one-armed of course...no really...lol)
Brilliant idea!
Thanks Rawd, I'm trying to come up with something to set it apart from the rest.
Don't pm or expect an answer from me here ... the links above are my contacts.
I know so much about so little that I could teach you all there is to know about nothing......
#128
Posted 28 August 2011 - 03:47 PM
That looks awesome Zeb,
it does set it apart from the rest.
Nice work with the new theme images.
it does set it apart from the rest.
Nice work with the new theme images.
#129
Posted 29 August 2011 - 05:13 AM
QUOTE (zebulon @ Aug 28 2011, 07:07 AM) <{POST_SNAPBACK}>
QUOTE (Darkfall @ Aug 28 2011, 05:34 AM) <{POST_SNAPBACK}>
Looks awesome.
I'm looking at the video, and it looks like your flashers are overlaid onto your DMD. I gather that I'm seeing a reflection of the flashers on the glass the covered the DMD, and the actual flashers are under that lip on the backbox, or something? It's hard to figure out what I'm looking at there. LOL.
The DMD is in the back wall at the top of the playfield and the lighting is inset into the back box and angled forward to relect on the glass.
Ah ha! I figured it had to be something like that. Fancy!
#130
Posted 30 August 2011 - 12:18 AM
QUOTE (Darkfall @ Aug 29 2011, 01:13 AM) <{POST_SNAPBACK}>
QUOTE (zebulon @ Aug 28 2011, 07:07 AM) <{POST_SNAPBACK}>
QUOTE (Darkfall @ Aug 28 2011, 05:34 AM) <{POST_SNAPBACK}>
Looks awesome.
I'm looking at the video, and it looks like your flashers are overlaid onto your DMD. I gather that I'm seeing a reflection of the flashers on the glass the covered the DMD, and the actual flashers are under that lip on the backbox, or something? It's hard to figure out what I'm looking at there. LOL.
The DMD is in the back wall at the top of the playfield and the lighting is inset into the back box and angled forward to relect on the glass.
Ah ha! I figured it had to be something like that. Fancy!
Yeah....originally I designed the cab for the whole P2K thing but got hung up on the flipping of the image for reflecting. By the time Mameman figgered out the registry edit for flipy, I was too far into the revised build to turn back. The DMD is about 4" x 12" so it works out ok and it's easier to reflect the flashers than the dmd. I also don't have an issue with washing out the dmd when the flashers go off.
Don't pm or expect an answer from me here ... the links above are my contacts.
I know so much about so little that I could teach you all there is to know about nothing......
#131
Posted 05 September 2011 - 03:16 PM
So of course, being almost finished (again) is no challenge, so it's all out and gutted (again).
My initial idea of mounting to a board with wooden slide rails has been replaced with proper drawer glides and a second shelf below has been added to allow for moving the interface and control boards closer to the computer (ala maxxsinner). This will (hopefully) eliminate the phantom credit inserts and looping I was getting by having the extended usb cables in the base cabinet near the solenoids (the magnetic field was pretty harsh). Shorter runs should mean fewer issues and it will be far more convenient to tinker (when necessary).

If I ever get this reassembled (and some days that seems to be the question), I will be installing these RGB strips I devised under the copper rails on either side of the playfield.

My initial idea of mounting to a board with wooden slide rails has been replaced with proper drawer glides and a second shelf below has been added to allow for moving the interface and control boards closer to the computer (ala maxxsinner). This will (hopefully) eliminate the phantom credit inserts and looping I was getting by having the extended usb cables in the base cabinet near the solenoids (the magnetic field was pretty harsh). Shorter runs should mean fewer issues and it will be far more convenient to tinker (when necessary).

If I ever get this reassembled (and some days that seems to be the question), I will be installing these RGB strips I devised under the copper rails on either side of the playfield.

Don't pm or expect an answer from me here ... the links above are my contacts.
I know so much about so little that I could teach you all there is to know about nothing......
#133
Posted 05 September 2011 - 11:22 PM
QUOTE (bladexdsl @ Sep 5 2011, 03:43 PM) <{POST_SNAPBACK}>
you sure you want them leds real close to the playfield their bright and distracting!
That may be the point. If they're too bright, it's easy to cut the power down a bit.
#134
Posted 06 September 2011 - 12:57 AM
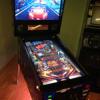
They go underneath the copper tubes and illuminate them from the bottom.....like where the red line is on this pic....
Don't pm or expect an answer from me here ... the links above are my contacts.
I know so much about so little that I could teach you all there is to know about nothing......
#135
Posted 27 October 2011 - 04:19 PM
Finally finished my move and I can start the reassembly of the build.
Not too much progress as yet, finished the control board shelf and wiring.

Everything can be undone by disconnecting the the 2 atx harness plugs (I bought 2 extensions and cut the harness in half giving me 2 20 pin plug sets for under $10.00) and the 3 colour led harness.
Now it's on to re-wiring the base cab.
Not too much progress as yet, finished the control board shelf and wiring.

Everything can be undone by disconnecting the the 2 atx harness plugs (I bought 2 extensions and cut the harness in half giving me 2 20 pin plug sets for under $10.00) and the 3 colour led harness.
Now it's on to re-wiring the base cab.
Don't pm or expect an answer from me here ... the links above are my contacts.
I know so much about so little that I could teach you all there is to know about nothing......
#137
Posted 28 October 2011 - 02:51 PM
QUOTE (rcadefrk @ Oct 27 2011, 05:00 PM) <{POST_SNAPBACK}>
Hell of a build buddy
Thanks, it's taking a helluva long time too...(we won't even go into the cost factor....
Don't pm or expect an answer from me here ... the links above are my contacts.
I know so much about so little that I could teach you all there is to know about nothing......
#138
Posted 29 October 2011 - 03:54 AM
Spent some time today building the final version of the shaker motor. Thanks to Darkfall's excellent tutorial, I was able to source out the materials at a local shop and now have a shaker that I'm happy with.

I figured just inside the coin door would be the best location for it as it is the most likely part of the base cab to fail/need adjustment.
Beyond that, the day was spent painting the cab legs and side rails black and clear in preparation for reassembly.

I figured just inside the coin door would be the best location for it as it is the most likely part of the base cab to fail/need adjustment.
Beyond that, the day was spent painting the cab legs and side rails black and clear in preparation for reassembly.
Don't pm or expect an answer from me here ... the links above are my contacts.
I know so much about so little that I could teach you all there is to know about nothing......
#139
Posted 29 October 2011 - 08:29 AM
QUOTE (zebulon @ Oct 28 2011, 08:54 PM) <{POST_SNAPBACK}>
Spent some time today building the final version of the shaker motor. Thanks to Darkfall's excellent tutorial, I was able to source out the materials at a local shop and now have a shaker that I'm happy with.
Shaker looks awesome. Good work!
#140
Posted 29 October 2011 - 02:39 PM
QUOTE (Darkfall @ Oct 29 2011, 04:29 AM) <{POST_SNAPBACK}>
QUOTE (zebulon @ Oct 28 2011, 08:54 PM) <{POST_SNAPBACK}>
Spent some time today building the final version of the shaker motor. Thanks to Darkfall's excellent tutorial, I was able to source out the materials at a local shop and now have a shaker that I'm happy with.
Shaker looks awesome. Good work!
Thanks for the ideas, I was over engineering the whole thing. Now if I can just get one collar to tighten correctly.....
Don't pm or expect an answer from me here ... the links above are my contacts.
I know so much about so little that I could teach you all there is to know about nothing......


Top


are all trademarks of VPFORUMS.