Jump to content


Photo

Advice on MAME cabinet build (Actual build starts on page 3)


  • Please log in to reply
85 replies to this topic

#41 BoltBait

BoltBait

    Software Developer

  • Members
  • PipPipPip
  • 392 posts
  • Location:Sacramento, CA

  • Flag: United States of America

  • Favorite Pinball: Elvira, Whitewater, Big Bang Bar, Fun House and All the old EM tables of the 70s that I played as a kid (including Buccaneer, Spirit of 76, and King Kool)

Posted 28 June 2018 - 07:26 PM

Hey just my 2 cents about the Electric Ice Buttons...


That's some good feedback.  Thanks.  I'll let you know how it turns out.


I put my order in:


GGG.png


Randy of Groovy Game Gear seemed very nice. We had a dozen emails back-and-forth to be sure I ordered everything I would need.


Edited by BoltBait, 28 June 2018 - 08:33 PM.

How I built my B2S Pinball Cabinet, step-by-step, with pictures!  Full-sized cabinet for ~$700. Believe me, if I can do it, so can you!

"Making anything with your hands goes wonderfully with whatever in your life you would consider your grind." ~Nick Offerman


#42 Nemo

Nemo

    Pinball Fan

  • Platinum Supporter
  • 1,283 posts
  • Location:Netherlands

  • Flag: Netherlands

  • Favorite Pinball: Monster Bash

Posted 29 June 2018 - 04:41 AM

Game on ! I'm eagerly awaiting pic's of the build, ahhh the smell of freshly cut wood !


Have a good (and productive) weekend !


Gone fishin', no really.......

My F14 Cab http://www.vpforums....showtopic=21820

My Coffee Table http://www.vpforums....topic=25407&hl=

My Jukebox WIP http://www.vpforums....topic=23825&hl=


#43 BoltBait

BoltBait

    Software Developer

  • Members
  • PipPipPip
  • 392 posts
  • Location:Sacramento, CA

  • Flag: United States of America

  • Favorite Pinball: Elvira, Whitewater, Big Bang Bar, Fun House and All the old EM tables of the 70s that I played as a kid (including Buccaneer, Spirit of 76, and King Kool)

Posted 29 June 2018 - 05:17 PM

Game on ! I'm eagerly awaiting pic's of the build...


OK, here's the first pic:


Packages.png


All the pieces and parts I ordered from eBay and Amazon have arrived. (Not the controls from GGG, those will arrive next week.)


ahhh the smell of freshly cut wood !


I thought I was the only one! :D


How I built my B2S Pinball Cabinet, step-by-step, with pictures!  Full-sized cabinet for ~$700. Believe me, if I can do it, so can you!

"Making anything with your hands goes wonderfully with whatever in your life you would consider your grind." ~Nick Offerman


#44 BoltBait

BoltBait

    Software Developer

  • Members
  • PipPipPip
  • 392 posts
  • Location:Sacramento, CA

  • Flag: United States of America

  • Favorite Pinball: Elvira, Whitewater, Big Bang Bar, Fun House and All the old EM tables of the 70s that I played as a kid (including Buccaneer, Spirit of 76, and King Kool)

Posted 13 July 2018 - 06:07 AM

All of the controls from GGG came in the mail today.


I might as well get off my butt and build my cabinet... :D 


How I built my B2S Pinball Cabinet, step-by-step, with pictures!  Full-sized cabinet for ~$700. Believe me, if I can do it, so can you!

"Making anything with your hands goes wonderfully with whatever in your life you would consider your grind." ~Nick Offerman


#45 BoltBait

BoltBait

    Software Developer

  • Members
  • PipPipPip
  • 392 posts
  • Location:Sacramento, CA

  • Flag: United States of America

  • Favorite Pinball: Elvira, Whitewater, Big Bang Bar, Fun House and All the old EM tables of the 70s that I played as a kid (including Buccaneer, Spirit of 76, and King Kool)

Posted 17 July 2018 - 07:10 AM

I started working on the cabinet last weekend.


First thing I did was make my final design:


ArcadePlans.png


I wanted the maximum width to be 24 inches so it would easily fit though my 26 inch wide interior doors.


When I was at Home Depot to buy the wood, I had them cut two feet off the top of the 4x8 sheets of plywood (2x4 and 4x6 foot pieces) to fit into the car (black line in the next image).  The max length of wood that would fit in my car is 6 foot and my machine will be 6 feet tall. Perfect.


Wood00.png


Next, I started cutting the wood starting with the side pieces.


I took one of the 4x6 pieces and cut it straight down the middle (blue, dotted line above) giving me two pieces 2x6 feet.  I nailed them together so that I would be cutting the sides out at the same time.  Then, I drew out a rough outline of where I was going to cut.


I wanted to have curved corners so that the T-molding would be nice and smooth.  I don't have any special tools, so I just grabbed my largest drill bit and drilled some holes where the corners will be:


Wood01.png


Then I used the skill saw to cut along the marked line ending at the pre-drilled holes.


Wood02.png


It is hard to get the entire 6 foot side piece in one picture, but above you can see the bottom of the cabinet (where the cutout for the gas pedal will be) and below you can see the top of the cabinet with the cutout for the control panel, screen, and marquee will be located:


Wood03.png


Finally, I cut out all the middle pieces (one for the bottom/floor, front, top, back, and two pieces to make the cutout for the gas pedal).  Sorry, no pictures of those pieces... they're all just rectangles anyway.  :tup:


I still need to cut pieces to go around the monitor. I'll work that out later once I start assembling the cabinet.  The last thing I will be making is the control panel. As you can see in this picture, it will be slightly raised in the back.  And, again I rounded the corners.


That's all for now.  More later. 


Edited by BoltBait, 28 July 2018 - 04:59 AM.

How I built my B2S Pinball Cabinet, step-by-step, with pictures!  Full-sized cabinet for ~$700. Believe me, if I can do it, so can you!

"Making anything with your hands goes wonderfully with whatever in your life you would consider your grind." ~Nick Offerman


#46 STAT

STAT

    Pinball and Arcade Freak

  • VIP
  • 4,978 posts
  • Location:Wels - Austria

  • Flag: Austria

  • Favorite Pinball: Twilight Zone

Posted 17 July 2018 - 08:14 AM

:tup:

#47 BoltBait

BoltBait

    Software Developer

  • Members
  • PipPipPip
  • 392 posts
  • Location:Sacramento, CA

  • Flag: United States of America

  • Favorite Pinball: Elvira, Whitewater, Big Bang Bar, Fun House and All the old EM tables of the 70s that I played as a kid (including Buccaneer, Spirit of 76, and King Kool)

Posted 23 July 2018 - 07:54 AM

Did some more work on the cabinet this weekend.


I started by working on the piece pointed to by the green arrow:


ArcadePlans04.png


It will be horizontal to the ground and will have two 120mm holes in it--1 for the sub woofer and 1 for the 120mm case fan.


Just like when building my pinball machine, I made a template on paper for the holes, cut them out with scissors, and spray painted the template onto the wood:


Wood04.png


I drilled a large starter hole in each blue area, then I used the jig saw to cut out the holes.


Wood05.png


Each hole will be covered with a 120mm fan finger guard.  One hole will have a 120mm fan to draw air into the cabinet and the other have the sub woofer.


Here, you can see how this piece fits into the cabinet and you can see where the gas pedal will go.  (The bottom piece of the cabinet, blue arrow, is not shown. But, you can see how the front piece of the cabinet will attach.)


Wood07.png


Remember when I built my pinball machine and I forgot to feed in the power cord before assembling the case?  Well, I almost did it again, only this time with the wires for the gas pedal.


Before I attached all of these pieces to the sides of the cabinet, I prepared the bottom piece (blue arrow in the above plans) by cutting out a groove in the base, attaching the gas pedal to the base running the wiring through the groove, and painting around the gas pedal.  I actually painted the base before attaching the gas pedal.  I just did a rough paint job--later I'll mask out the gas pedal and paint the entire cabinet.  I just wanted to have paint on the base around where the pedal is attached so I won't have to be so careful with the masking later.


Wood08.png


Next up, attaching the sides.


How I built my B2S Pinball Cabinet, step-by-step, with pictures!  Full-sized cabinet for ~$700. Believe me, if I can do it, so can you!

"Making anything with your hands goes wonderfully with whatever in your life you would consider your grind." ~Nick Offerman


#48 BoltBait

BoltBait

    Software Developer

  • Members
  • PipPipPip
  • 392 posts
  • Location:Sacramento, CA

  • Flag: United States of America

  • Favorite Pinball: Elvira, Whitewater, Big Bang Bar, Fun House and All the old EM tables of the 70s that I played as a kid (including Buccaneer, Spirit of 76, and King Kool)

Posted 05 August 2018 - 11:02 PM

Work on the cabinet was delayed because of "family issues", but I'm back on track this weekend.


I cut out the pieces that will surround the monitor (top piece, green arrow, and bottom piece, blue arrow):


ArcadePlans05.png

I cut out the top piece and then drilled 2 holes in it with the 2" hole saw (something like this that I found on the web):


HoleSaw.png


These holes will be for the speakers.  Then, I rounded the holes out with a router.  Once I mount the speakers, I'll cover the speaker holes with some chrome fan finger guards (like I did with the pinball machine).


Wood09.png


Next, I attached the sides.  I counter-sunk all the holes and filled them in with wood filler.


Wood11.png


I also mounted some 2x4's along the bottom edge to strengthen the sides (purple arrows above).


Wood10.png


Last night, I picked up some wood filler and lots of paint.  So far the grand total is about $625.  I still need to get a piece of Lexan to mount the Space Invaders marquee. But, that should be about it for this build. I should be able to come in just under my $700 target.


Once the wood putty dries, I'll set this thing upright, sand it, and start painting it...


Edited by BoltBait, 06 August 2018 - 12:03 AM.

How I built my B2S Pinball Cabinet, step-by-step, with pictures!  Full-sized cabinet for ~$700. Believe me, if I can do it, so can you!

"Making anything with your hands goes wonderfully with whatever in your life you would consider your grind." ~Nick Offerman


#49 BoltBait

BoltBait

    Software Developer

  • Members
  • PipPipPip
  • 392 posts
  • Location:Sacramento, CA

  • Flag: United States of America

  • Favorite Pinball: Elvira, Whitewater, Big Bang Bar, Fun House and All the old EM tables of the 70s that I played as a kid (including Buccaneer, Spirit of 76, and King Kool)

Posted 13 August 2018 - 06:09 AM

I finished sanding all of the wood putty.  Then, I set the cabinet upright on a set of wheels:


Wood12.png


I really is starting to look like an arcade cabinet!


And, here's how it looks like from the back:


Wood13.png


I will probably cut a little off the top once I fabricate the marquee holder.


But, for today, I decided to install the power strip before putting on the back.


I mounted a 2x4 half way up the cabinet (on the left side, looking from the back) as shown in the previous picture.


Then, I measured out where the mounting screws would go and I cut out a hole for access to the power strip's switch.  I bought the same power strip that I used for my pinball machine. So, it has a switch on the side of the power strip instead of on top. Plus, it has an 8 foot (2.5 meters) cord.


Wood14.png


And, here's how it looks with the power strip in place:


Wood15.png


I started out drilling a large hole for the power switch access, then made it square shaped with a jig saw.  Then, I finished it up with the router to round out the edges:


Wood16.png


A little bit of the wood came off around the hole during the cutting process, so I filled that in with wood putty.  When that dries, I'll sand it out and it will look good as new.


Next up, I'll be figuring out the marquee area.  Once that's done, I'll paint the cabinet and then put on the back.


Edited by BoltBait, 13 August 2018 - 06:28 AM.

How I built my B2S Pinball Cabinet, step-by-step, with pictures!  Full-sized cabinet for ~$700. Believe me, if I can do it, so can you!

"Making anything with your hands goes wonderfully with whatever in your life you would consider your grind." ~Nick Offerman


#50 BoltBait

BoltBait

    Software Developer

  • Members
  • PipPipPip
  • 392 posts
  • Location:Sacramento, CA

  • Flag: United States of America

  • Favorite Pinball: Elvira, Whitewater, Big Bang Bar, Fun House and All the old EM tables of the 70s that I played as a kid (including Buccaneer, Spirit of 76, and King Kool)

Posted 14 August 2018 - 05:01 AM

I forgot to stop by the Home Depot to pick up a piece of Lexan for the marquee, so I sanded all the wood putty I put on yesterday, then I worked on the monitor track.


I wanted to create a similar track system that I had made for my pinball machine's backbox.


Here's one side (the other side is the same):


Wood17.png


I'm not sold on the circles.  I'll probably take them off.  They really aren't needed anyway.


Here's how it looks with the monitor in place:


Wood18.png


I'll be putting a piece of black electrical tape across the bottom of the monitor to hide the white frame.


And, here's how it looks from the back with the monitor in place:


Wood19.png


That's it for tonight.  Hopefully, I'll remember to pick up the Lexan after work tomorrow... :D


Edited by BoltBait, 14 August 2018 - 05:18 AM.

How I built my B2S Pinball Cabinet, step-by-step, with pictures!  Full-sized cabinet for ~$700. Believe me, if I can do it, so can you!

"Making anything with your hands goes wonderfully with whatever in your life you would consider your grind." ~Nick Offerman


#51 STAT

STAT

    Pinball and Arcade Freak

  • VIP
  • 4,978 posts
  • Location:Wels - Austria

  • Flag: Austria

  • Favorite Pinball: Twilight Zone

Posted 14 August 2018 - 01:51 PM

Looking good :tup: ... please don't Forget and don't make the same as in your Draw: Space Invaders Marquee and Pole Position Screen ;) /Joke-End

#52 BoltBait

BoltBait

    Software Developer

  • Members
  • PipPipPip
  • 392 posts
  • Location:Sacramento, CA

  • Flag: United States of America

  • Favorite Pinball: Elvira, Whitewater, Big Bang Bar, Fun House and All the old EM tables of the 70s that I played as a kid (including Buccaneer, Spirit of 76, and King Kool)

Posted 14 August 2018 - 03:17 PM

Looking good :tup: ... please don't Forget and don't make the same as in your Draw: Space Invaders Marquee and Pole Position Screen ;) /Joke-End


Thanks!


Yes, it will have a Space Invaders marquee.  I already bought one off eBay.  I just need to buy a piece of Lexan to mount it on.


Similar to this one: https://www.ebay.com...gn/163138696876


I just need to purchase https://www.homedepo...GE-07/202038064 to mount it on.


Then, I'll build a frame around it to hold it in place.


How I built my B2S Pinball Cabinet, step-by-step, with pictures!  Full-sized cabinet for ~$700. Believe me, if I can do it, so can you!

"Making anything with your hands goes wonderfully with whatever in your life you would consider your grind." ~Nick Offerman


#53 STAT

STAT

    Pinball and Arcade Freak

  • VIP
  • 4,978 posts
  • Location:Wels - Austria

  • Flag: Austria

  • Favorite Pinball: Twilight Zone

Posted 14 August 2018 - 05:48 PM

Sounds good, I had something About this in my first Arcade Cab, i bought this in About 2009, resold 2010 (had limited room only),
made my own 2011 …

Tip: don't close Frame complete, then you can Always Change your Marquee (?)

Edited by STAT, 14 August 2018 - 05:50 PM.


#54 BoltBait

BoltBait

    Software Developer

  • Members
  • PipPipPip
  • 392 posts
  • Location:Sacramento, CA

  • Flag: United States of America

  • Favorite Pinball: Elvira, Whitewater, Big Bang Bar, Fun House and All the old EM tables of the 70s that I played as a kid (including Buccaneer, Spirit of 76, and King Kool)

Posted 15 August 2018 - 05:43 AM

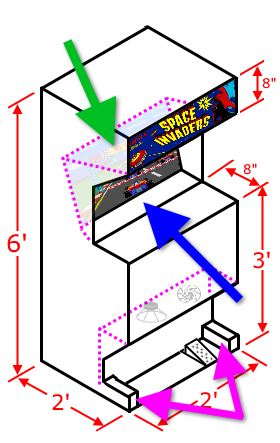
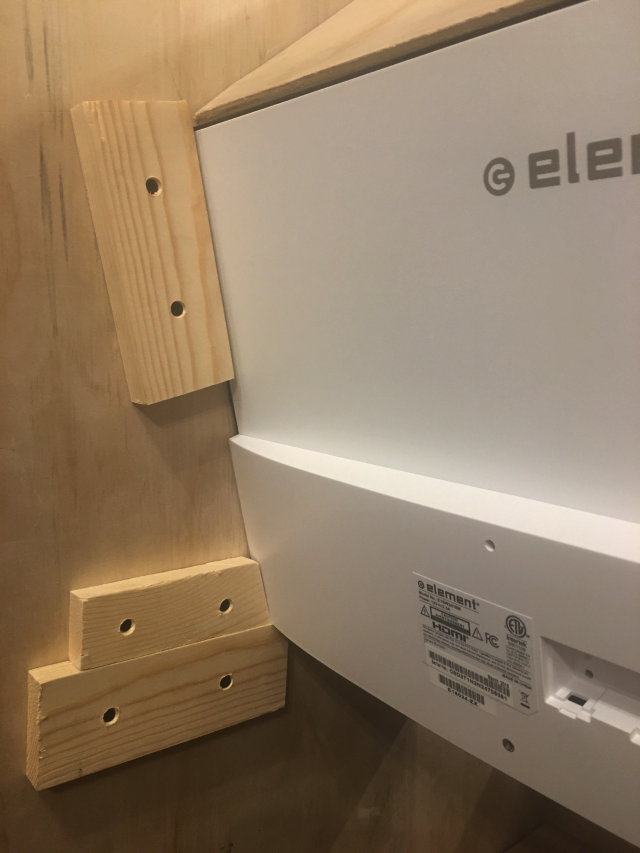
I picked up the piece of Lexan on the way home from work today ($21) shown here with my marquee:


Wood22.png


I'm not quite sure how to attach the marquee to the Lexan... spray adhesive?  2 sided tape? Just regular tape?


Anyone have experience with this and can advise me?  Thanks!


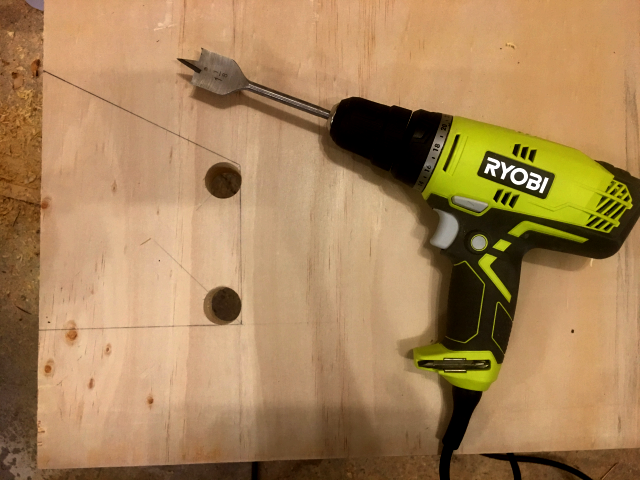
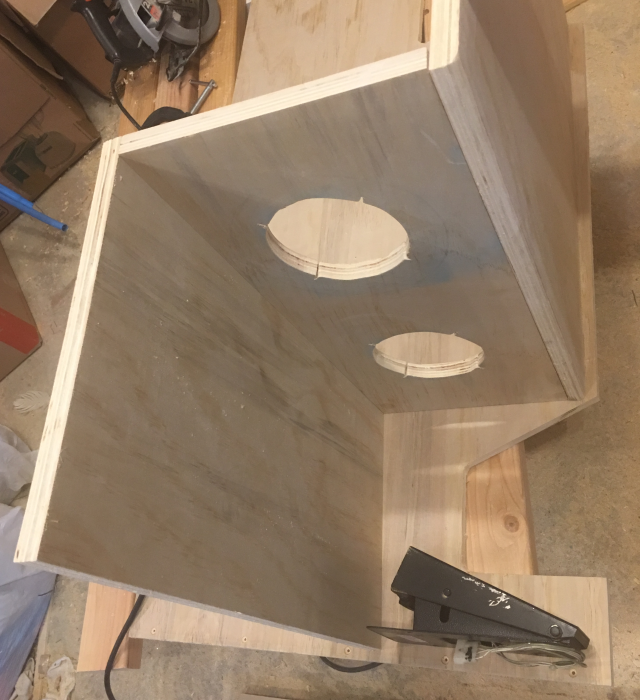
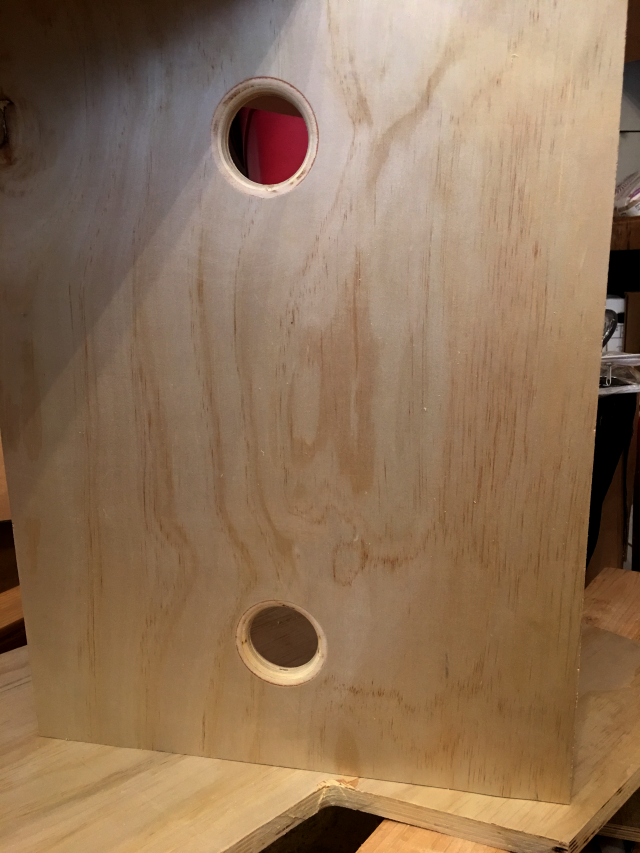
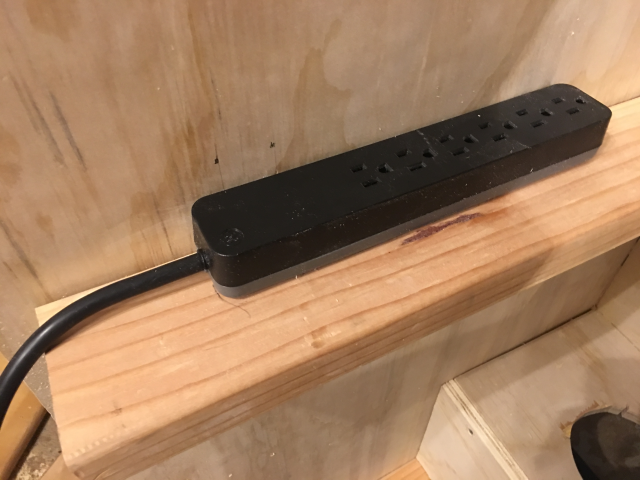
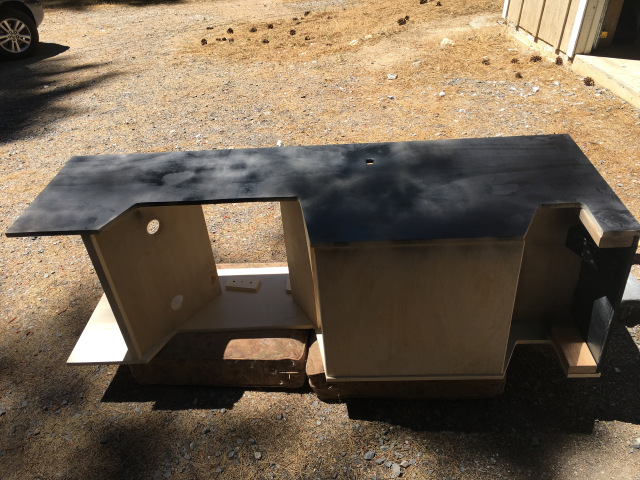
Anyway, I had picked up a LED bar some time ago and tonight I mounted it to a board that will go across the inside of the head:


Wood21.png


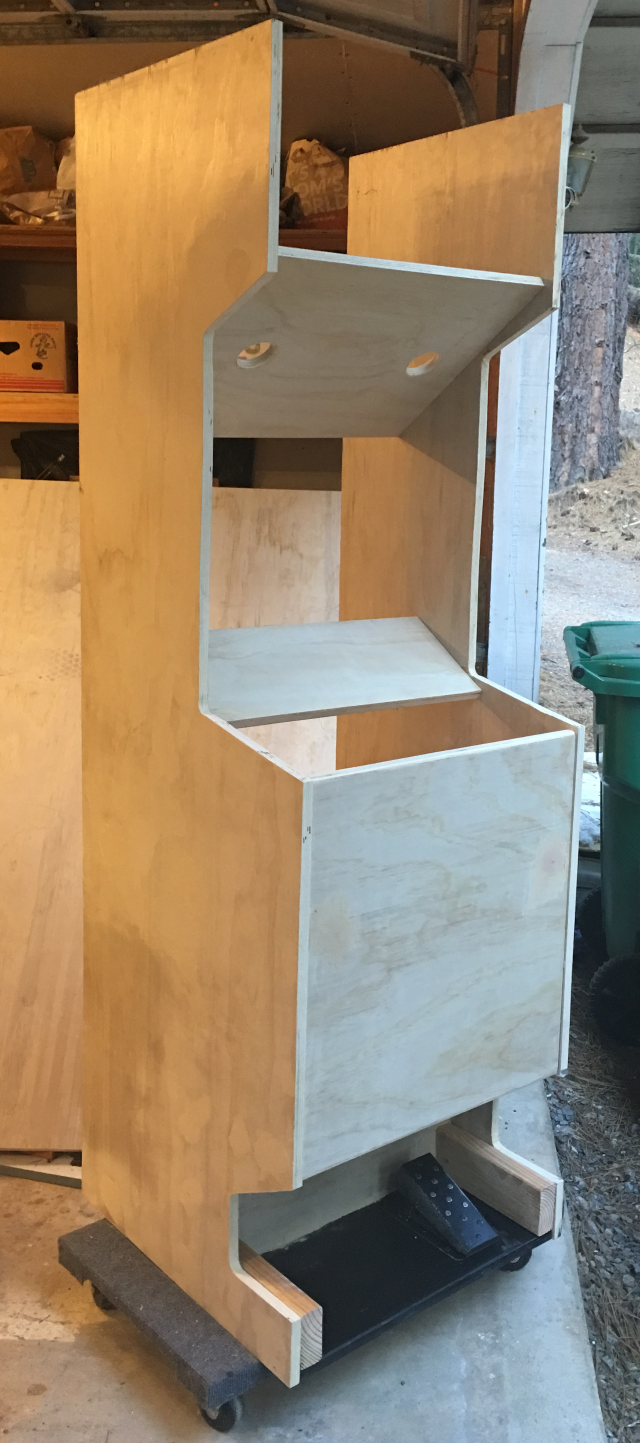
Wow! That looks really crooked, but it is not.  It is just the angle I took the picture.  Remember, the left and right sides are parallel to each other. And, I cut out the left and right sides at the same time as they were nailed together at that time so they are exactly the same height and size.


The light bar is not screwed in place yet.  But, that's pretty much where it will go.  I just put it up there for the picture.  I want to finish the marquee frame first.


As the light bar is LED, it won't generate any heat at all.  It is equivalent to a 40w bulb.  So, bright enough to illuminate the marquee, but not too bright.


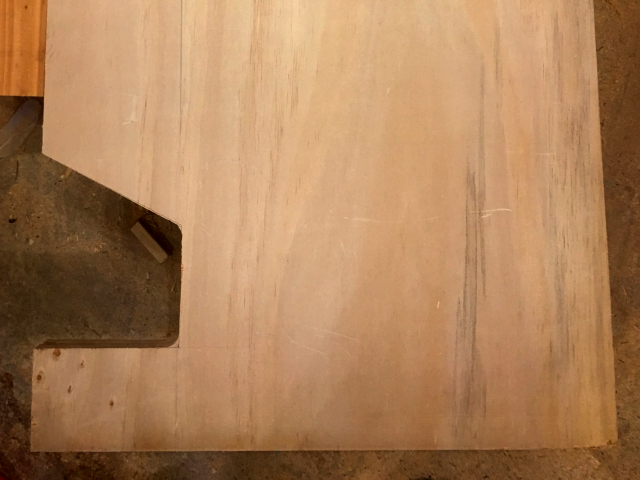
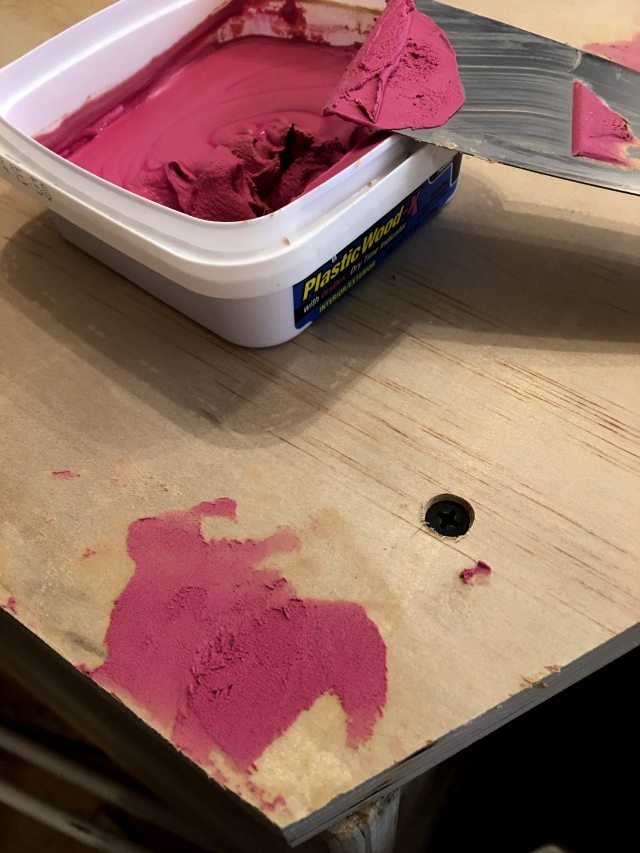
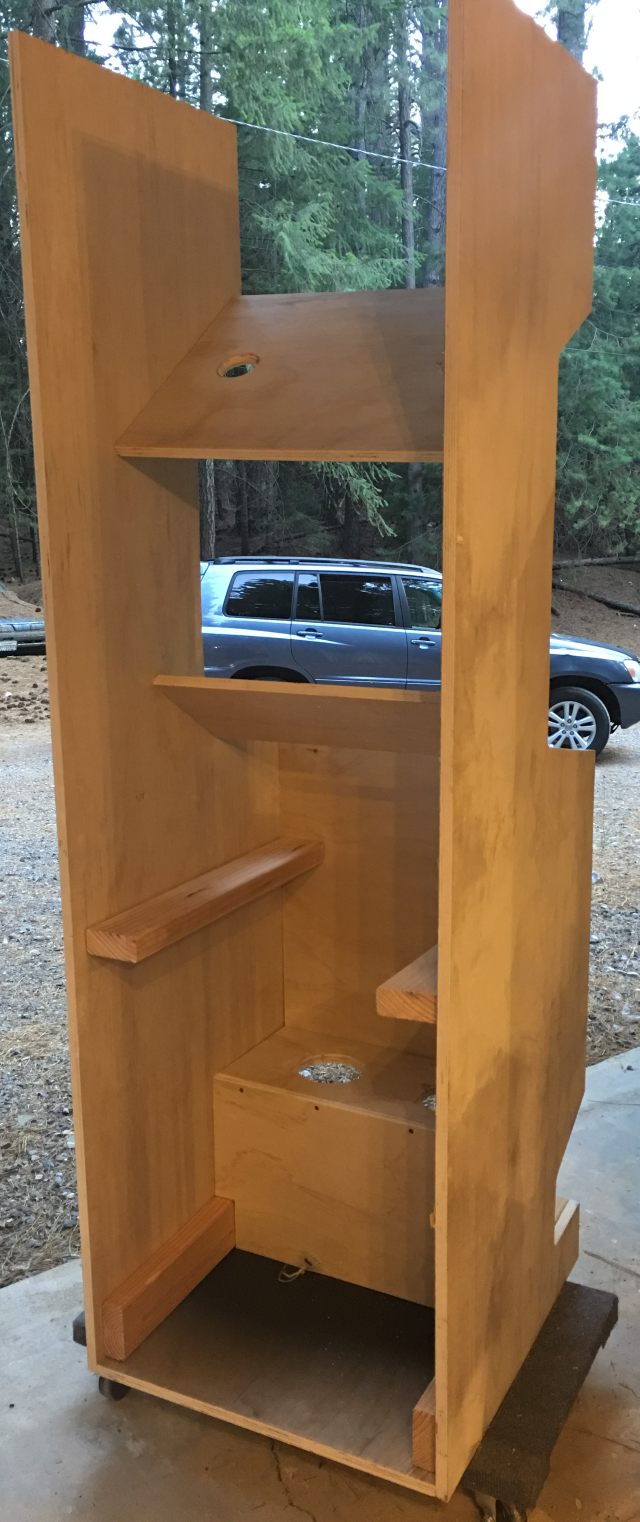
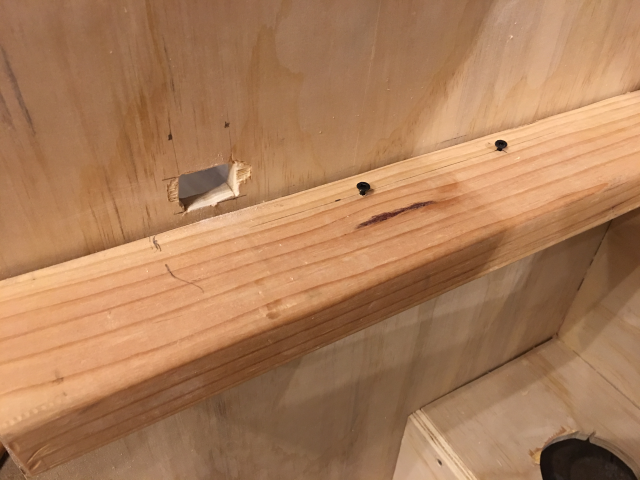
Next, I started on the marquee frame.  I used my router to cut a groove in the edge of two boards, one for the top and one for the bottom.  I screwed the bottom piece into the cabinet:


Wood23.png


I smoothed out the seams and covered the counter sunk screws with wood putty.


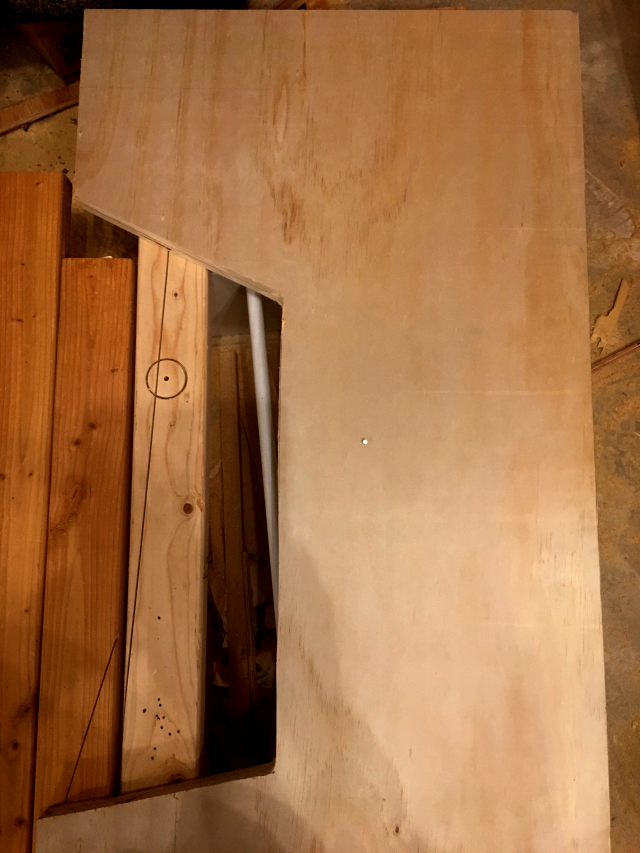
I did not attach the top yet.  I'll wait until I have cut the Lexan to size and attached the marquee to it.


I know that it has been suggested that I make the marquee changeable, but how often do you change yours?!  I seriously doubt I will be changing mine, so I decided to make it fixed in place.  (In reality, the top piece will only be held in place by 3 or 4 screws, so if I really wanted to change my marquee, it wouldn't be too hard.)


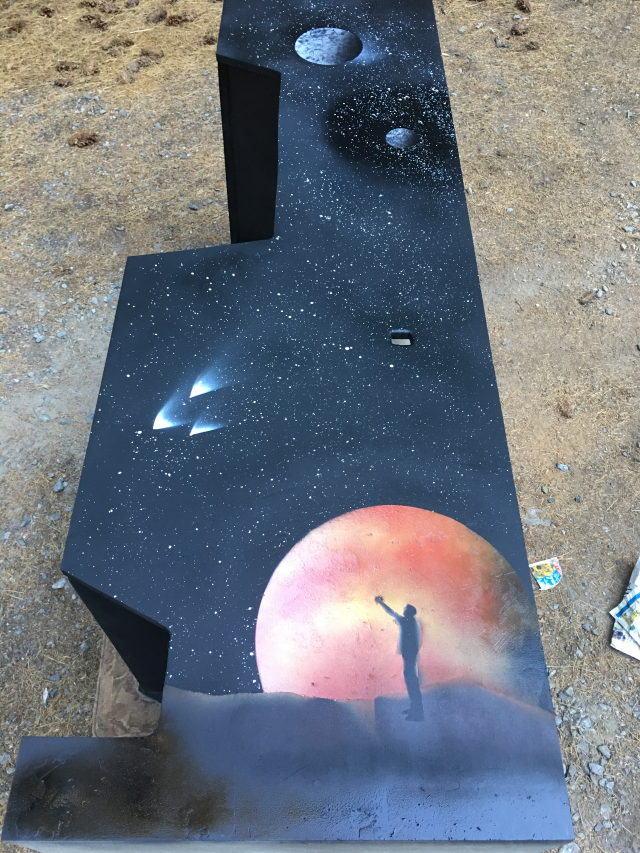
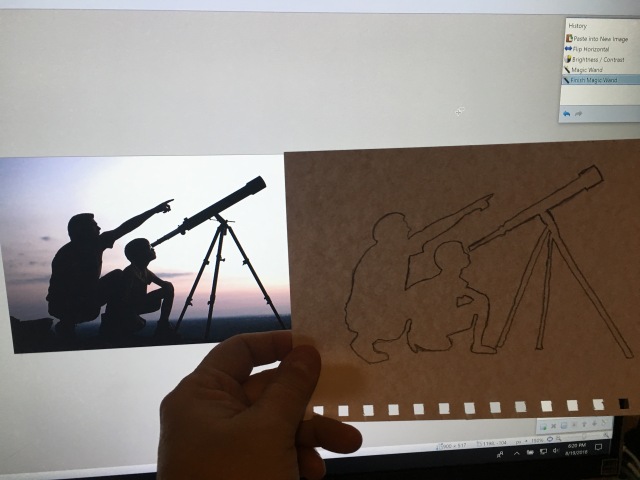
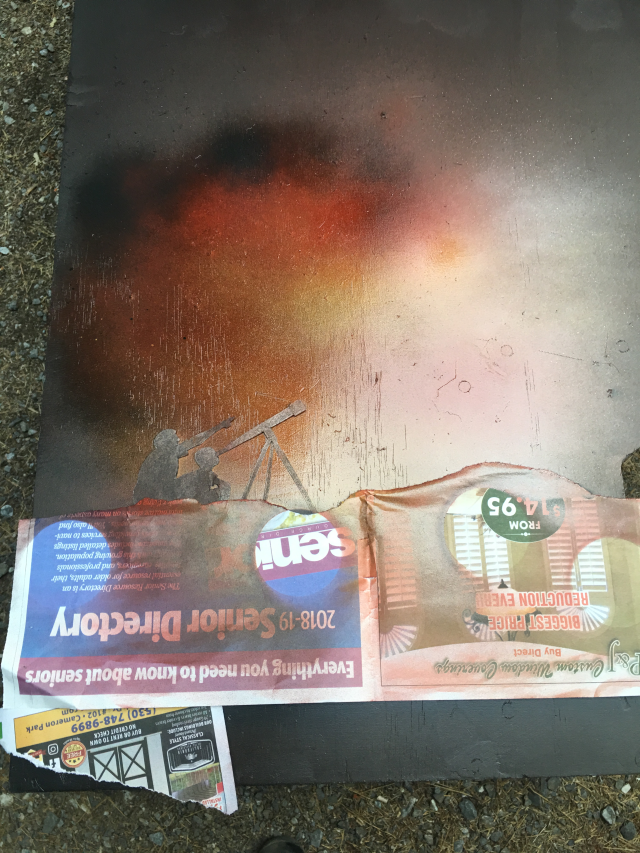
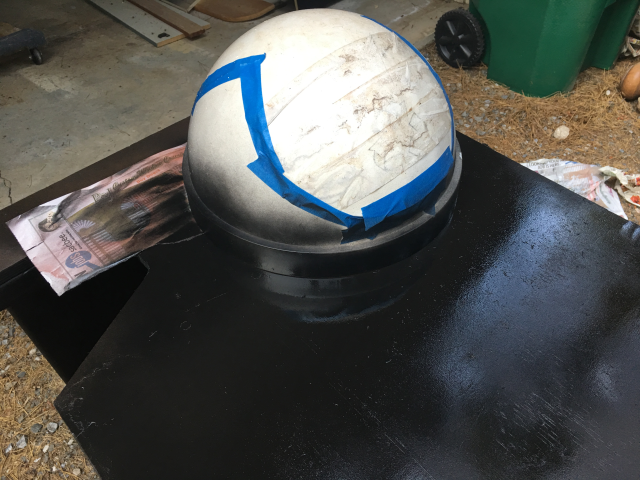
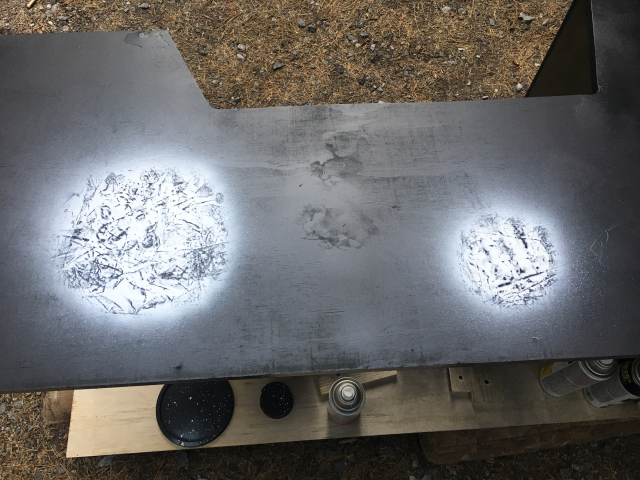
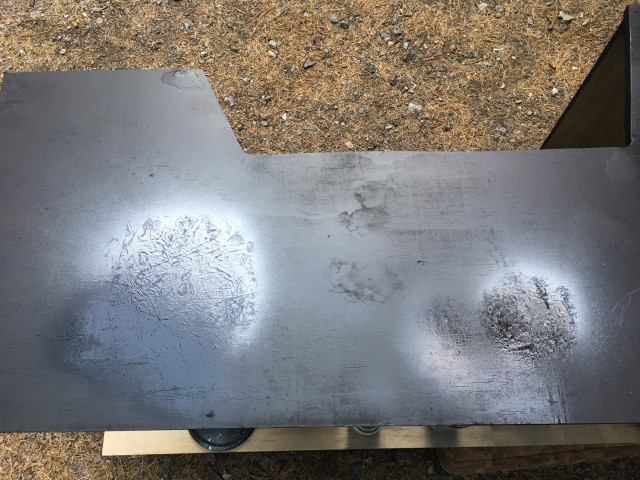
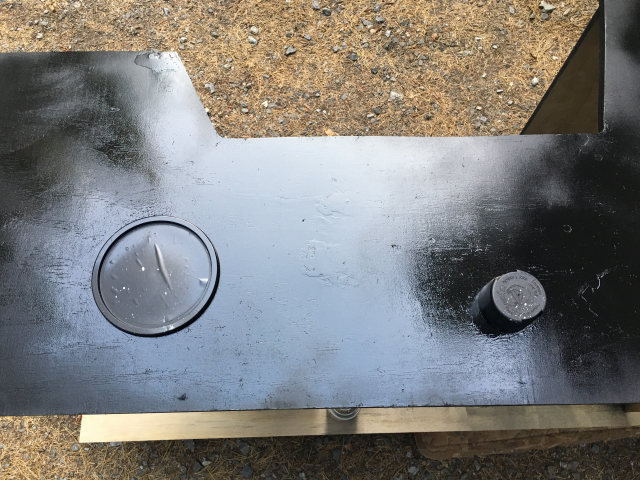
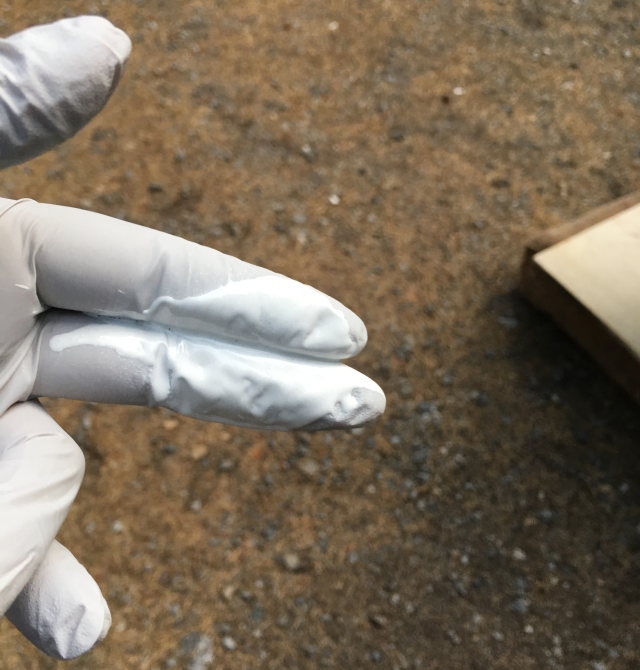
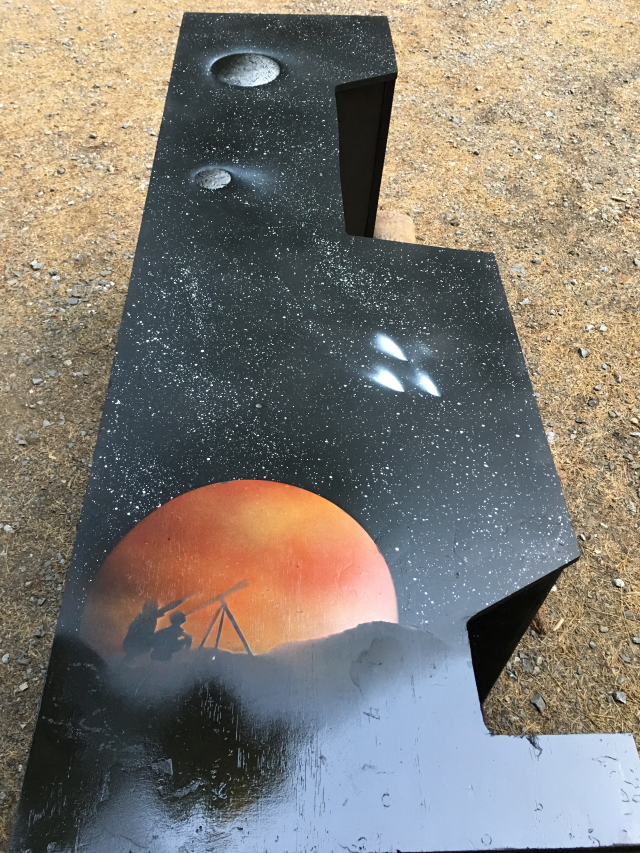
I'm getting really close to being ready to paint the cabinet. I'll be doing a spacescape (to match my pinball machine).  But, I've been watching more spray painting videos on YouTube, so I think I'll be making the painting a little more complicated this time.  If things go well, I'll probably do one side on this Saturday and one side on Sunday.  I already have the paint and other supplies I need.


Edited by BoltBait, 15 August 2018 - 05:20 PM.

How I built my B2S Pinball Cabinet, step-by-step, with pictures!  Full-sized cabinet for ~$700. Believe me, if I can do it, so can you!

"Making anything with your hands goes wonderfully with whatever in your life you would consider your grind." ~Nick Offerman


#55 DDH69

DDH69

    Pinball Wizard

  • Platinum Supporter
  • 3,515 posts
  • Location:DOFLinx HQ, Adelaide

  • Flag: Australia

  • Favorite Pinball: Monster Bash

Posted 15 August 2018 - 06:40 AM

I've "sandwiched" printed banners between Perspex sheets previously, not sure if that helps at all. ...... and yes, that does look like either drunk carpentry or photography :)


DOFLinx
Contributions for equipment to help with ongoing DOFLinx development can be made here

#56 BoltBait

BoltBait

    Software Developer

  • Members
  • PipPipPip
  • 392 posts
  • Location:Sacramento, CA

  • Flag: United States of America

  • Favorite Pinball: Elvira, Whitewater, Big Bang Bar, Fun House and All the old EM tables of the 70s that I played as a kid (including Buccaneer, Spirit of 76, and King Kool)

Posted 15 August 2018 - 06:52 AM

Thanks for the response, but there isn't room in the groove for 2 sheets of plastic.  I need to figure out how to do it with only 1 sheet.
 
So far, I'm leaning toward spray adhesive (found this on the web):
 

Elmer's Multi-Purpose Spray Adhesive is acid-free, photo-safe, allows for repositioning. Our spray adhesive dries permanent, fast drying, and dries clear. Elmer's Multi-Purpose Spray Adhesive is specially formulated for mounting items to a variety of surfaces, including plastics.


EDIT: I picked up some spray adhesive, $3.


Edited by BoltBait, 16 August 2018 - 06:46 PM.

How I built my B2S Pinball Cabinet, step-by-step, with pictures!  Full-sized cabinet for ~$700. Believe me, if I can do it, so can you!

"Making anything with your hands goes wonderfully with whatever in your life you would consider your grind." ~Nick Offerman


#57 BoltBait

BoltBait

    Software Developer

  • Members
  • PipPipPip
  • 392 posts
  • Location:Sacramento, CA

  • Flag: United States of America

  • Favorite Pinball: Elvira, Whitewater, Big Bang Bar, Fun House and All the old EM tables of the 70s that I played as a kid (including Buccaneer, Spirit of 76, and King Kool)

Posted 19 August 2018 - 02:24 AM

Time to paint the cabinet...


First, start with a light coat of flat black:


Paint01.png


While that was drying, I went online and found a silhouette of a man pointing upwards.


Paint02.png


I traced it onto paper and then cut it out with scissors.


I placed the cutout onto the black paint near the bottom of the cabinet and set a few small items on it to hold it down.


Paint03.png


Then, I painted the bottom of the cabinet a combination of red, white, and black.  In fact, I covered most of the red and white with black.  Once that was dry, I covered it with a torn out newspaper to create the ground.


Next, I created the planet and moons.  I covered the planet with a garbage can lid and I covered the moons with a small bowl and the cap to a paint can.


Once those were covered, I painted around the covers with black to complete the entire sky.  When the sky was dry, I flicked white paint onto the sky area to create the star field.  At this time, I also painted 3 shooting stars by using a thick piece of paper folded into a "V" shape.


Once everything was dry, I removed the lids and the paper silhouette.


Paint04.png


Once all the paint dries (and I do the other side as well), I'll clean up the silhouette edges with a black paint pen.


I'll tackle the other side tomorrow.  If I decide to do the same image on the other side, I'll have to make another silhouette as this one got torn apart when removing it.


Edited by BoltBait, 19 August 2018 - 02:41 AM.

How I built my B2S Pinball Cabinet, step-by-step, with pictures!  Full-sized cabinet for ~$700. Believe me, if I can do it, so can you!

"Making anything with your hands goes wonderfully with whatever in your life you would consider your grind." ~Nick Offerman


#58 Nemo

Nemo

    Pinball Fan

  • Platinum Supporter
  • 1,283 posts
  • Location:Netherlands

  • Flag: Netherlands

  • Favorite Pinball: Monster Bash

Posted 19 August 2018 - 06:21 AM

Again as with your pincab this is one insane cool build, loving it man ! And the artwork has a certain Bob Ross feel to it (flickes his brush with white paint, maybe a star lives here) ......extremely creative my good sir  :otvclap:


Gone fishin', no really.......

My F14 Cab http://www.vpforums....showtopic=21820

My Coffee Table http://www.vpforums....topic=25407&hl=

My Jukebox WIP http://www.vpforums....topic=23825&hl=


#59 STAT

STAT

    Pinball and Arcade Freak

  • VIP
  • 4,978 posts
  • Location:Wels - Austria

  • Flag: Austria

  • Favorite Pinball: Twilight Zone

Posted 19 August 2018 - 09:06 AM

Really awesome what you create here :tup:

Just a small side note: the man with the Hand Looks like a bit an "old german salutation" …


#60 BoltBait

BoltBait

    Software Developer

  • Members
  • PipPipPip
  • 392 posts
  • Location:Sacramento, CA

  • Flag: United States of America

  • Favorite Pinball: Elvira, Whitewater, Big Bang Bar, Fun House and All the old EM tables of the 70s that I played as a kid (including Buccaneer, Spirit of 76, and King Kool)

Posted 20 August 2018 - 03:12 AM

Just a small side note: the man with the Hand Looks like a bit an "old german salutation" …


Not my intent at all, of course!


With that in mind, I made a new template for the other side:


Paint05.png


After giving this side 3 coats of black, I placed the template on the black, added some newspaper for the land, and painted the big planet with red and yellow:


Paint06.png


After that dried a little, I placed the garbage can lid over the planet and sprayed black around it:


Paint07.png


Next, I painted the two moons with white and removed part of the paint with a crinkled up newspaper:


Paint08.png


Then, I sprayed the back side of the moons with black to create the shadow:


Paint09.png


Next, I covered the moons with plastic lids--a soup bowl lid for the large moon and a spray paint can lid for the smaller one.  Once covered, I sprayed black around the lids to give the moons their shape:


Paint10.png


With the moons and big planet covered, it is time to create the stars.  I sprayed some white paint onto my gloved fingers, then "flicked" my fingers toward the black area.  Repeat until the sky is filled with stars:


Paint11.png


Once the stars were done, I made the 3 shooting stars with a piece of paper folded into a "V" shape.


After the paint had dried for about an hour, I removed the coverings.  I'll let the paint dry over night and tomorrow I'll touch up the silhouette area with a black paint pen.


Paint12.png


Next up, installing all the electronics (computer, sub woofer, speakers, screen, case fan, etc.).


The last thing I need to do is create and wire up the control panel.  I have some serious concerns there as none of the controls I purchased came with any instructions... eek!  Anyway, I'm sure you guys will help me out. :D


How I built my B2S Pinball Cabinet, step-by-step, with pictures!  Full-sized cabinet for ~$700. Believe me, if I can do it, so can you!

"Making anything with your hands goes wonderfully with whatever in your life you would consider your grind." ~Nick Offerman