
Jump to content


Photo
* * * * - 3 votes

Star Wars: Pinball Unleashed - 46"/32"/DMD Widebody Build

Star Wars Pinball Cabinet

  • Please log in to reply
73 replies to this topic

#21 T-800

T-800

    All-In

  • Silver Supporter
  • 417 posts
  • Location:Minnesota

  • Flag: United States of America

  • Favorite Pinball: Wrath of Olympus


Posted 19 March 2013 - 09:25 PM

I invented and designed this:      (it makes body filler more fun to play with.... :)


#22 Gamester

Gamester

    Enthusiast

  • Members
  • PipPipPip
  • 185 posts
  • Location:Texas

  • Flag: United States of America

  • Favorite Pinball: .

Posted 19 March 2013 - 09:50 PM

LOL, I get it now.  I would probably do the same.  ;)


#23 Shakenbake

Shakenbake

    Enthusiast

  • Members
  • PipPipPip
  • 230 posts

  • Flag: United States of America

  • Favorite Pinball: Funhouse

Posted 19 March 2013 - 09:52 PM

That is sweet stuff T-800. A good friend of mine owns a large chain of body shops. I'll have to find out if he is using that.


#24 Gamester

Gamester

    Enthusiast

  • Members
  • PipPipPip
  • 185 posts
  • Location:Texas

  • Flag: United States of America

  • Favorite Pinball: .

Posted 19 March 2013 - 10:41 PM

So decided to give my body a break after two days on my hands and knees doing the woodworking and tweak the artwork a bit more.  So here's round 3...
 
For this version I decided to open up the logo a bit by getting rid of the border around it and taking the character images from the background and integrating them into the lettering.  I think it opens the scene up a little and helps blend the logo into the background action better.  Also added a couple more details, like some rebel artillery.  One of their cannons didn't fare so well against the imperial onslaught.   ;)
 
There will inevitably be some adjustments required once I complete the construction of the cab, but from a design perspective I think I'm close to calling this 'good enough.'
 
CabinetLeftSide_v5_1024_zpsc3241567.png
 

Edited by Gamester, 20 March 2013 - 06:16 PM.


#25 Gamester

Gamester

    Enthusiast

  • Members
  • PipPipPip
  • 185 posts
  • Location:Texas

  • Flag: United States of America

  • Favorite Pinball: .

Posted 31 March 2013 - 07:21 AM

Spent a several hours on the cabinet over the past week, and made some progress on the woodworking...
 
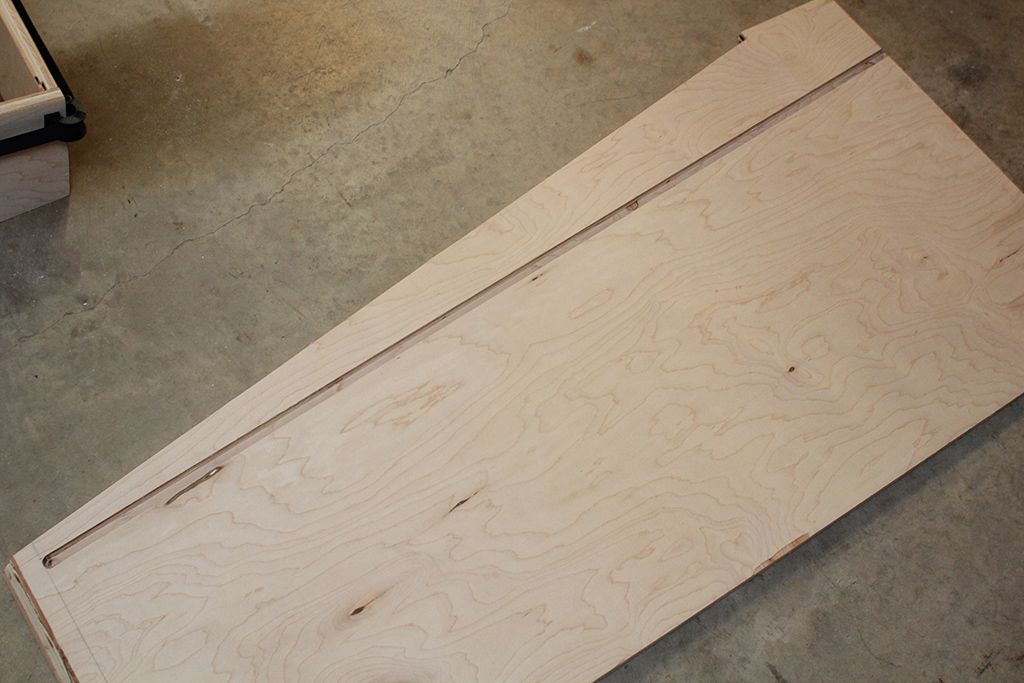
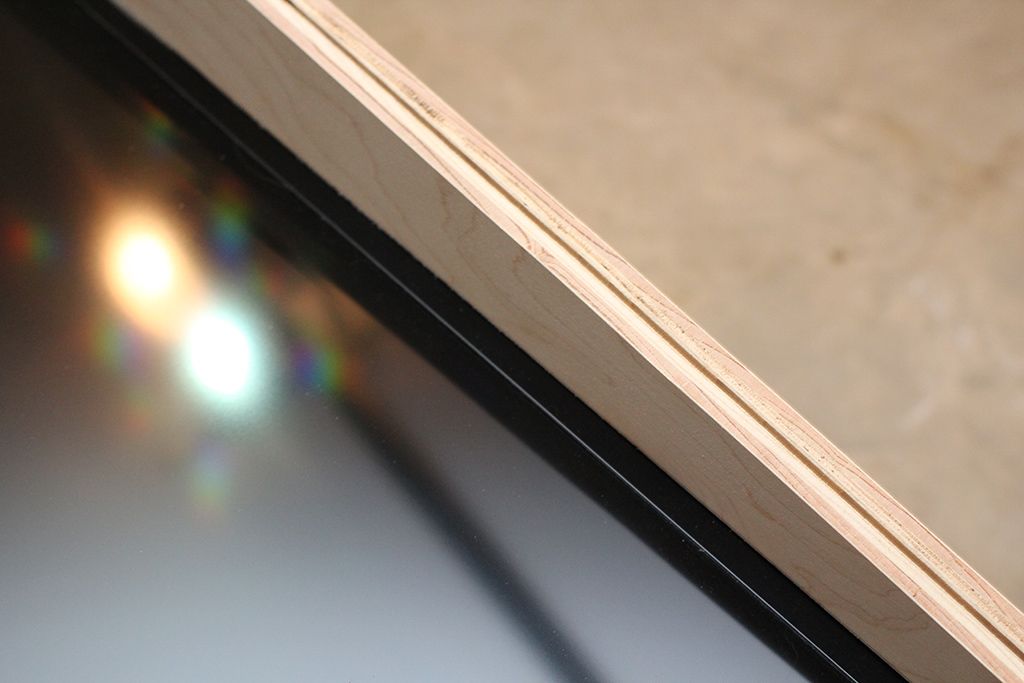
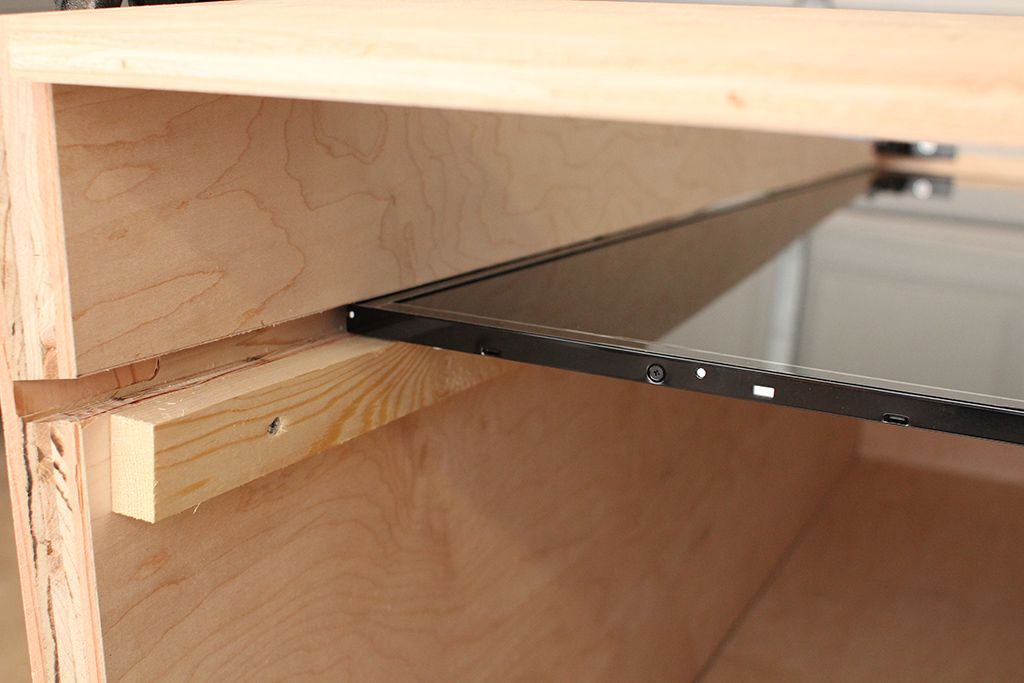
Cut slots in the cabinet sides for the playfield TV using a 1/2" router straight bit.  After cutting the initial half-inch slot (which took three progressively deeper passes), I adjusted my metal guide to enlarge the slot just a hair, since the TV is pretty much right at 1/2" thick, and I didn't want the TV to bind or rub too much when sliding it in and out.  I cut the slot 3/4" from the top edge in the front and approximately 4.5" from the top edge in the back, which seems to be a pretty common approach lately.  Gives the monitor some depth in the cab, but also a decent angle toward the player.  The shape of the side almost gives the illusion that the playfield slopes backward, but it doesn't.   ;)
 
IMG_2579_zps55858a28.jpg
 
 
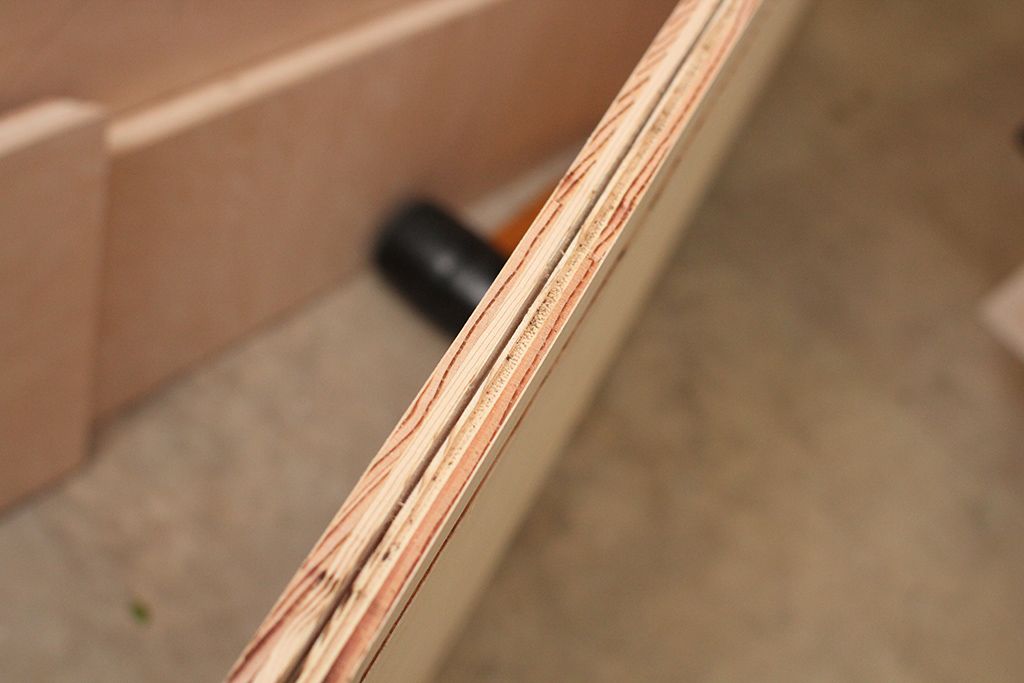
Also used a 1/16" slot cutting bit and the router to cut the slots for the playfield glass plastics and t-molding, which I'm planning to put around the backbox.  I hear 1/16" is pretty tight for the glass plastics, so I may end up enlarging those slots slightly.  We'll see when I get them.  Luckily that's something that can still be done after the cabinet body is assembled.
IMG_2581_zps2a214626.jpg
 
IMG_2591_zps8464c76f.jpg
 
 
Backbox partially assembled.  Got some intake ventilation holes cut, as well as an access hole for the wiring between the backbox and the cab body.
 
IMG_2597_zps0c87b41a.jpg
 
IMG_2589_zpsa4d5e9b8.jpg
 
 
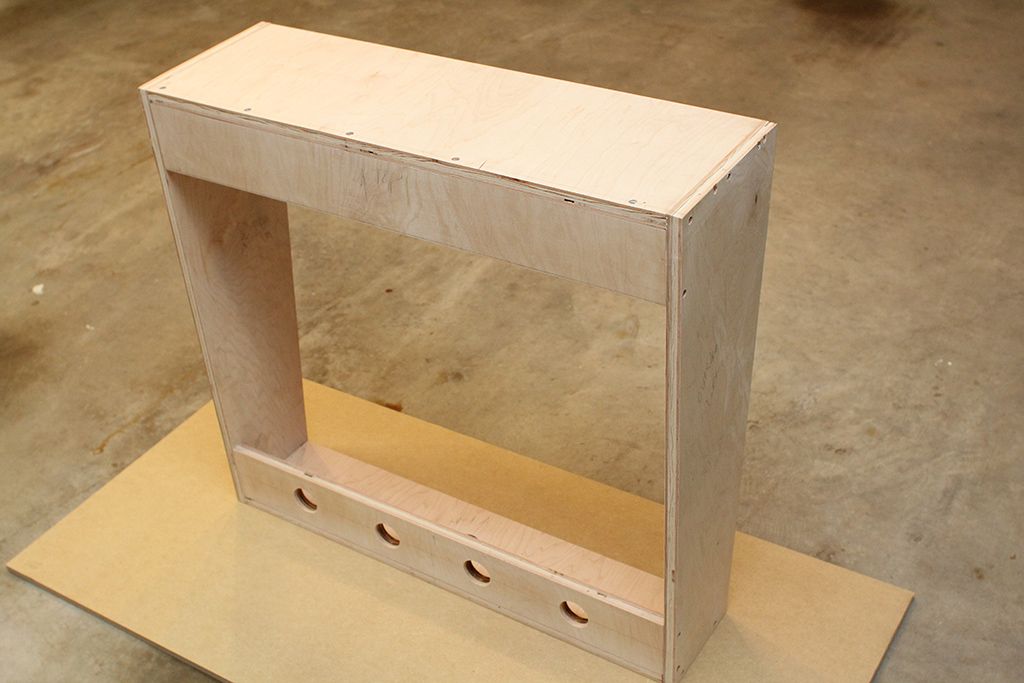
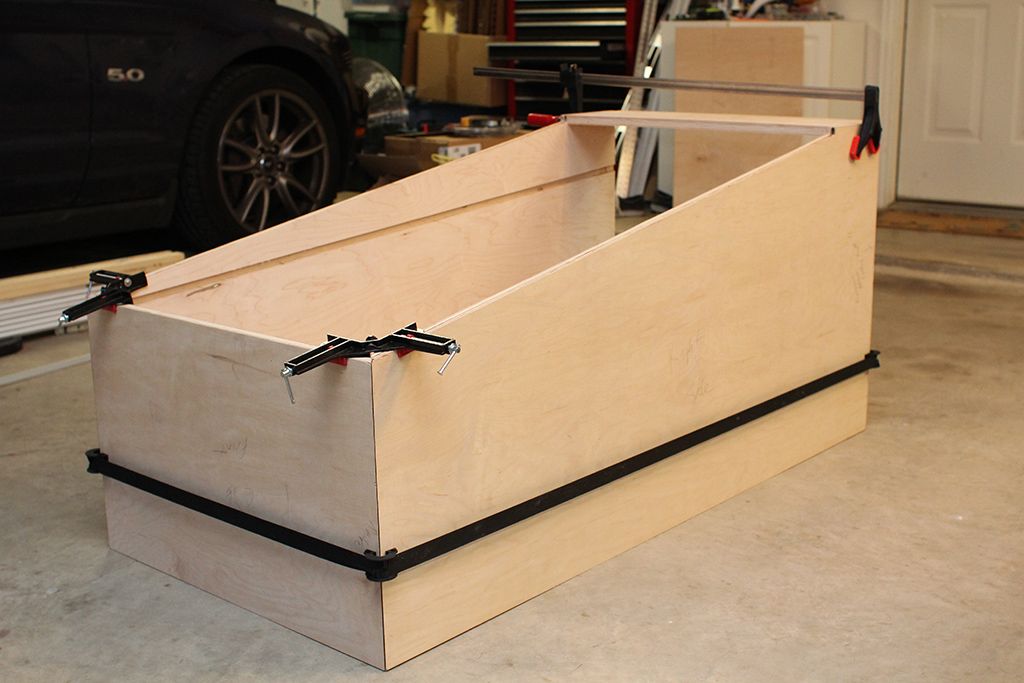
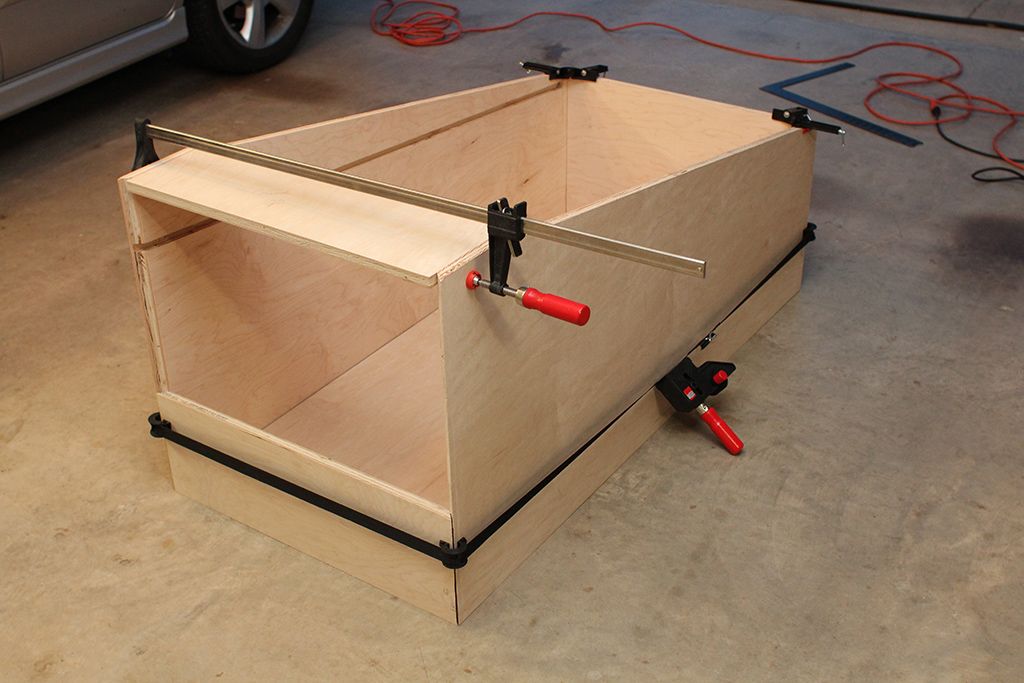
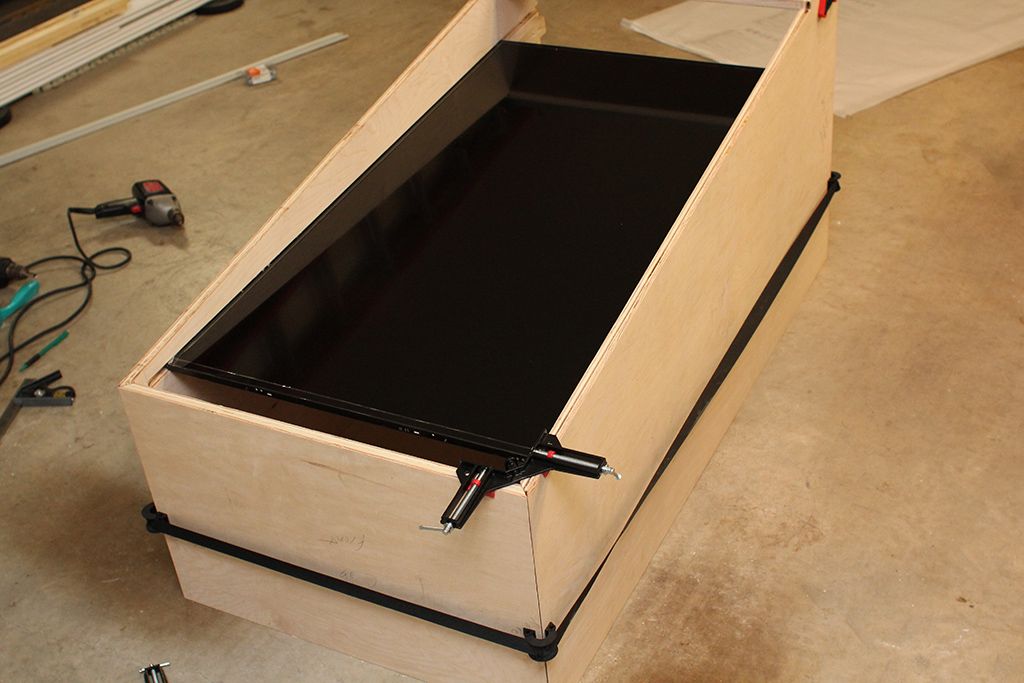
Test fitting the pieces for the cabinet body.  Strap clamp was a new purchase for this project.  Love it!  Every project is an excuse to buy new tools, of course!   :)
IMG_2601_zpsdfe3ed0d.jpg
 
IMG_2600_zps217ea903.jpg
 
 
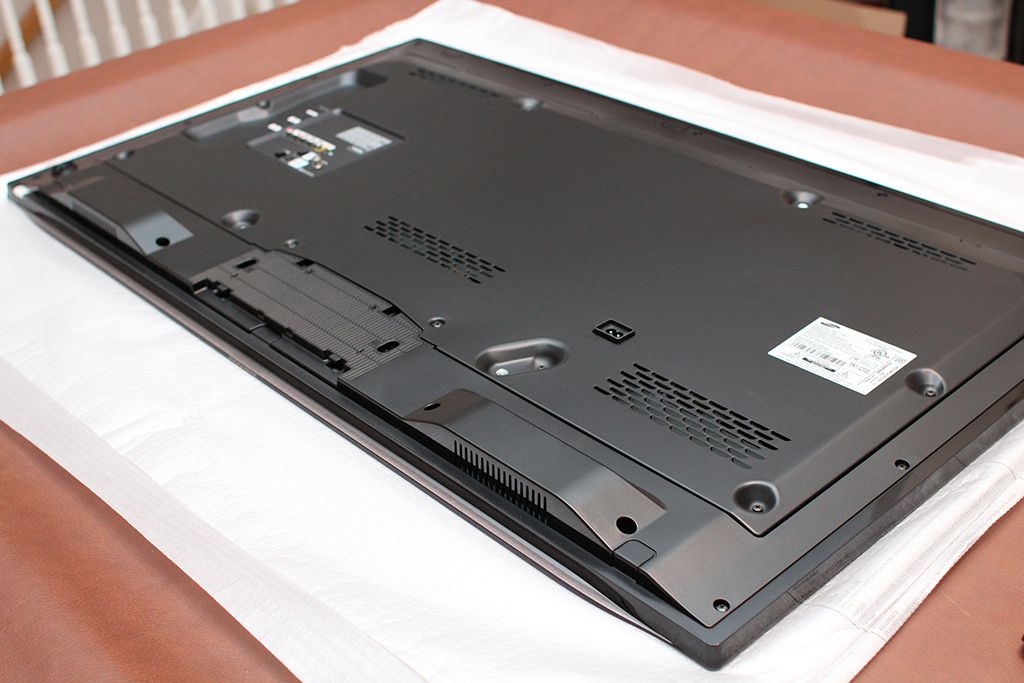
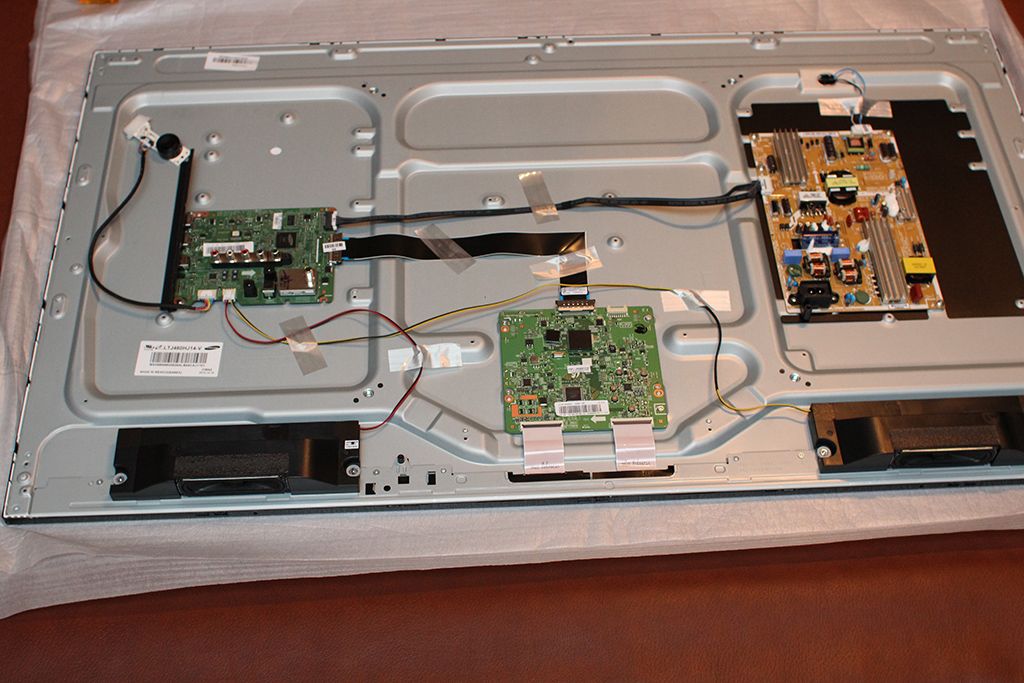
Playfield TV de-casing time!  Have to admit, it's a slightly cringe-worthy process, taking apart a several hundred dollar, brand new piece of electronics like this.  Luckily this thing was extremely easy to de-case.
 
IMG_2602_zps18fa5b91.jpg
 
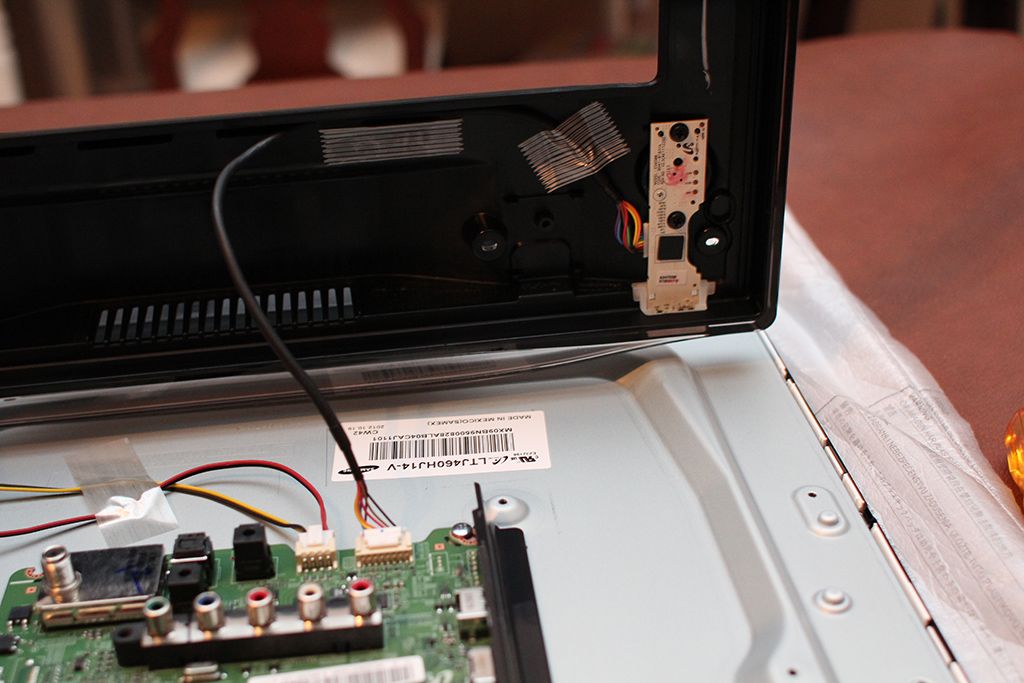
Inner cover removed:
IMG_2603_zpse2e557c6.jpg
 
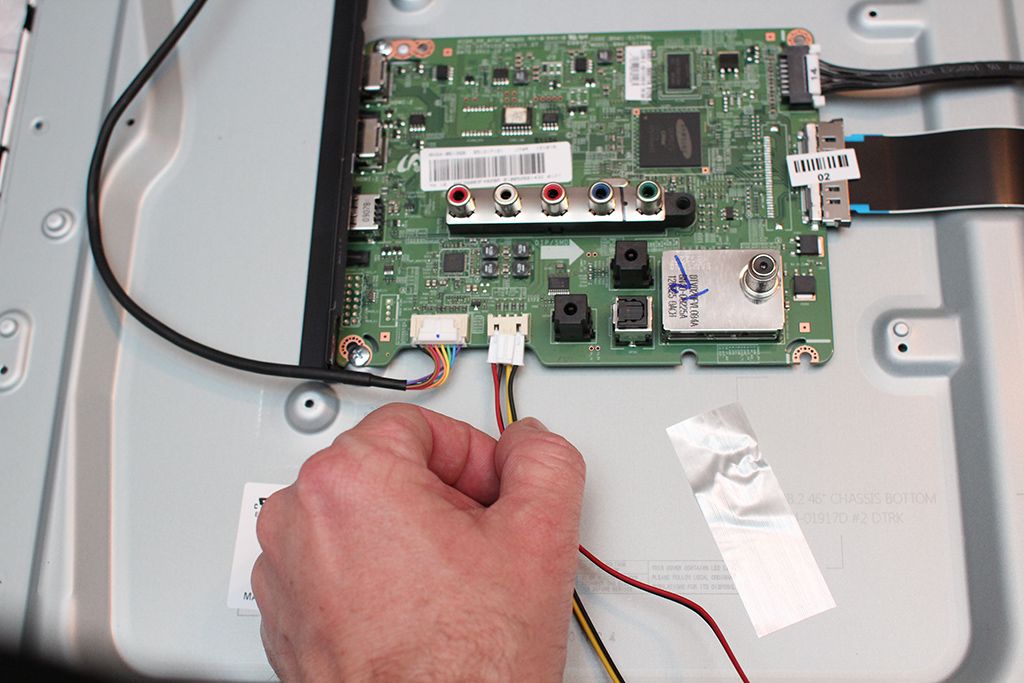
The on/off switch and remote sensor were just held in with two screws and then slid right out:
IMG_2608_zps17fc1a60.jpg
 
After unplugging the cable, the speakers simply lifted out:
IMG_2609_zps00ca3dce.jpg
 
IMG_2610_zps5d8ab8b7.jpg
 
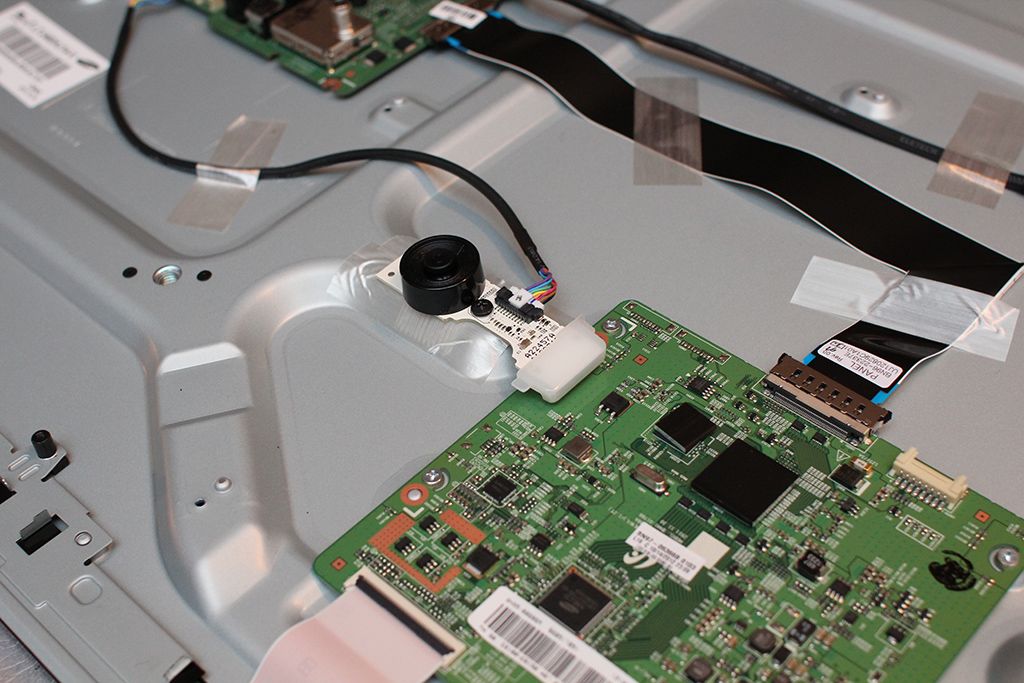
Fastened the on/off switch and remote sensor board onto one of the available screw holes (after insulating the board from the metal of course with some tape).  Faced the sensor toward the front of the monitor (front of the cab) so if needed, I can simply open the coin door and point the remote in to make adjustments, etc.
IMG_2611_zpsbeddc8e4.jpg
 
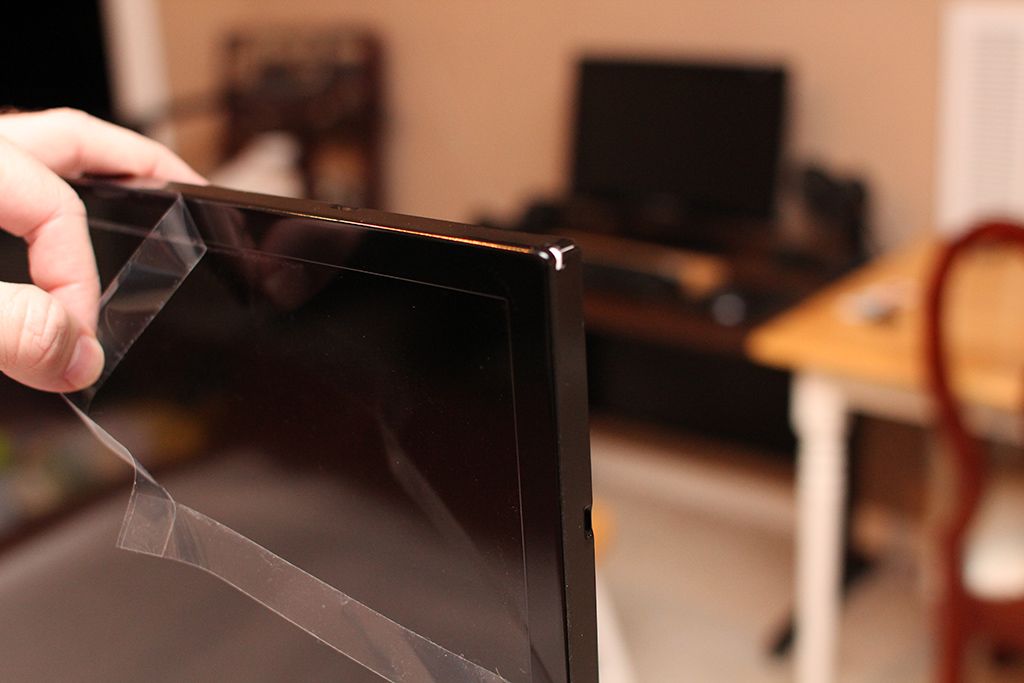
This TV is perfect for a cab; even after de-casing it has a nice black bezel around it.
IMG_2612_zps62205ccb.jpg
 
 
Test fitting the TV:
IMG_2617_zpsf1e88864.jpg
 
About 1/4" of black bezel showing on each side, so the playfield isn't completely edge-to-edge, but looks really nice.  Once the sides are painted black and with glass over it, I doubt anyone would even know the difference.
IMG_2620_zps646ad602.jpg
 
Installed some 1x2 railing to give the monitor extra support on the sides. I actually made the slots a bit deeper than I needed to.  I'll probably run some insulation through there to fill the extra gap and give the monitor a little cushion on the sides.
IMG_2622_zpsda83158d.jpg
 
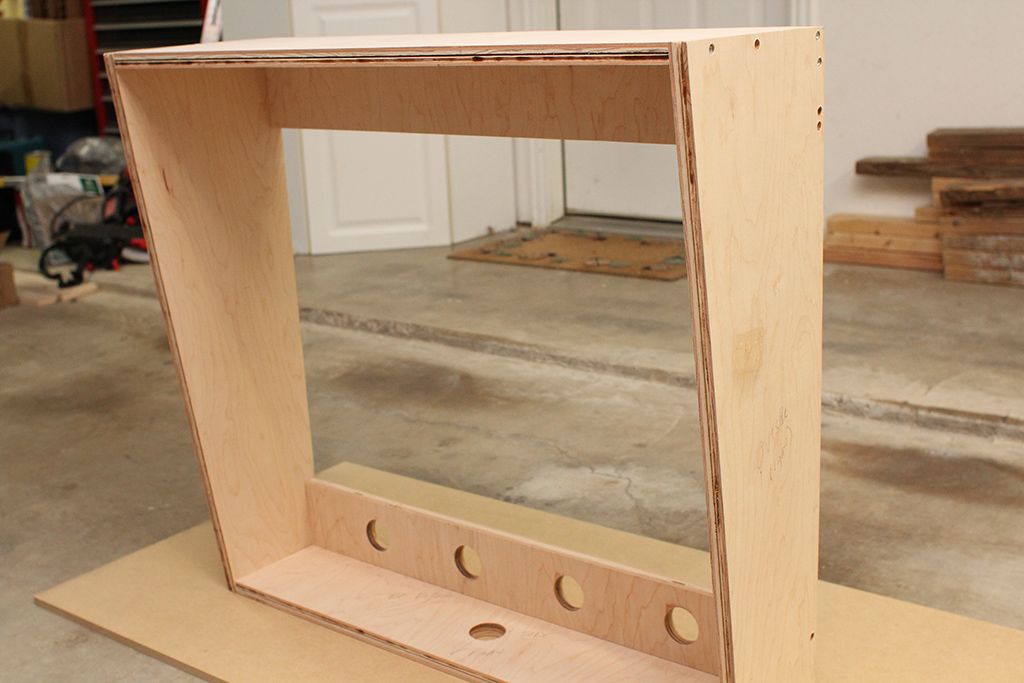
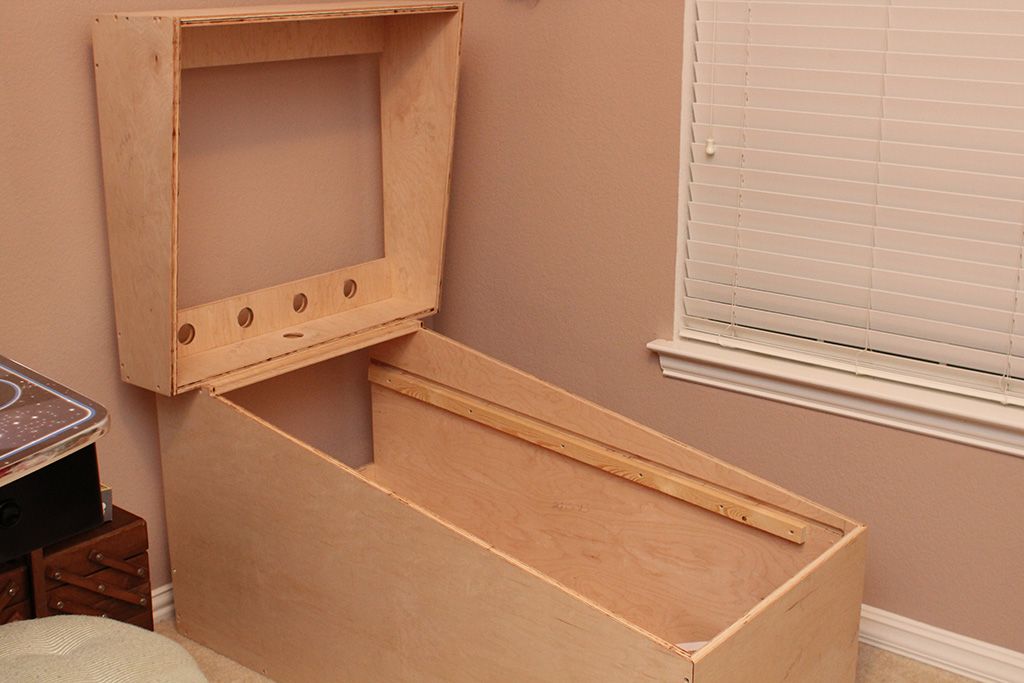
Woohoo!  Finally taking shape and looking like a pin!  But oh so much more work to do...   ;)
IMG_2632_zpsa48efc79.jpg
 
So remaining woodwork items consist of cutting the holes for the fans, intake vents, coin door and subwoofer, building the support framework for the backbox monitor, and cutting/routing the DMD/Speaker panel.  As soon as I get the cabinet hardware, I'll make sure everything fits okay, and then I'll probably add some glued blocking to reinforce the joints too.  So hoping to have the woodworking done over the next week or so I can start on the finishing/painting.


#26 gerardnl

gerardnl

    Enthusiast

  • Members
  • PipPipPip
  • 75 posts

  • Flag: Netherlands

  • Favorite Pinball: twilight zone

Posted 31 March 2013 - 08:33 AM

looks like a kickoff to a great build !!


started my build "the twilight zone"


http://www.vpforums....showtopic=23883


#27 freneticamnesic

freneticamnesic

    A Faint Ghost Through the Raindrops

  • VIP
  • 3,370 posts
  • Location:Portland, OR

  • Flag: United States of America

  • Favorite Pinball: Star Trek, Black Hole, AFM, Fast Draw, Tron, AMH

  • 360 Gamer Tag: sixgunsounddd

Posted 31 March 2013 - 08:10 PM

This is great looking. I like the custom artwork :)

How did you know how wide to make the cabinet before tearing the TV apart? Or were the pictures not in order? Or was it just absolute luck? (unlikely!)


#28 gerardnl

gerardnl

    Enthusiast

  • Members
  • PipPipPip
  • 75 posts

  • Flag: Netherlands

  • Favorite Pinball: twilight zone

Posted 01 April 2013 - 08:06 AM

guess he took the same plunge as me.


take the standard widebody plans, route the sides, one can allways make it smaller ! 


started my build "the twilight zone"


http://www.vpforums....showtopic=23883


#29 Gamester

Gamester

    Enthusiast

  • Members
  • PipPipPip
  • 185 posts
  • Location:Texas

  • Flag: United States of America

  • Favorite Pinball: .

Posted 01 April 2013 - 04:43 PM

This is great looking. I like the custom artwork :)

How did you know how wide to make the cabinet before tearing the TV apart? Or were the pictures not in order? Or was it just absolute luck? (unlikely!)


Thanks!


My cabinet is based on the popular Williams widebody plans, so it's a standard size, and I knew that I would need slots cut.  I already knew the thickness of the TV also. I based the measurement on information from another recent build of a member here that has the same TV. But my slots still ended up a bit deeper than needed, so I probably could have prevented that minor error by de-casing and double-checking the measurements first.


So bottom line is, yes, I think it's a good practice to de-case the TV and take all the measurements yourself before making cuts. Every build is done to different tolerances, so you always have to be sure to double-check measurements that you get from other builds against your own cabinet and parts.


#30 MTPPC

MTPPC

    Enthusiast

  • Members
  • PipPipPip
  • 352 posts
  • Location:Big Sky, Montana USA

  • Flag: ---------

  • Favorite Pinball: Mata Hari .directB2S

Posted 01 April 2013 - 08:42 PM

WHat is the purpose in decasing a super thin bezel tv. Did you lose any width by decasing it? I would be concerned with a decased TV hanging horizontally by the edges while transporting. I just don't understand why you would take away some structural strength and protection of the components if you don't gain anything. Maybe you do it for cooling? Not criticizing, just curious.


#31 Gamester

Gamester

    Enthusiast

  • Members
  • PipPipPip
  • 185 posts
  • Location:Texas

  • Flag: United States of America

  • Favorite Pinball: .

Posted 02 April 2013 - 05:48 AM

MTPPC, it's a fair question.  The easy answer is that the outer plastic bezel has a clear trim that protrudes quite a bit on the bottom edge and makes the shape of the bezel impractical for mounting.  I could probably route it off or something if I wanted to destroy it, but I don't really want to do that.


However, I do share your concerns about the rigidity of the TV while it's laying flat, considering how thin it is.  To address that, I have two things planned.  For one, I've re-installed the inner metal casing on the back of the TV (the first part I removed in my pics above) to add a little extra rigidity  and to help protect the components when sliding the TV in and out.  Additionally, I plan to add a couple cross-braces to support the center area.


I'll post pics of my solution once it's done.


Edited by Gamester, 02 April 2013 - 05:50 AM.


#32 Gamester

Gamester

    Enthusiast

  • Members
  • PipPipPip
  • 185 posts
  • Location:Texas

  • Flag: United States of America

  • Favorite Pinball: .

Posted 02 April 2013 - 02:45 PM

So I managed to get in a few more hours of woodworking yesterday...


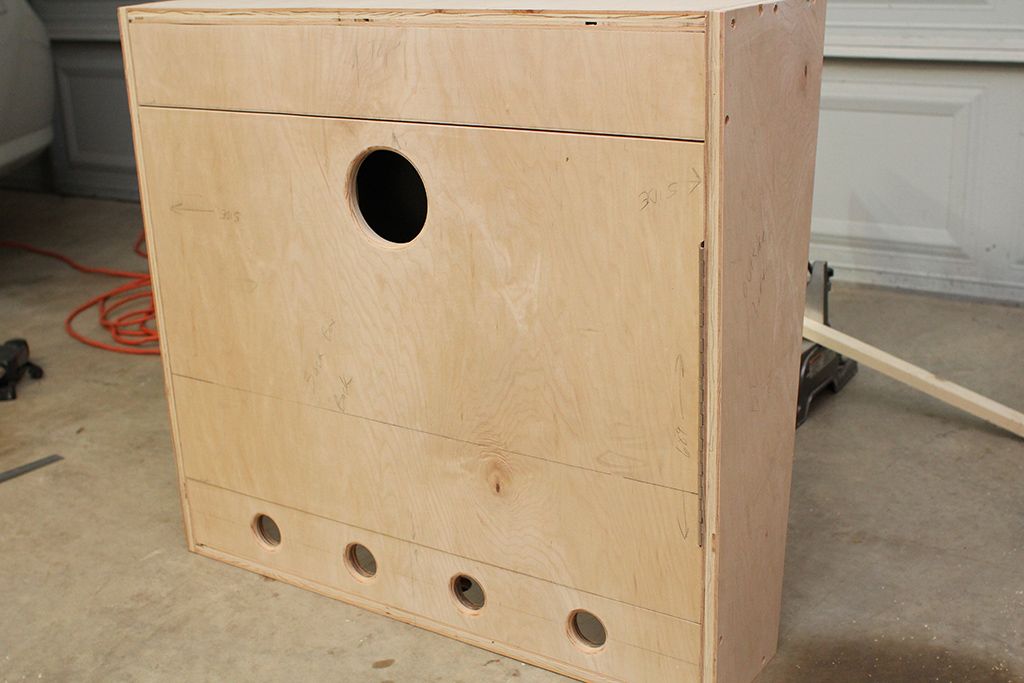
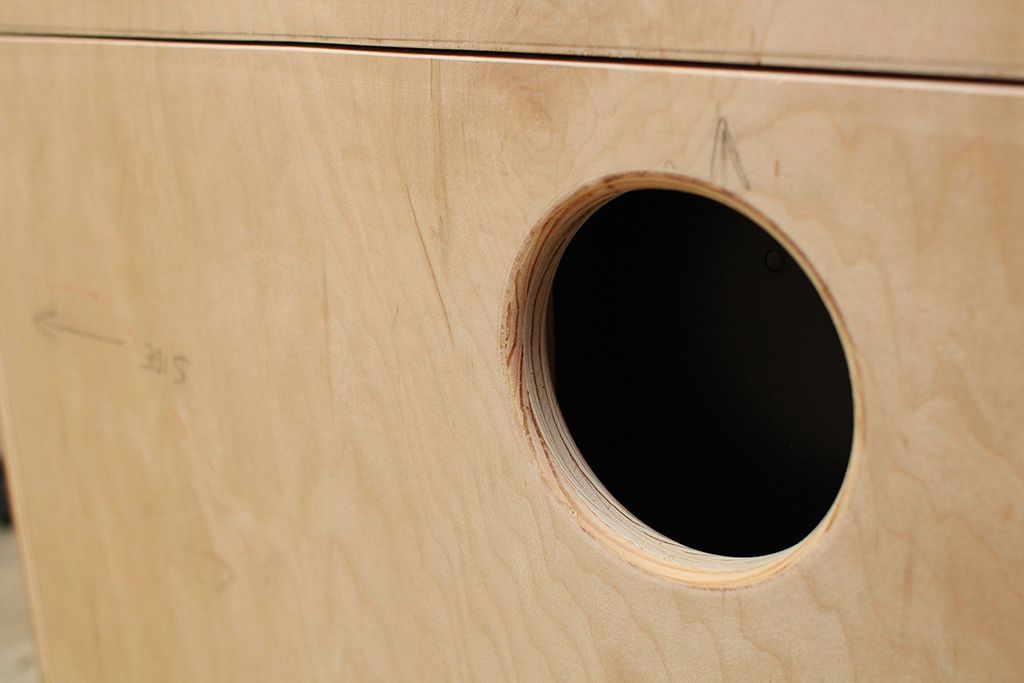
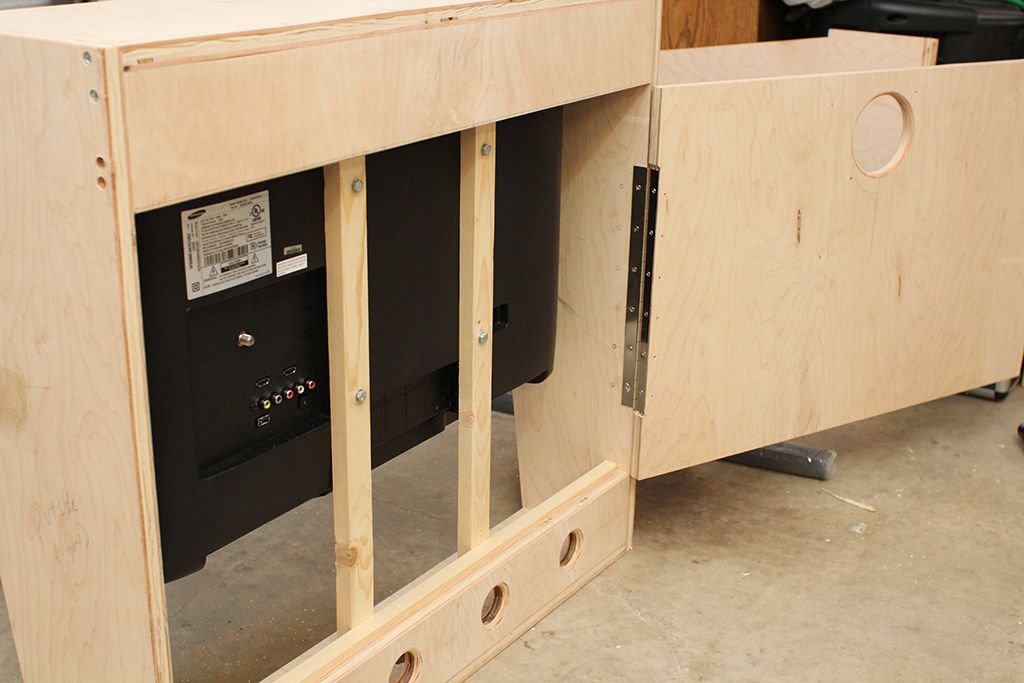
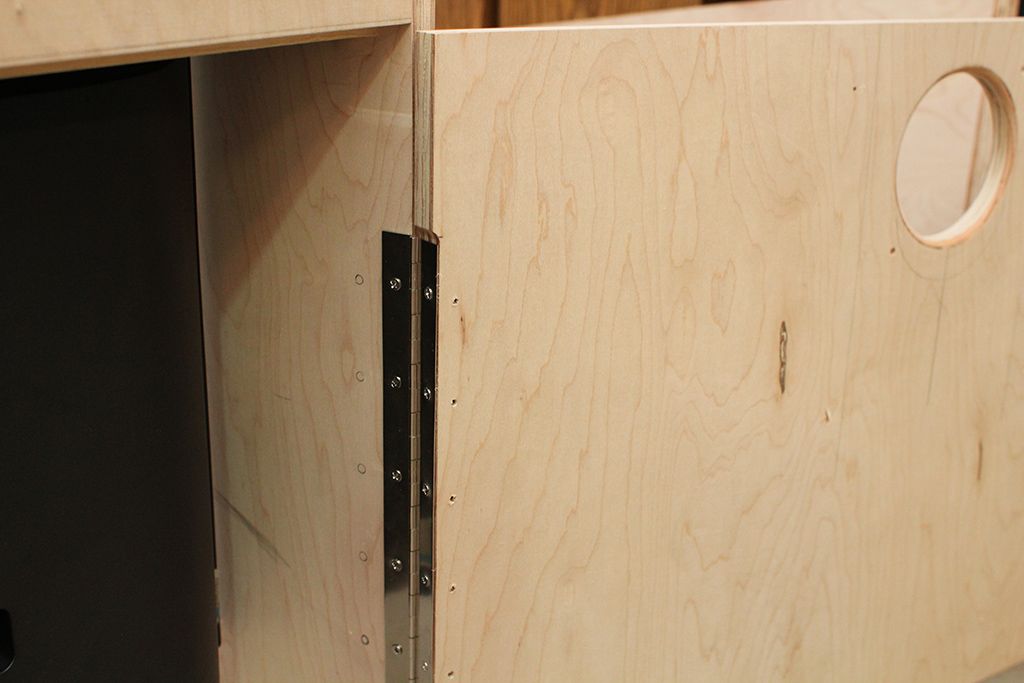
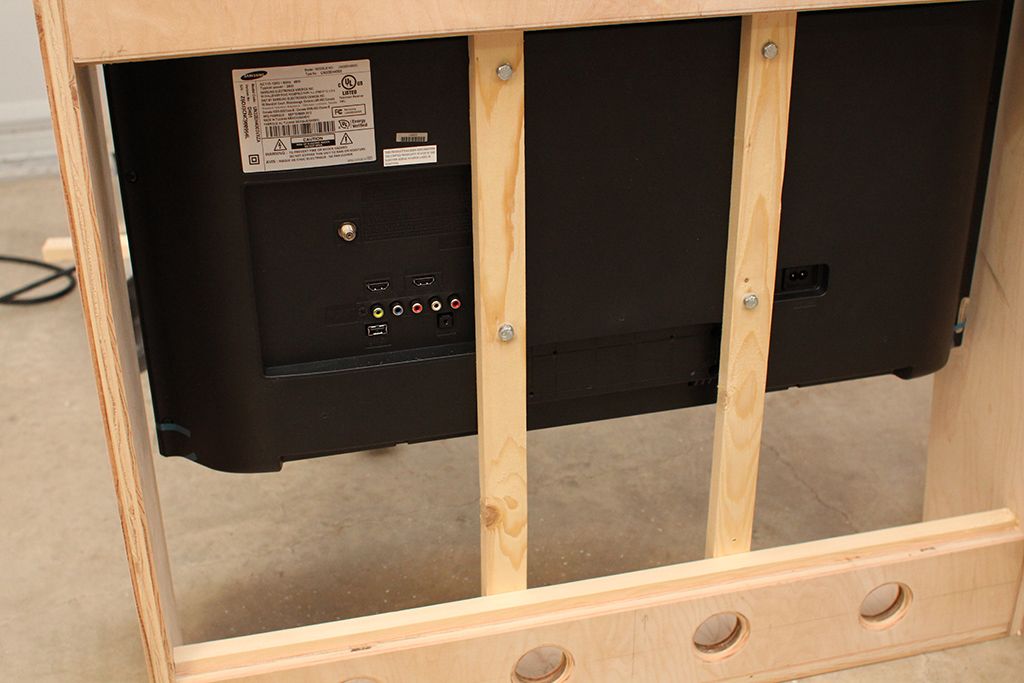
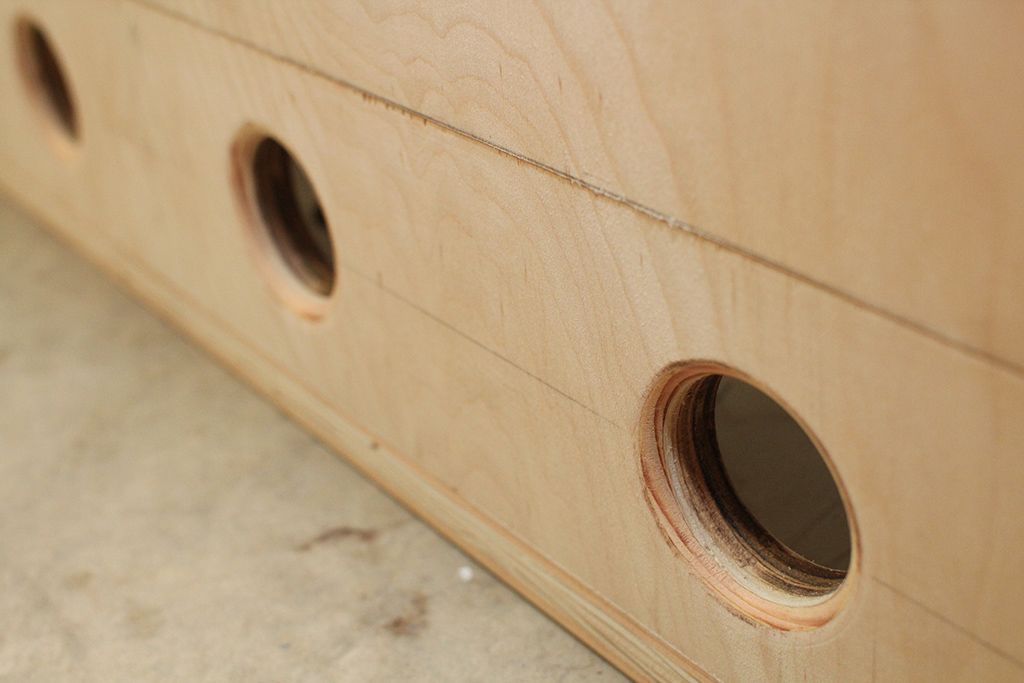
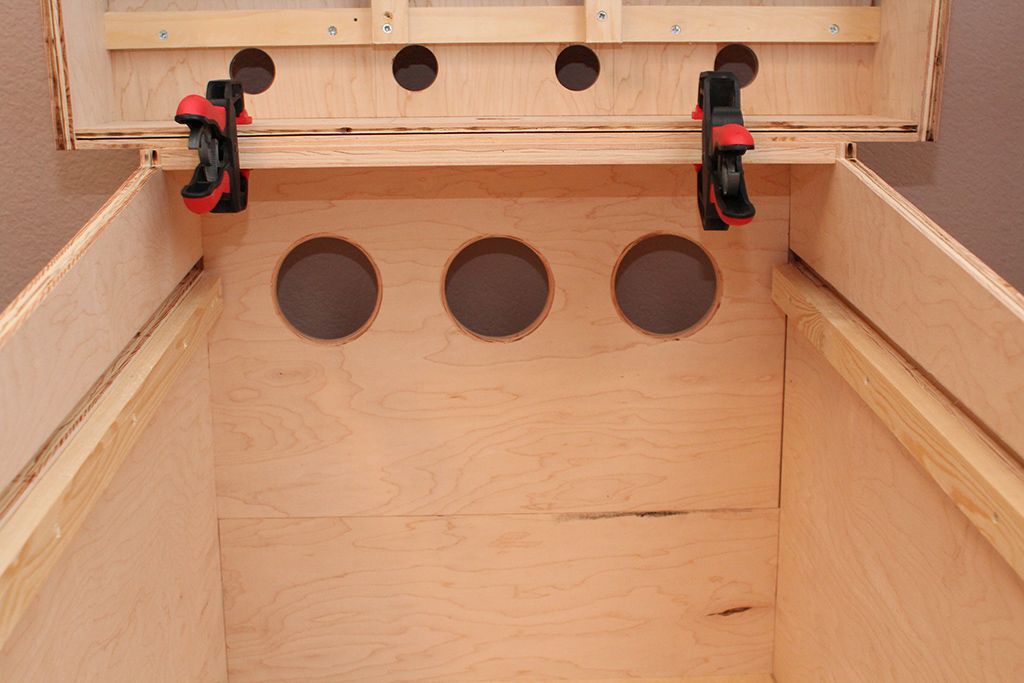
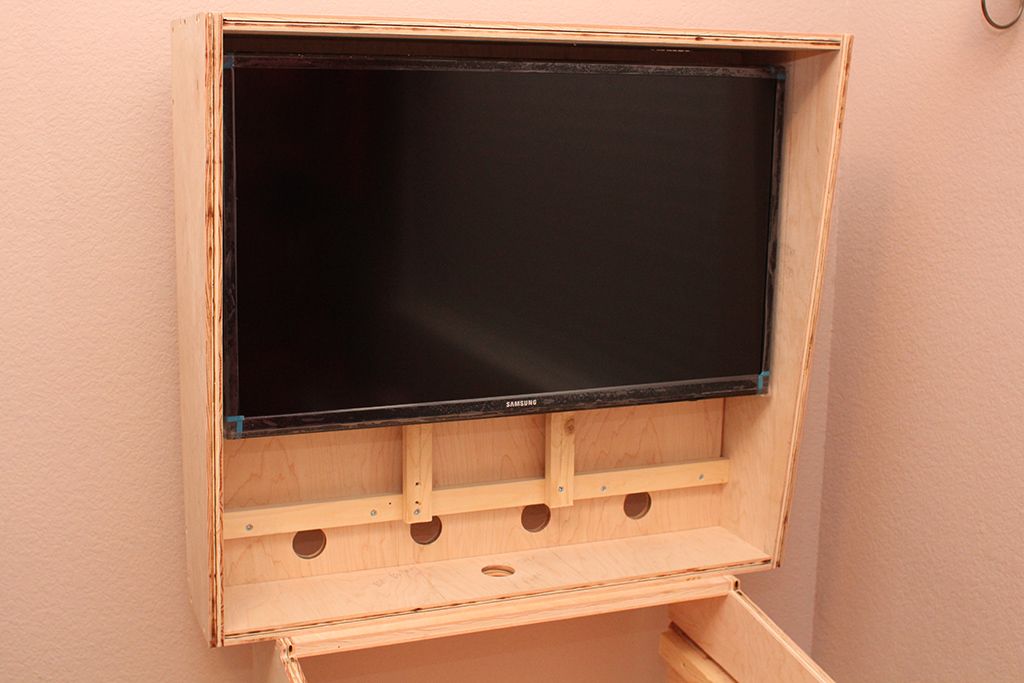
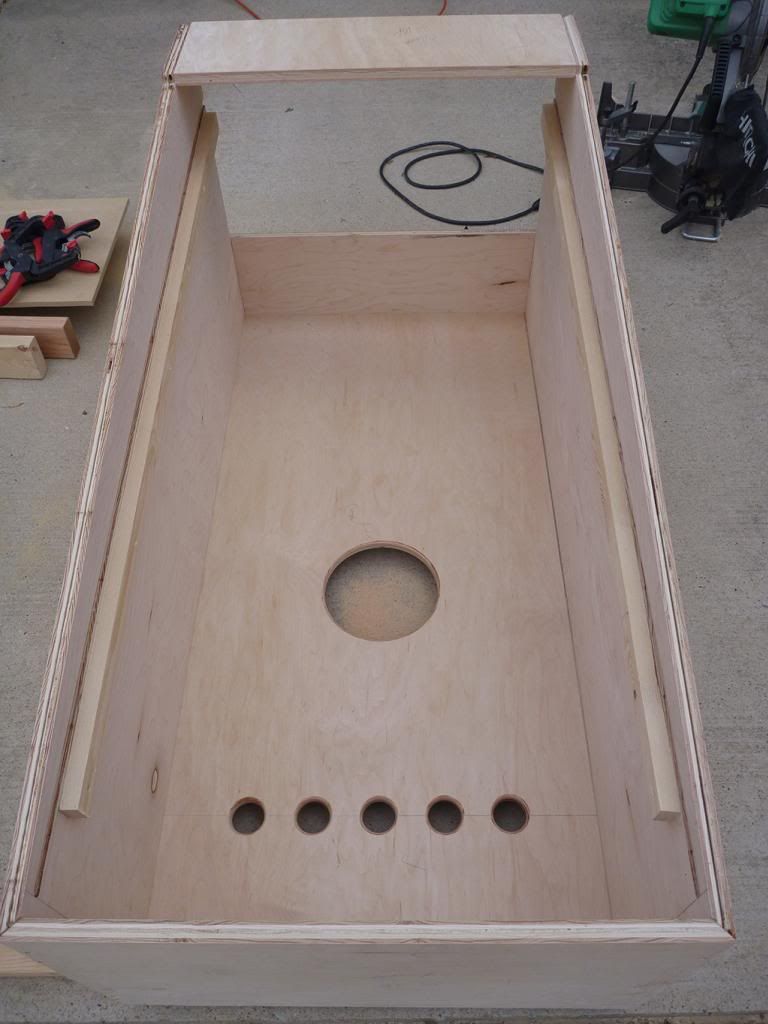
Cut and routed the 120mm fan hole for the backbox cover, cut and installed the hinge and used the router to round the edges of all of the fan and vent holes.  Also built the framework for the backglass TV and installed it (the TV) temporarily.  And finally, I cut and routed the fan holes for the back cover of the cabinet itself.


I had originally purchased those huge 200mm fans for the build, but I've since decided to just stick with 120mm fans. The 200mm units look impressive, but I found that I kept having to re-think every choice I was making with the dimensions of the various back pieces just to accommodate those big fans.  Ultimately, it's not worth the hassle to me.  Those big fans are really major overkill anyway.  I think three 120mm fans for the cabinet and one for the backbox, with strategically placed intake holes, will be plenty of ventilation, and these 120s I purchased are extremely quiet (only 11dBA) too.


So for the woodworking the only major things left are the DMD/Speaker panel, leg holes, coin door opening and button holes. Then it's on to patching and painting!  Luckily that part should not be as brutal and exacting as my last build was since I get to put artwork over it.   :)


Pics of the latest progress...


IMG_2635_zps925356eb.jpg


IMG_2636_zps4dfb6d0c.jpg


IMG_2639_zps9c2e52c7.jpg


IMG_2638_zps31292f45.jpg


IMG_2637_zpse90784b8.jpg


IMG_2643_zps1ad0f338.jpg


IMG_2648_zpsf2c670da.jpg


IMG_2644_zps0266105f.jpg


#33 gerardnl

gerardnl

    Enthusiast

  • Members
  • PipPipPip
  • 75 posts

  • Flag: Netherlands

  • Favorite Pinball: twilight zone

Posted 02 April 2013 - 06:35 PM

again nice progress !


started my build "the twilight zone"


http://www.vpforums....showtopic=23883


#34 freneticamnesic

freneticamnesic

    A Faint Ghost Through the Raindrops

  • VIP
  • 3,370 posts
  • Location:Portland, OR

  • Flag: United States of America

  • Favorite Pinball: Star Trek, Black Hole, AFM, Fast Draw, Tron, AMH

  • 360 Gamer Tag: sixgunsounddd

Posted 03 April 2013 - 12:59 AM

Seeing the better detail in your latest photos, I am in awe of your craftsmanship. The cuts are so clean and perfect. This is exciting to watch!


#35 Gamester

Gamester

    Enthusiast

  • Members
  • PipPipPip
  • 185 posts
  • Location:Texas

  • Flag: United States of America

  • Favorite Pinball: .

Posted 03 April 2013 - 06:59 PM

@gerardnl - Thanks!  Have my eye on the finish line, but at the same time I keep trying to remember to pace myself and enjoy the journey.  ;)


@freneticamnesic - I'm flattered. Thank you for the compliment. There are some amazing builds on this forum, and my goal is to build something of similar quality. Time will tell whether I accomplish that, but in the process I've gained lots of respect for the talents represented in this community.


#36 Nemo

Nemo

    Pinball Fan

  • Platinum Supporter
  • 1,283 posts
  • Location:Netherlands

  • Flag: Netherlands

  • Favorite Pinball: Monster Bash

Posted 05 April 2013 - 06:59 PM

Looking good ! Excellent woodworking skills displayed right here, loving it, ahhhh the smell of freshly cut wood ! 


Gone fishin', no really.......

My F14 Cab http://www.vpforums....showtopic=21820

My Coffee Table http://www.vpforums....topic=25407&hl=

My Jukebox WIP http://www.vpforums....topic=23825&hl=


#37 Gamester

Gamester

    Enthusiast

  • Members
  • PipPipPip
  • 185 posts
  • Location:Texas

  • Flag: United States of America

  • Favorite Pinball: .

Posted 08 April 2013 - 04:17 AM

Thanks Nemo!  I like the smell of fresh cut wood too.  
 
Another progress update...
 
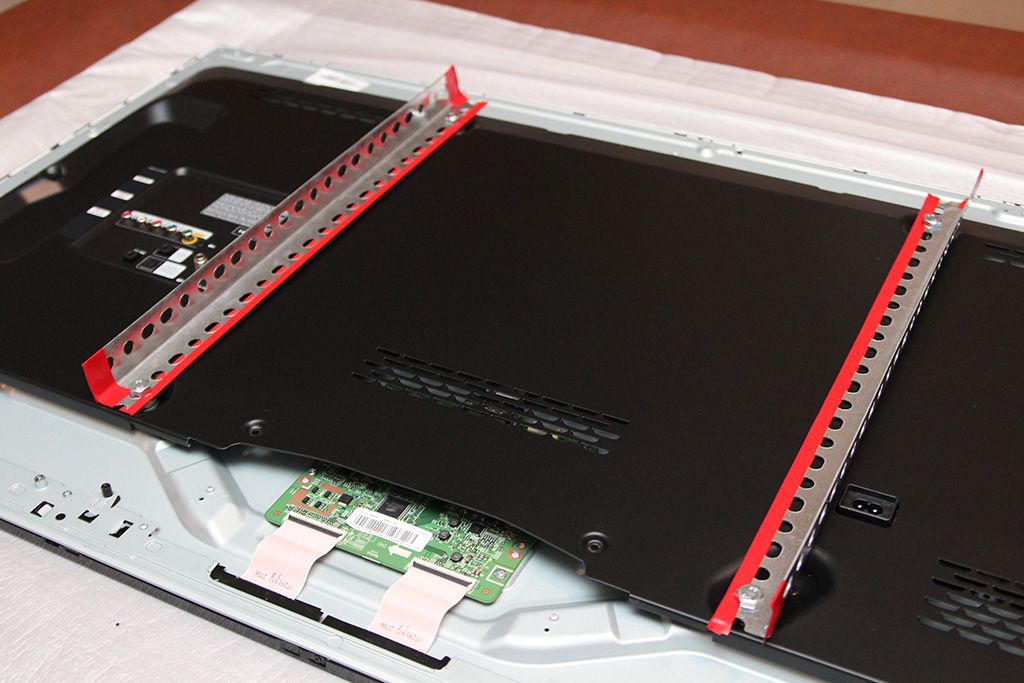
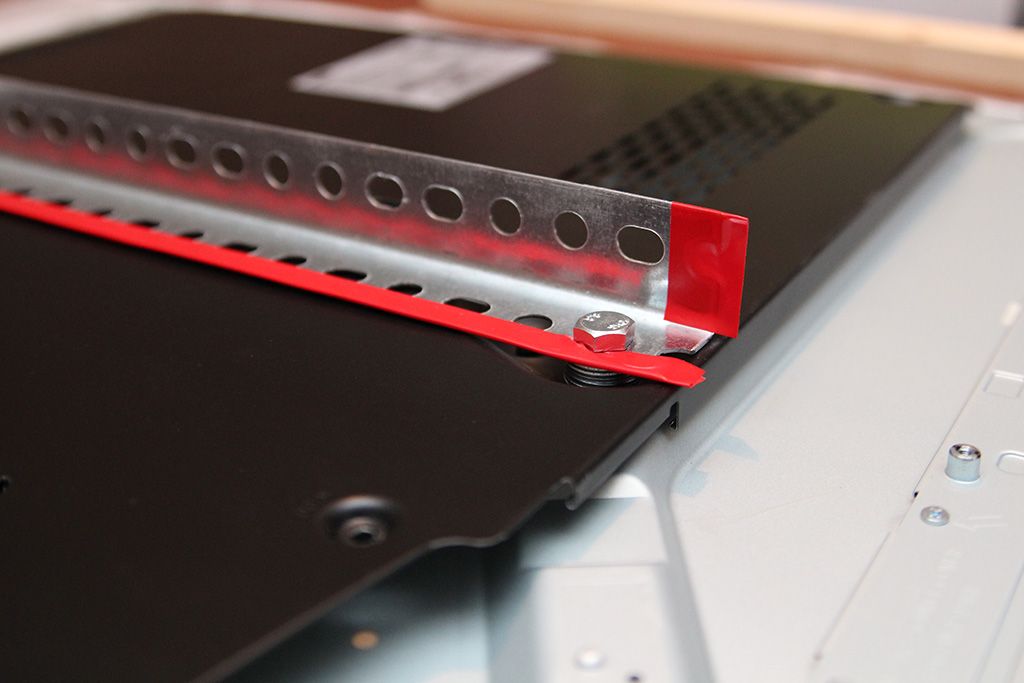
Since the TV is so thin, I was concerned about the long-term rigidity of it mounted horizontally, plus it's my nature to over-engineer stuff.   ;) So I decided to re-install the inner metal back cover, and reinforce it even further by installing brackets using the TV's wall mount holes (M8 size bolts btw).  I used some washers on each bolt to elevate the brackets a bit so they're not squishing the cover.  I think it's plenty rigid now.   :)
 
IMG_2864_zpsd7557afd.jpg
 
IMG_2863_zpsa7332141.jpg
 
 
And on to more woodworking...
 
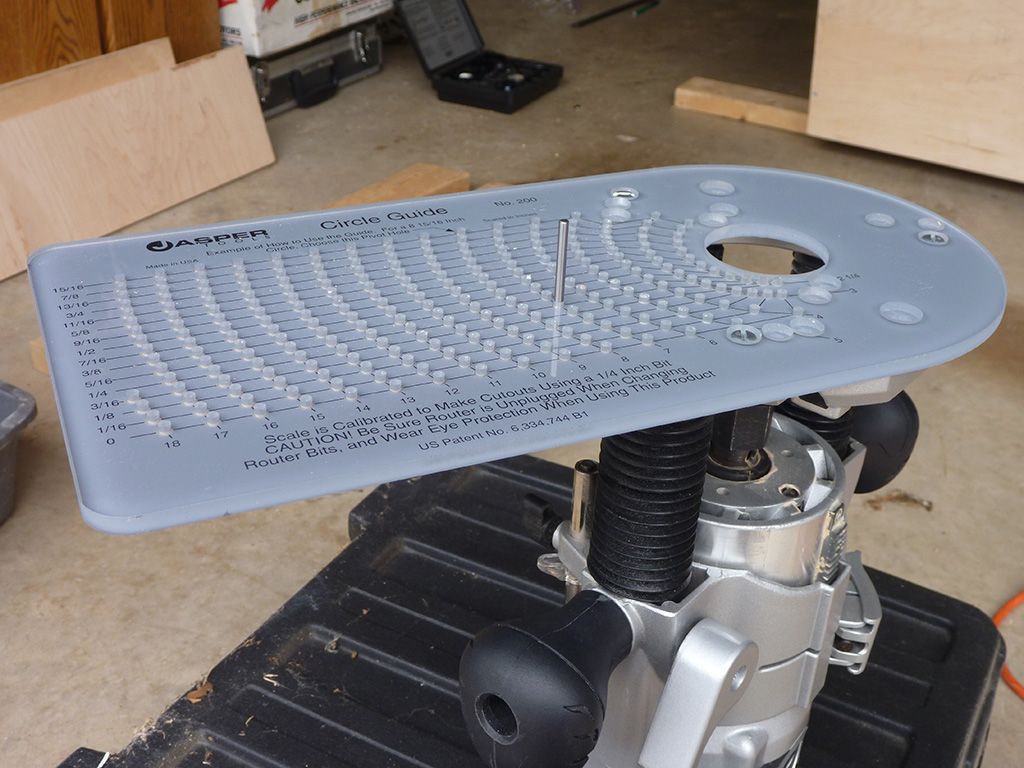
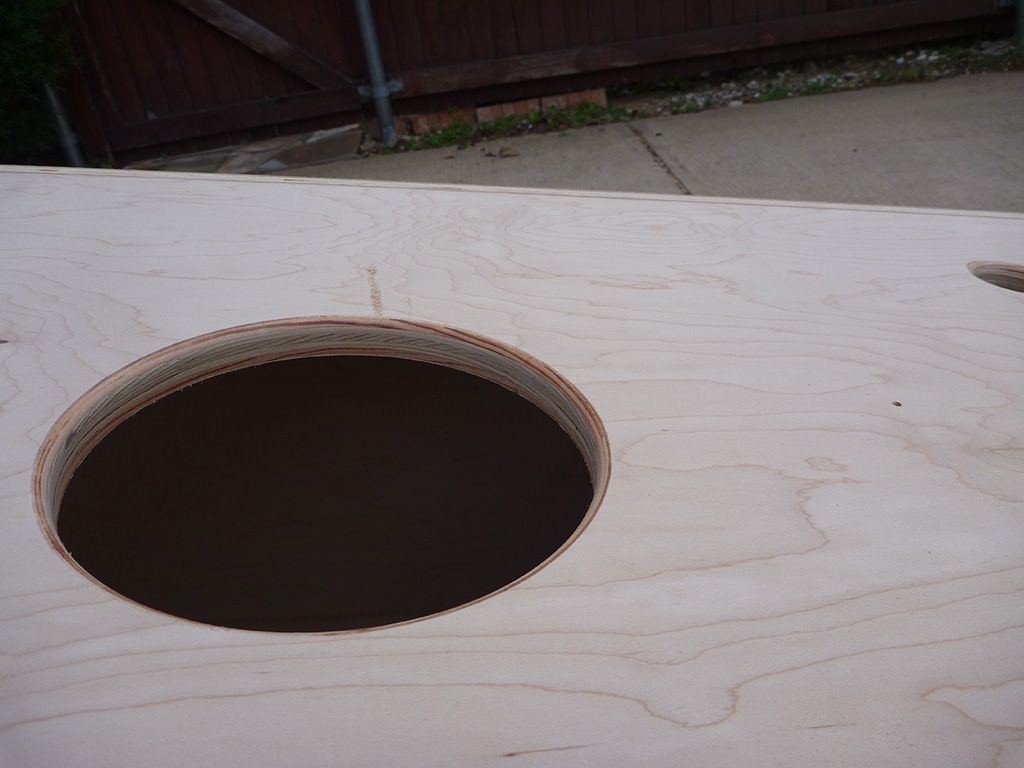
So this circle jig is the bomb!  Was a little intimidating at first trying to figure out how to use it, but it's actually quite simple, and it cuts PERFECT holes.
 
P1010966_zps69b976f9.jpg
 
For those of you who may have never used one, here's how it works:
 
1. Attach the jig to your plunge router, install a 1/4" straight cut bit and insert the metal dowel pin in the jig bore that corresponds to the size of hole you want.  There is a grid printed on the jig that makes it really simple to choose the size.
 
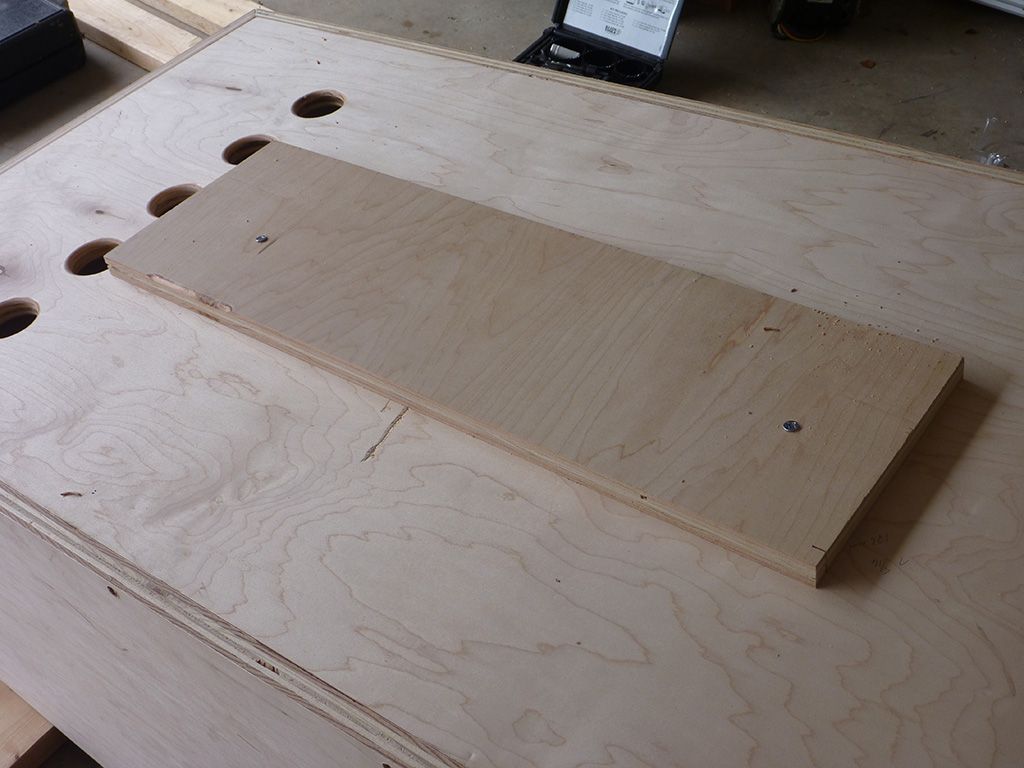
2. Attach a backing piece of wood to the work. Since the backing piece will not be cut, it allows the router to maintain a solid pivot point throughout the cut.
 
3. Identify the centerpoint for the hole you want to route and drill a 1/8" hole in the center. This hole is what the dowel pin will be inserted into when cutting.
 
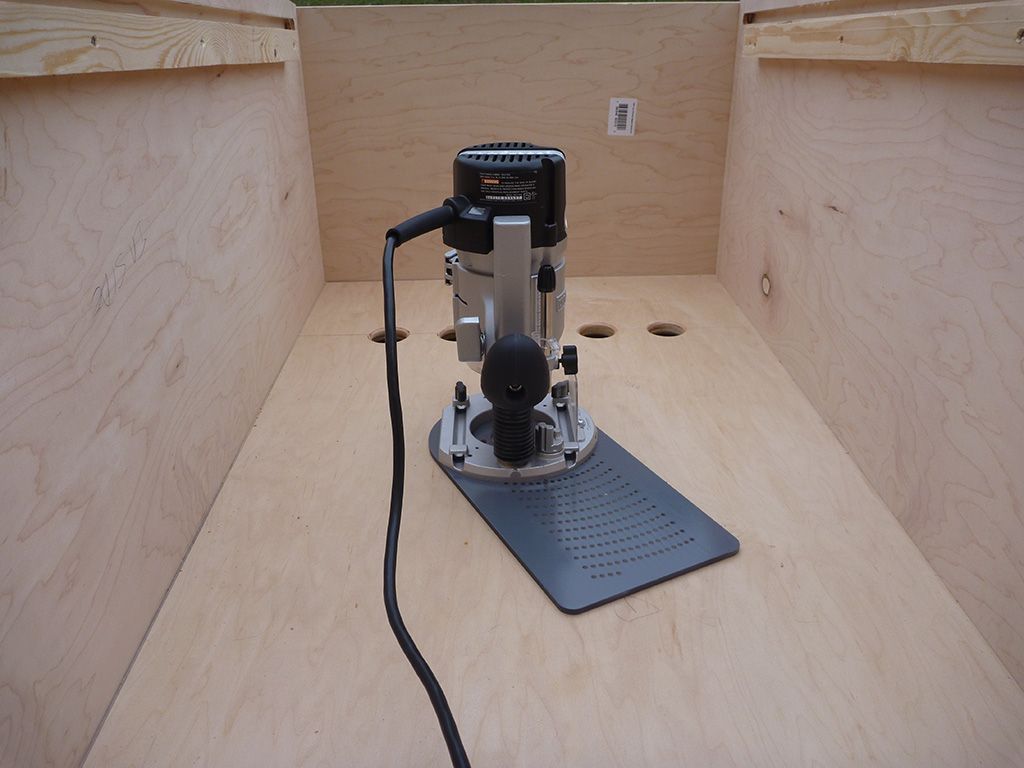
4. Insert the dowel pin into the centerpoint hole and gently set the router down so that the jig is flat.  Be sure the dowel pin is inserted far enough into the wood so that it goes all the way into the second piece.
 
5. Turn on the router, plunge the bit part way in, lock it down and rotate to make the cut. You'll want to make 2-3 progressively deeper cuts, depending on how thick your work piece is.  If you take your time, you'll end up with a perfect cut, exactly the size you wanted.  
 
So time to put it to work on the subwoofer hole. Attaching the backing piece...
P1010967_zps706f5acf.jpg
 
Marked off the center point, drilled the 1/8" hole and inserted the router/dowel...
P1010968_zps6ac1bd14.jpg
 
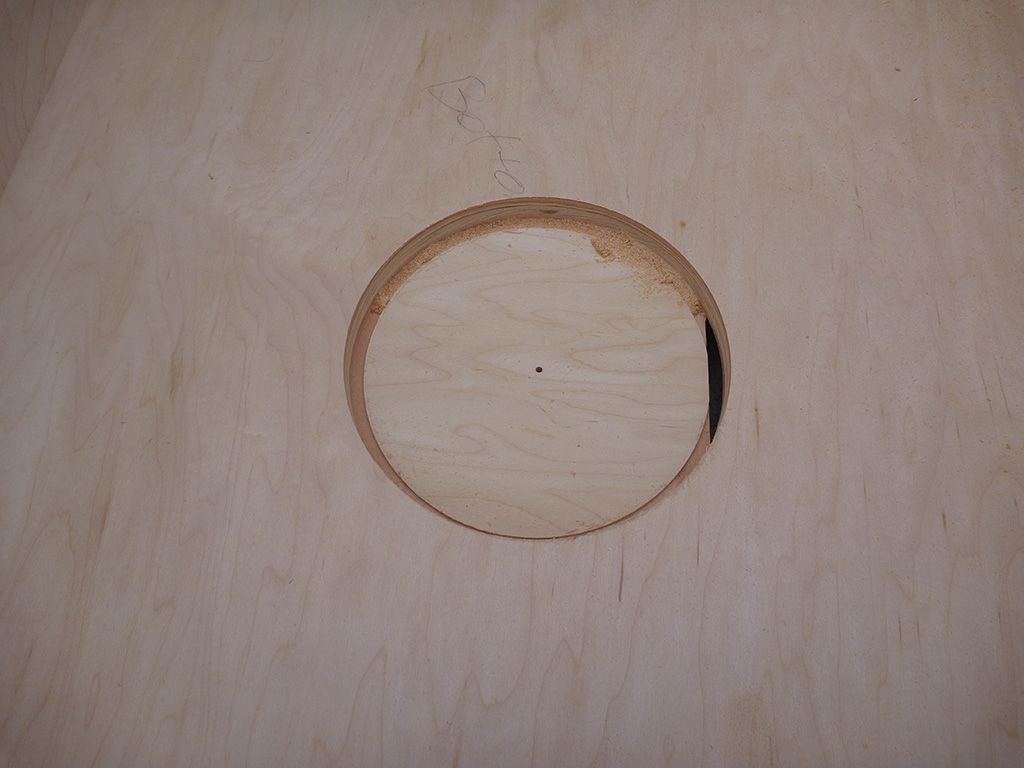
Three progressively deeper passes, and voila, a perfect hole.  It's best to let the bit cut into the backing piece just a bit; makes for a cleaner hole...
P1010969_zps2577cb8d.jpg
 
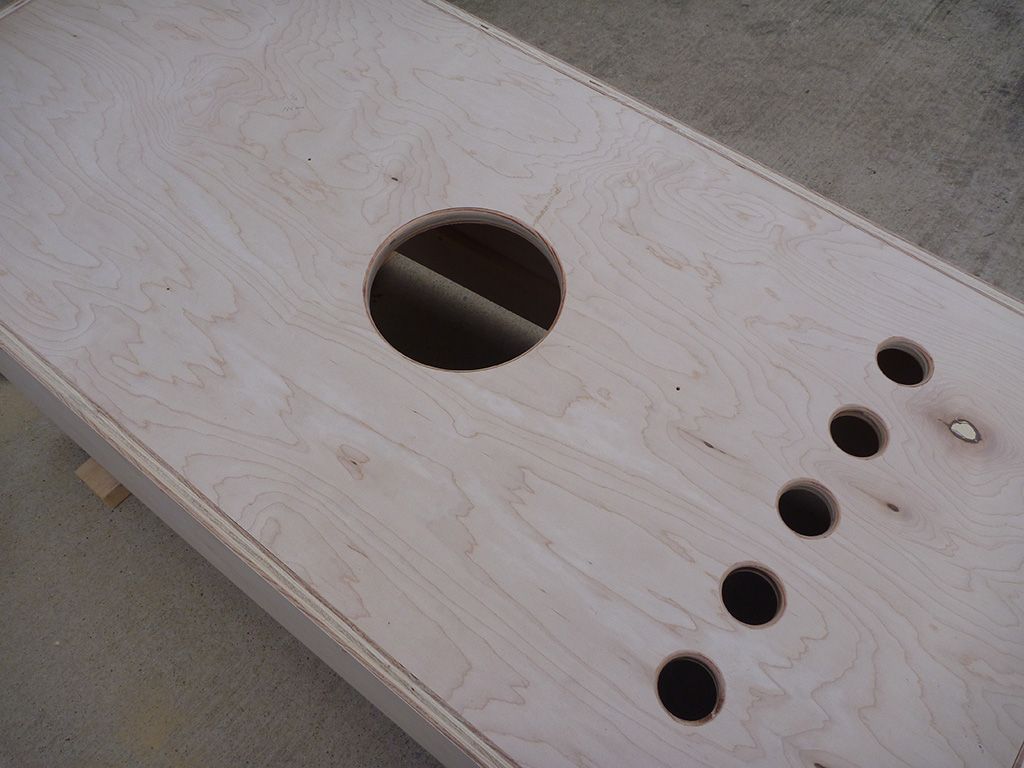
Ran the round over bit on the edge to give a nice clean rounded off look (only one side done here)...
P1010981_zps4315d692.jpg
 
Also cut the intake ventilation holes using a drill hole saw and rounded those off too...
P1010980_zps3dc59c87.jpg
 
P1010982_zps71818438.jpg
 
 
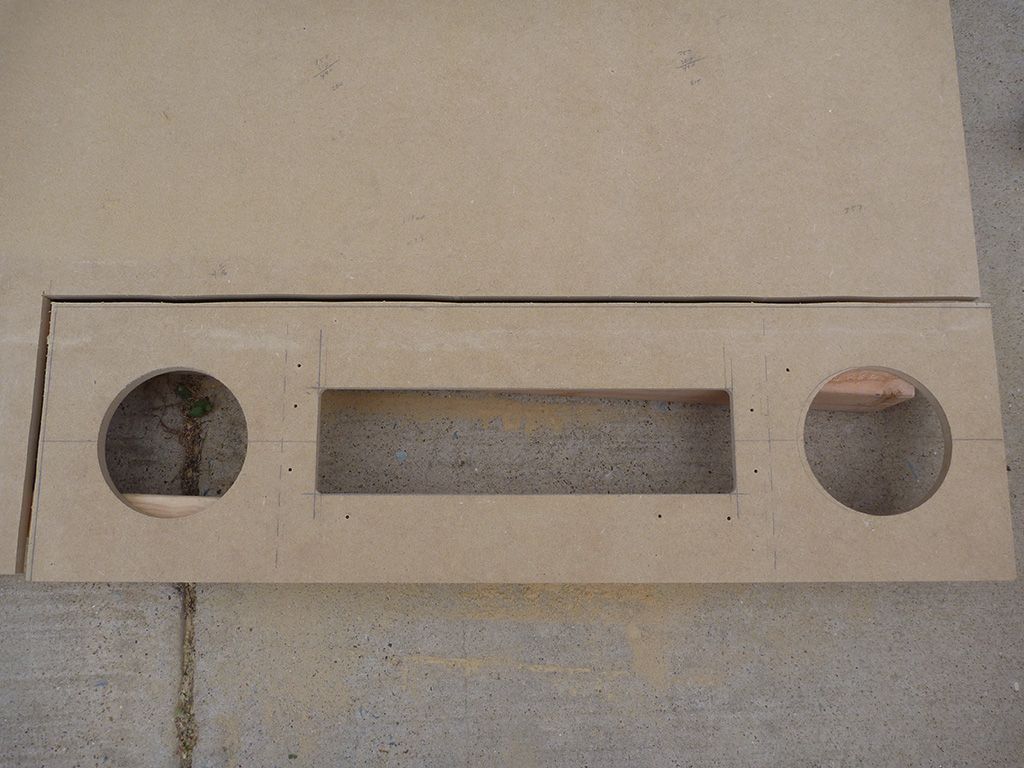
DMD panel anyone?  Yes, I think so...
 
P1010971_zps7d17f144.jpg
 
Used the circle jig again to cut out the speaker holes...
P1010972_zpse1ae6655.jpg
 
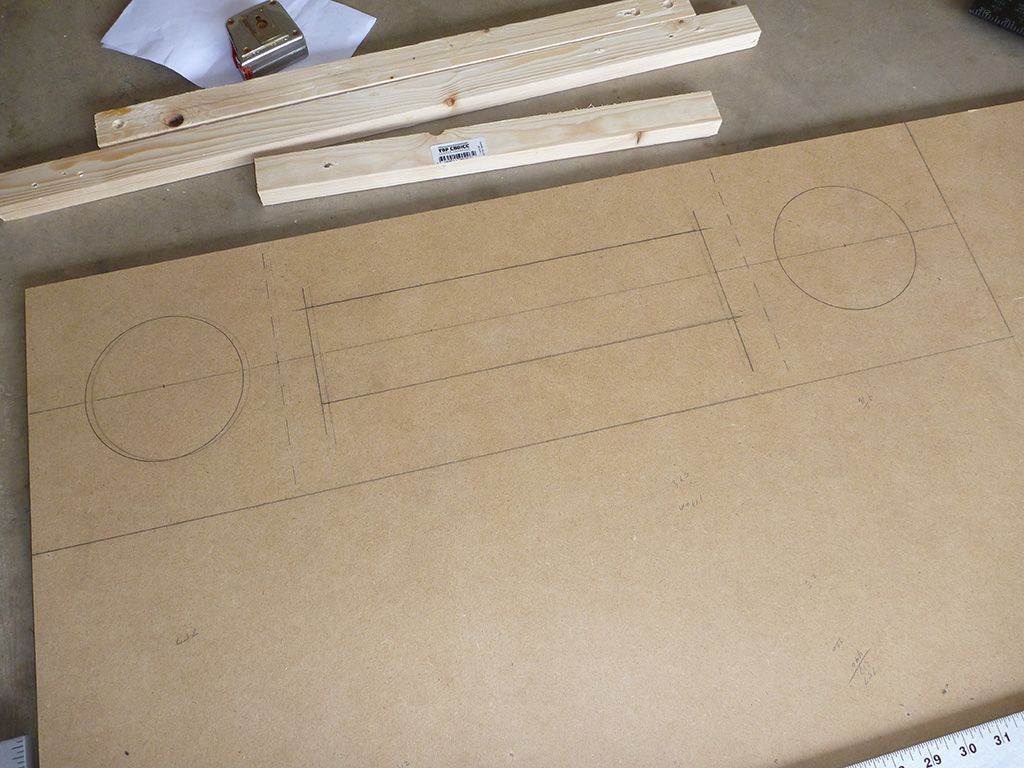
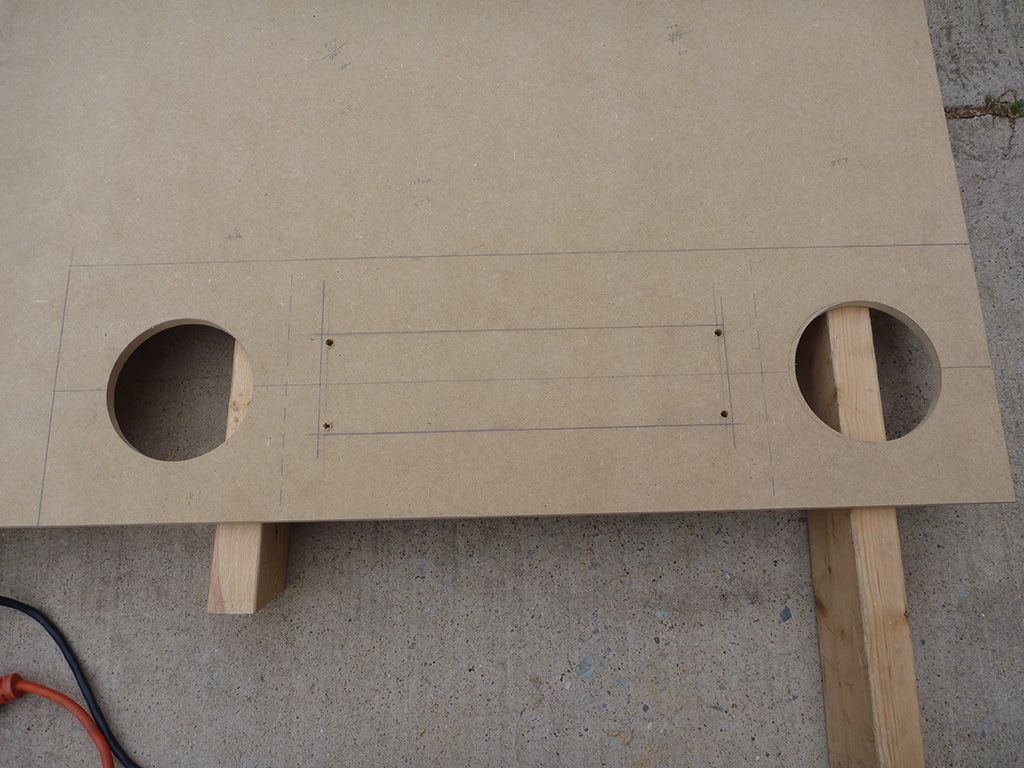
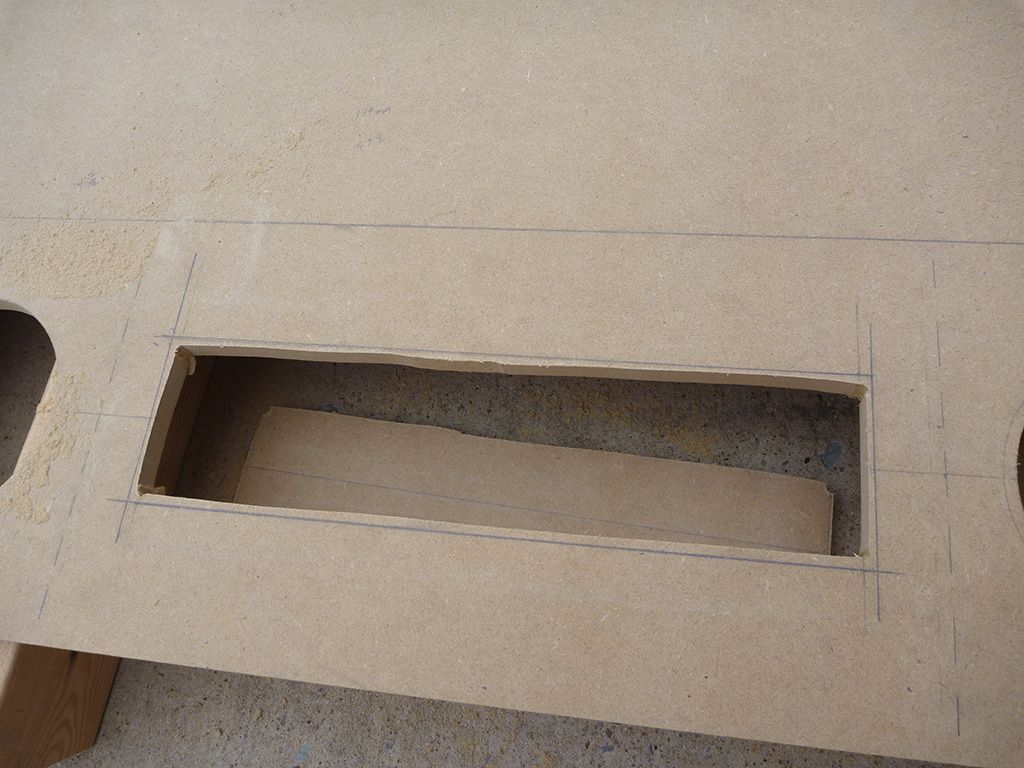
Did a rough cutout of the DMD window with the jig saw, staying 1/8" or so inside the line...
P1010973_zpsd1ab37d2.jpg
 
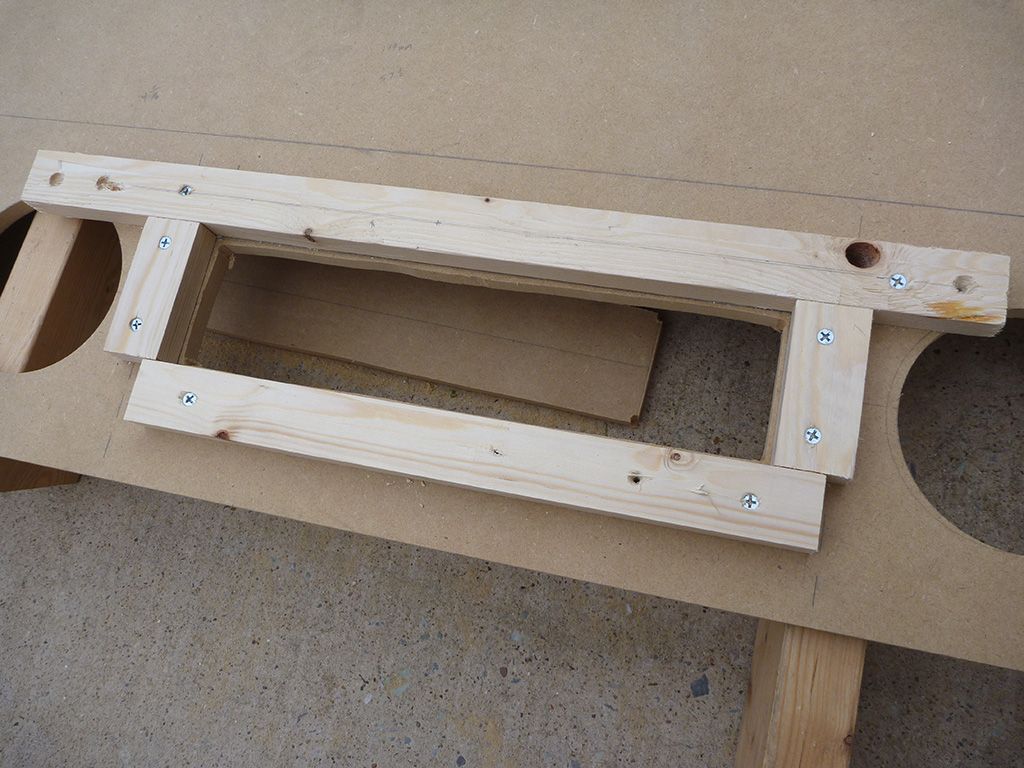
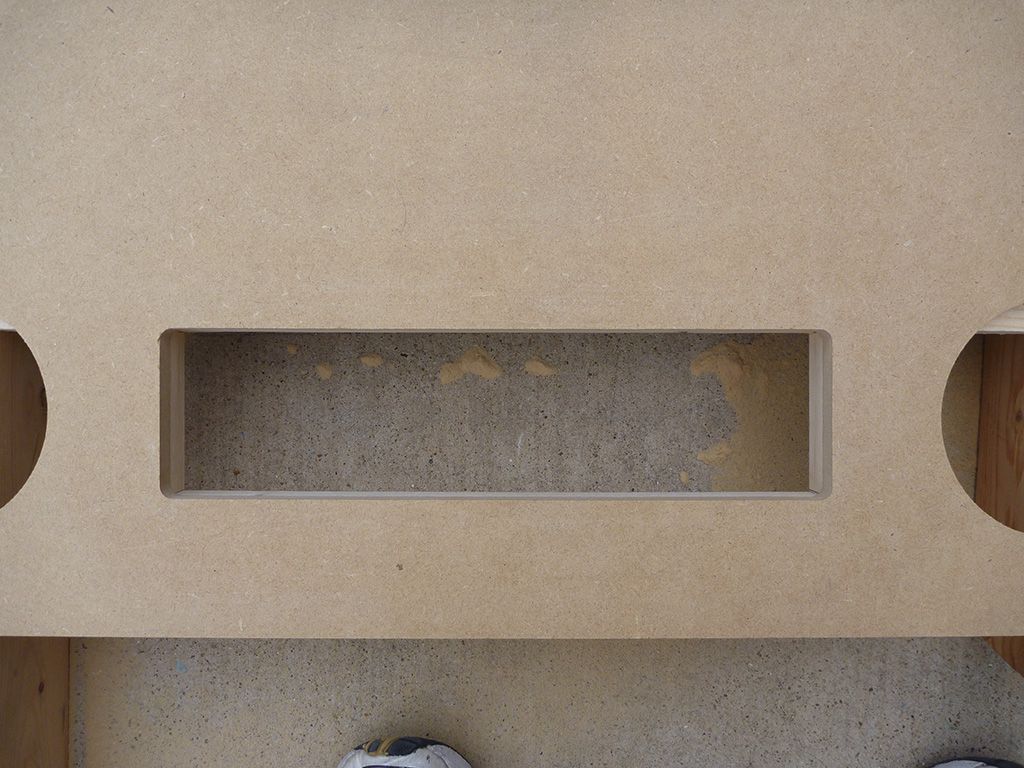
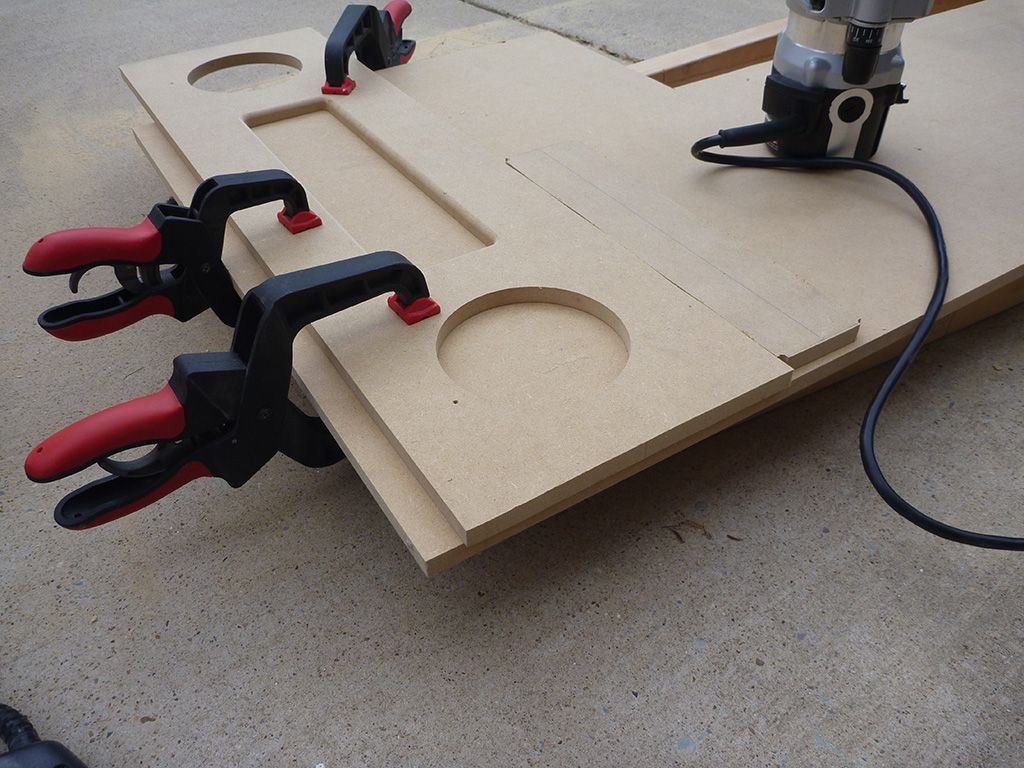
Built a guide on the back side with inside dimensions to match the exact size that I wanted the DMD window.  Basically just lined the wood up with the pencil lines and screwed them down (being careful not to go all the way through the wood). I then used a 1/2" flush cut router bit to make the finish cut. The roller on the bottom of the bit follows the guide and makes makes a perfect and smooth cut...
P1010974_zpsc07dffe8.jpg
 
P1010975_zps9d3affec.jpg
 
Rough cut the edge of the panel with a jig saw...
P1010976_zpsba6b2c34.jpg
 
Then used the edge of the remaining MDF as a guide, once again making the finishing cut with the router and flush cut bit..
P1010977_zpsc8450ebd.jpg
 
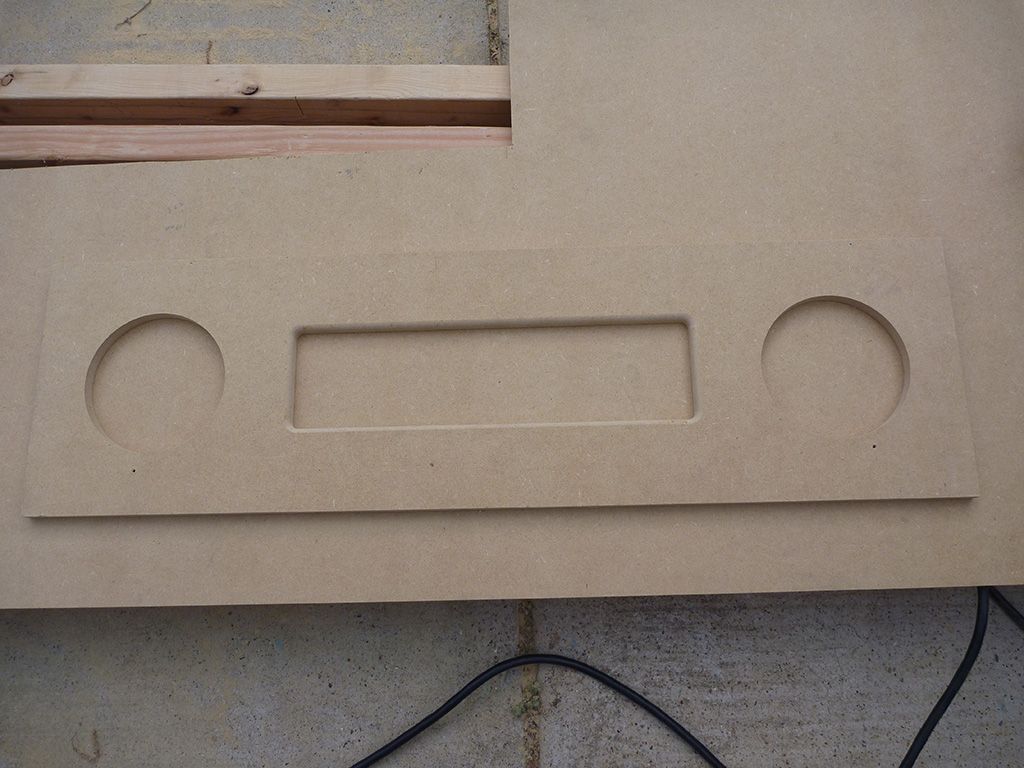
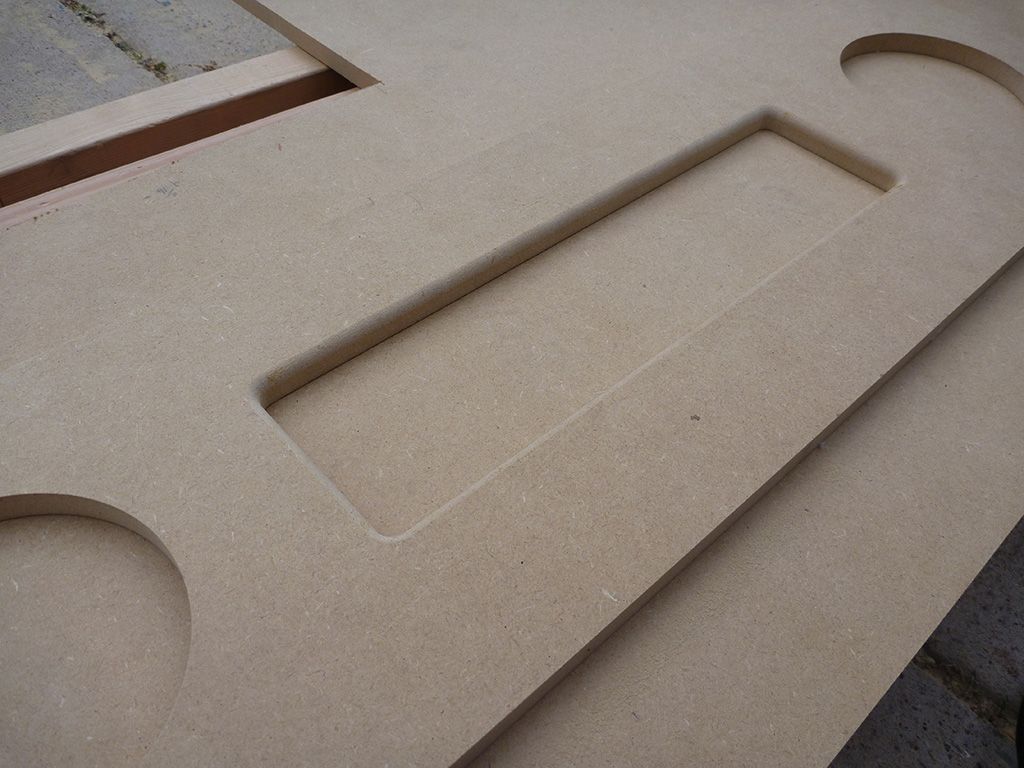
Went over the DMD window with a round over bit and we have a perfect DMD panel.  I didn't round the speaker holes because I'm going to be installing the grill on top...
P1010978_zps483ee92a.jpg
 
P1010979_zpsdc24ed70.jpg
 
 
In the home stretch as far as the woodworking goes. Only things left are building the mounting framework for the DMD panel in the backbox, building a light bar for the space above the playfield, cutting the coin door hole and drilling the button holes.

Edited by Gamester, 08 April 2013 - 04:30 AM.


#38 freneticamnesic

freneticamnesic

    A Faint Ghost Through the Raindrops

  • VIP
  • 3,370 posts
  • Location:Portland, OR

  • Flag: United States of America

  • Favorite Pinball: Star Trek, Black Hole, AFM, Fast Draw, Tron, AMH

  • 360 Gamer Tag: sixgunsounddd

Posted 08 April 2013 - 05:54 AM

Exciting :) Watching this build intently


#39 Gamester

Gamester

    Enthusiast

  • Members
  • PipPipPip
  • 185 posts
  • Location:Texas

  • Flag: United States of America

  • Favorite Pinball: .

Posted 08 April 2013 - 08:31 PM

Exciting :) Watching this build intently


Getting exciting for me too.  Finally getting close to that phase where it all starts coming together.  Should have my cabinet hardware by the end of this week, then it's really on!  ;)


#40 ABACABB

ABACABB

    Hobbyist

  • Members
  • PipPip
  • 26 posts
  • Location:Pennsylvania

  • Flag: United States of America

  • Favorite Pinball: South Park

Posted 10 April 2013 - 01:00 AM


Amazing build. I have been viewing buils here and I am in the "parts collecting phase" so I'm trying to learn as much as I can right now. Your cabinet looks beautiful with so much detail. I do not have any woodworking ability, tools, or patience for the cabinet. I will probably end up buying a kit. Makes me kinda sad that il miss out the journey you are in right now but there's just no way I could pull that off. Keep up the excellent work.


I invented and designed this:      (it makes body filler more fun to play with.... :)


SWEET!!! A 3M'er...... I had the opportunity to tour the Innovation Center a year ago. Absolutely incredible......Is the "Bud Room" still set up?? Also had a chance to spend a week at Wonewok. I would give up my Dream of owning a PinCab for another week back there!!


Also tagged with one or more of these keywords: Star Wars, Pinball, Cabinet