Jump to content


Photo
* * * * * 3 votes

Phantom of the Opera VPX

Poto

  • Please log in to reply
125 replies to this topic

#1 DCrosby

DCrosby

    Enthusiast

  • Platinum Supporter
  • 125 posts

  • Flag: United States of America

  • Favorite Pinball: Phantom Of The Opera (Currently, may change tomorrow) ;D

Posted 22 May 2019 - 02:07 PM

So I've started as my first project to try and get Phantom of the Opera into VPX, I know crazy, but I always liked the Table Art, and the Music on it, so after much reading and struggling I got the rom to load, I got to fire some sounds, which was awesome to hear again, and I started looking at bugs in the code, or should I say conversion issues of things that are no longer relevant, and have been deprecated like BallSize.


I'm also right now struggling with the Flashers, as those used to be 2D, and now are 3D, plus VPX somehow can't do good bounce lighting so you have to fake GI. which is fine, but when I take out geo for the flashers, I have what looks like a triangle, and there are several and i have no idea how they hook into the code, the code calls for f15 and the object is names wall312 or something, so any clues as to how the dataflow works would help give this project another kick, this is where I am now, I have to replace a lot of materials. And update the ramp textures and materials, but as soon as it looks a little better I may post it so others interested can start contributing.


Almost forgot, I got a 4K Playfield Image, and I started with the apron, and the Plunger Cutout to replace some of the art. I may replace the plastics as well, if I can get good scans.


Original conversion for VP9 by LORD HIRYU


Attached File  
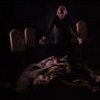
Poto_v01.jpg   314.1KB   35 downloads


-DC


Edited by DCrosby, 22 May 2019 - 02:10 PM.


#2 bord

bord

    Pinball Fan

  • Members
  • PipPipPipPip
  • 603 posts

  • Flag: ---------

  • Favorite Pinball: Star Gazer, Whirlwind, Frontier

Posted 22 May 2019 - 02:26 PM

Cool pick for a project. 32assassin had a mostly working WIP of POTO in this thread for a while: https://vpinball.com...testers-needed/

You might contact him and see if you can collaborate to get it finished.


#3 DCrosby

DCrosby

    Enthusiast

  • Platinum Supporter
  • 125 posts

  • Flag: United States of America

  • Favorite Pinball: Phantom Of The Opera (Currently, may change tomorrow) ;D

Posted 22 May 2019 - 05:16 PM

That's awesome, I'll do that thanks ! He's much further ahead of me... :P


#4 Thalamus

Thalamus

    Pinball Wizard

  • Platinum Supporter
  • 4,984 posts

  • Flag: Norway

  • Favorite Pinball: GOT, Alien Star, LOTR, TOM

Posted 22 May 2019 - 05:45 PM

I'm really impressed on how good that looks as a first build. I agree with Bord. If 32a has time, he would be a perfect partner to you because of the things you say you're struggling with. Good luck, and thumbs up from me !


From now on. I won't help anyone here at VPF. Please ask Noah why that is.


#5 DCrosby

DCrosby

    Enthusiast

  • Platinum Supporter
  • 125 posts

  • Flag: United States of America

  • Favorite Pinball: Phantom Of The Opera (Currently, may change tomorrow) ;D

Posted 23 May 2019 - 03:35 AM

So one of the reasons I wanted phantom, actually the chief reason is because it sounds so awesome, but the sound on the rom is so low it's basically non-existant, there has to be some code for the vpx, that allows you to control that with the 8/9 keys like other cabs ?


Any Pointers would be appreciated.


Well after some searching I find it's not easy on Data East Tables, I guess I may want to investigate some where this does work, but I don't see many posts of adjusting background music in Poto, tables. Which is a shame as the organ is part of the appeal for me. I also tried the F12 menu, and set it to 0 and -32 and nothing doing... it changes, but since it was at 0, the "Phantom Of the Opera" at the beginning is ok volume, but the organ comes in quiet.


Edited by DCrosby, 23 May 2019 - 04:21 AM.


#6 robwaade

robwaade

    Enthusiast

  • Members
  • PipPipPip
  • 127 posts
  • Location:Minnesota

  • Flag: United States of America

  • Favorite Pinball: tales from the crypt munsters phantom of the opera

Posted 24 May 2019 - 05:31 PM

hope you can finish table looks great sold my phantom a year ago miss playing it cant wait thanks fot taking it on
adjustments are in table settings in game on the rom adjustments i believe on the table i owned if that helps

#7 kiwi

kiwi

    Pinball Fan

  • VIP
  • 2,671 posts

  • Flag: Italy

  • Favorite Pinball: Star Trek 25th Anniversary


Posted 24 May 2019 - 05:57 PM

To adjust the volume, first click on the DMD and then press the Tilde key,

with the up and down arrows you move between the various volume adjustments (and more),

with the right and left arrows you make the volume adjustment,

when you have adjusted the volume press the Tilde key again, and then click where you want but not on the DMD.


#8 DCrosby

DCrosby

    Enthusiast

  • Platinum Supporter
  • 125 posts

  • Flag: United States of America

  • Favorite Pinball: Phantom Of The Opera (Currently, may change tomorrow) ;D

Posted 26 May 2019 - 07:06 AM

PinballFan, Thanks! That kind of worked, it worked on the VP9X conversion I had setup with the VP9 table / conversion, but didn't work on 32Assasin's table, I don't know why the UI didn't pop up on his. But since the rom saves a .cfg I just adjusted it in mine and loaded it in his. So for anybody trying to re-create this, try and load the rom into a table that's maybe started from scratch or the one that you can create with File-New, until I figure out what the issue with the UI is...


Or I can post/include the .cfg


I worked on the bumpers and the rails, I had everything dialed in when the Visual Pinball UI, started acting funny, and my spidey senses started tingling that I sould save and re-start it, when I did, I lost the entire afternoon's worth of work... when I loaded the files the OS reported as newest by date, and the backups, none of the work on the ramps was present...

I was a bit upset, but it's not the first time, so I picked myself back up and started again, with my new found knowledge of what the values and things should be. I still had some issues with the ramp on the left getting all the collision working. I also made and textured some bumper covers and installed them, but I may need some help with the script.

'Bumpers
Sub Bumper1_Hit:vpmTimer.PulseSw 46 : playsound SoundFX("fx_bumper1",DOFContactors): BumperCover1.image = "bumper_POTO_On" : End Sub
Sub Bumper2_Hit:vpmTimer.PulseSw 48 : playsound SoundFX("fx_bumper1",DOFContactors): BumperCover2.image = "bumper_POTO_On" :End Sub
Sub Bumper3_Hit:vpmTimer.PulseSw 47 : playsound SoundFX("fx_bumper1",DOFContactors): BumperCover3.image = "bumper_POTO_On" :End Sub

I tried to get a texture swap, as I have both a "Lit" and "Unlit" version of the Bumpers and I tried breaking this into a Sub but no luck, either way the lights flash under the cover I can see them, but nothing changing on the cover...


Here is the progess so far on 32Assasin's table.

Bumpers :

Attached File  Bumpers.png   579.58KB   9 downloads


Left Lane

Attached File  LeftLane.png   581.99KB   9 downloads


Oh I forgot, I also downloaded the Plastics from this site, and they were fairly low res. Being a "Knowledgeable" Guy in certain fields, I loaded up a Machine Learning Algorithm that allows you to scale things up without getting things blurry, so I tried it on the Plastics and here's the result...


Original

Attached File  Orig_POTO_ Plastics.png   668.22KB   22 downloads


Machine Learning Up-Res

Attached File  ML_POTO_ Plastics.png   1.5MB   20 downloads


You can see the text and detail is quite a bit better, and the resolution of the image I have is 4X larger, which should make for better coverage and less blurriness when I create the plastics.


Edited by DCrosby, 26 May 2019 - 07:18 AM.


#9 Thalamus

Thalamus

    Pinball Wizard

  • Platinum Supporter
  • 4,984 posts

  • Flag: Norway

  • Favorite Pinball: GOT, Alien Star, LOTR, TOM

Posted 26 May 2019 - 07:33 AM

Sorry to hear about the crash. Did you try opening the autosave ?


From now on. I won't help anyone here at VPF. Please ask Noah why that is.


#10 DCrosby

DCrosby

    Enthusiast

  • Platinum Supporter
  • 125 posts

  • Flag: United States of America

  • Favorite Pinball: Phantom Of The Opera (Currently, may change tomorrow) ;D

Posted 26 May 2019 - 07:50 AM

Sorry to hear about the crash. Did you try opening the autosave ?

Yes, I tried several it had 8, I also checked if the file was read-only and it wasn't... it seemed like it saved some changes from around noon, and from then on it looked like it saved, but it didn't actually write the data... so now I'm doing incremental saves v01, v02 etc.. and checking them with another version of VP


#11 kiwi

kiwi

    Pinball Fan

  • VIP
  • 2,671 posts

  • Flag: Italy

  • Favorite Pinball: Star Trek 25th Anniversary


Posted 26 May 2019 - 08:21 AM

The DMD must be visible to click on it, 32A uses lights to recreate the DMD and has hidden the true DMD.
Search in the scripts ".Hidden", and put a 0 after the equal.

.Hidden = 0

After the volume changes you can re-hide the DMD.

.Hidden = 1

Edited by kiwi, 26 May 2019 - 08:33 AM.


#12 kiwi

kiwi

    Pinball Fan

  • VIP
  • 2,671 posts

  • Flag: Italy

  • Favorite Pinball: Star Trek 25th Anniversary


Posted 26 May 2019 - 08:55 AM

I assume the bumper cap is a mesh,
for image swap, the bumper cap must be a dynamic or active object (no static),

in the property panel of the object uncheck the "Static Rendering" checkbox.


Other methods maybe more used to illuminate objects, is to put the light inside or above the object, depending on the situation,

you can have a look at my tables to get an idea on how to do it, if you have doubts about things you don't understand , ask.


#13 DCrosby

DCrosby

    Enthusiast

  • Platinum Supporter
  • 125 posts

  • Flag: United States of America

  • Favorite Pinball: Phantom Of The Opera (Currently, may change tomorrow) ;D

Posted 26 May 2019 - 02:55 PM

Yeah Visual Basic hasn't been my go-to language in say 10-15 years, so I fundamentally see the code, but it's not easy to see what's implied knowledge and where functionality is coming from, especially with these Mame-Rom tables, as a lot is handled by the rom, like switching things on/off and then there's other things that are just switched on like bulbs, that then have to have a flashing sequence and that has to be replicated in the Script.


I was Looking at Wipeout, which may not be a good table, as I know the Gotlieb Roms have been taken offline, so it's not easy for me to see the table in action, to try and re-construct what's going on. If there's a turorial on how to setup a bumper feel free to link to it, otherwise, I may look at things like Fireball or an EM table since the triggering should be all in code.Or if you have a table where the rom is available that exhibits bumper functionality that would be great also, I'm not afraid of looking or learning, VP Resources seem more of a learned art, than a "RTFM" kind of skill...


I guess what I'm trying to do is, there is a bulb in the bumper, and when it triggers I want the dome to light, so I know it's trrigger is somewhere, and if I can do the texture swap in that sub-routine, or capture the event, and then fire the texture swap as well, is what I'm looking for.


#14 kiwi

kiwi

    Pinball Fan

  • VIP
  • 2,671 posts

  • Flag: Italy

  • Favorite Pinball: Star Trek 25th Anniversary


Posted 26 May 2019 - 06:34 PM

I also have Tri Zone, in this table the bumper lights are controlled by the ROM.
I put a light that illuminates the base and another light that illuminates the cap,

as I said in the post above, the base and the cap must be active objects, and the assigned material must also be Active with a value slightly lower than 1 .
Material Manager, frame of opacity, the amount of opacity has a value of 0.9999 and the "Active" checkbox checked.

 
Light: intensity 10, the bulb enabled, the height of the halo adjusts according to the height of the cap or the base of the bumper,

and a transmission value of 0.5 is a good starting point.

 
You will need a timer that turns off the light after the bumper is hit, "Me.TimerEnabled" starts the internal bumper timer.
In the property panel of the bumper, in the "Misc" section, you find the time interval, adjust it according to how much you want the light to remain on.

Sub Bumper1_Hit:vpmTimer.PulseSw 46 : playsound SoundFX("fx_bumper1",DOFContactors): LightB1.State = 1:Me.TimerEnabled = 1 : End Sub
Sub Bumper1_Timer:LigthB1.State = 0:Me.TimerEnabled = 0:End Sub

LightB1 is a name that must match the light that illuminates the bumper.

 
If you want to do with the image swap:

Sub Bumper1_Hit:vpmTimer.PulseSw 46 : playsound SoundFX("fx_bumper1",DOFContactors): BumperCover1.image = "bumper_POTO_On":Me.TimerEnabled = 1 : End Sub
Sub Bumper1_Timer:BumperCover1.image = "bumper_POTO_Off":Me.TimerEnabled = 0:End Sub

Edit: correct "Me.TimerEnabled"


Edited by kiwi, 26 May 2019 - 09:02 PM.


#15 DCrosby

DCrosby

    Enthusiast

  • Platinum Supporter
  • 125 posts

  • Flag: United States of America

  • Favorite Pinball: Phantom Of The Opera (Currently, may change tomorrow) ;D

Posted 26 May 2019 - 07:32 PM

I REALLY appreciate the help Kiwi!  And this is just to clarify the previous post.


For others trying to follow, the "Me,Timers" need to be Me.Timers (dot, not comma) to work.


The code is solid otherwise, and thank you again ! It's coming together, As soon as I have the plastics in I'll release an early Version like an 0.9 and then maybe some more experienced VB Programmers can clean up some of the Weirdness from the rom, as not all lights are acting right, and after the game ends, the bottom center Bumper stars flashing.


Oh did I mention, last night when I was Delirious at 1:00am and pissed the software had crashed and lost my stuff, I though I had sorted by date, but apparently there was a slightly older version Backup08 or something, that had my changes, and I just copied and pasted them over, worked like a charm.


-DC


Edited by DCrosby, 28 May 2019 - 06:57 AM.


#16 DCrosby

DCrosby

    Enthusiast

  • Platinum Supporter
  • 125 posts

  • Flag: United States of America

  • Favorite Pinball: Phantom Of The Opera (Currently, may change tomorrow) ;D

Posted 27 May 2019 - 06:40 AM

Tonight I added the Apron, and cards, as well as a modified Plunger Mask / Plate... but from the looks I need to extend it down a bit further.


Attached File  Apron_Plunger.png   384.48KB   6 downloads


On 1920 x 1080 it's a little difficult to read, but I think on my 4K Table it should be legible.. if not I'll bump the res. Each card right now is 512x512


Edited by DCrosby, 27 May 2019 - 06:41 AM.


#17 robwaade

robwaade

    Enthusiast

  • Members
  • PipPipPip
  • 127 posts
  • Location:Minnesota

  • Flag: United States of America

  • Favorite Pinball: tales from the crypt munsters phantom of the opera

Posted 27 May 2019 - 07:11 AM

looks great if you lower the phantom logo a little it will be right owned machine for 20 years looking pretty close to real thing

#18 DCrosby

DCrosby

    Enthusiast

  • Platinum Supporter
  • 125 posts

  • Flag: United States of America

  • Favorite Pinball: Phantom Of The Opera (Currently, may change tomorrow) ;D

Posted 27 May 2019 - 07:13 PM

Lowered the phantom logo, added a normal map for the recesses, but I can hardly see them, May need to re-work the apron, as I'm not too thrilled with it...


Added the back ramp... which was a pretty big PITA... because of the irregularity of the plastics. May be off from the original, but unless I get a scan or better pictures it is what it is...

Messing with the red plastic was also interesting, getting the proper translucency, without messing with the decals, and maintaining the "Redness" of the plastic.


So here's an image of the entire table, minus the Plastics, I see a lot of people use one sheet, and then properly place the plastics, I wonder if that's more 3D than modeling them and placing them.... Suggestions welcome...


Attached File  TableMinusPlastics.jpg   244.92KB   8 downloads


Notice also how the Bumpers look really great with the texture change, but once the texture and the light get out of sync (Left Top Bumper) it looks really odd...


-DC


Edited by DCrosby, 27 May 2019 - 07:15 PM.


#19 robwaade

robwaade

    Enthusiast

  • Members
  • PipPipPip
  • 127 posts
  • Location:Minnesota

  • Flag: United States of America

  • Favorite Pinball: tales from the crypt munsters phantom of the opera

Posted 28 May 2019 - 06:16 AM

looks awesome below apron logo theres a line of gold trim styled like above cards and a white skull on left side like the right. also when organ door opens theres a red light where ball drops down on vp9 versions didnt have that if that helps
my mistake no skull on left side

#20 DCrosby

DCrosby

    Enthusiast

  • Platinum Supporter
  • 125 posts

  • Flag: United States of America

  • Favorite Pinball: Phantom Of The Opera (Currently, may change tomorrow) ;D

Posted 28 May 2019 - 07:07 AM

So I've been busy today, I added some of the plastics, but for some reason they don't light the way I'd expect, I think I have to do like Kiwi said and add lights above and below, the issue is there's no "Z" value in the transform, I saw someone use an off-screen wall with a certain height to then use a base in the light field, seems hacky though, why no "Z" transform ?


Here's the updated screenshot with the updated plastics, highlighted in green, since I know i'm still missing a bunch but I wanted to get the ones I finished in. I also added a Gate where the magic Mirror is, but I can't get The Phantom to be a texture on the flapper/gate door. :(


I also saw that in the previous post the Gallery's normals were reversed and I fixed that. It lost some of that cool Plastic'y look but, I know it's accurate now, and should interact with the light or angle properly if adjusted.


Still Eyeballing the Apron, and if I go back to it I will fix these things that I know it need, the wall at the base is perfectly flat and that sometimes slows down the ball from going into the drain. Also the graphics need to be re-visited, I think I'll try and base it off the blueprints if I can find it to get a better placement of the instruction cards, I was also looking at robocop, which pre-dates this table by a year, and has identical Apron, and Punger mask... just have to swap out the textures...


Attached File  TableWithSomePlastics.jpg   262.68KB   10 downloads


Edited by DCrosby, 28 May 2019 - 07:07 AM.


Also tagged with one or more of these keywords: Poto