Jump to content


Photo
* * * * * 1 votes

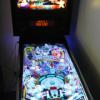
Original Super Mario Bros Cabinet into VP-Build

hyperpin visual pinball super mario gottlieb

  • Please log in to reply
19 replies to this topic

#1 benben26

benben26

    Hobbyist

  • Members
  • PipPip
  • 17 posts
  • Location:California

  • Flag: United States of America

  • Favorite Pinball: ACDC!!

Posted 07 February 2015 - 11:36 PM

Hi All,


Been around for a while but never posted, or introduced myself until now as im finally starting my first Visual Pinball Build using an Original 1992 Gottlieb Super Mario Bros Pinball Cabinet, my names Ben btw from Australia.


  • Brought a 1992 Gottlieb Super Mario Bros Pinball cabinet from eBay, the cabinet didn't come with any play-field, buttons, coin doors, legs, anything! Just the old ply box with original artwork which overall wasn't in bad condition really for its age.
     
  • My plan is to turn this cabinet into a Visual Pinball but trying to keep as much originality in the old cabinet as possible, remember that this cabinet once had everything working and was being played somewhere around the country! So I would like to maintain its originality by keeping all artwork and semi-restoring what I can to the best of my ability.
     
  • I also have to convert the machine into a workable Visual Pinball, that meaning modifying certain parts to fit in the new components, I will be using a 3 screen set up, 40inch Playfield, 24inch Backglass and an old 20inch screen I have for the DMD.
     
  • Computer build will be the following: Intel i5 3.1Ghz, 8GB Hyper X DDR3 Ram, MSI Z97 Motherboard, 250GB Samsung Evo SSD, Asus GTX760 Graphics Card, Corsair 750W PSU, Logitech 2.1 Speaker Sound System, 4x 120mm Coolermaster Fans for cooling throughout Cabinet.


Photos below of the cabinet after bringing it home, giving it an over all clean-out, removing items that I don't need from inside, and getting it ready to semi restore.


r22yJd.jpg


yvdydn.jpg


mWb0D2.jpg


DhRg1O.jpg


hvEXg5.jpg


QKdprA.jpg


Edited by benben26, 08 February 2015 - 11:53 AM.


#2 benben26

benben26

    Hobbyist

  • Members
  • PipPip
  • 17 posts
  • Location:California

  • Flag: United States of America

  • Favorite Pinball: ACDC!!

Posted 08 February 2015 - 12:39 AM

Have cut out the new door for the rear for access to the PC Components, will be hinged and latched, also cleaned out inside of cab and re sprayed with black, just to give it a new smell as it smells a bit 'old'.


3fxfSu.jpg


EXmHlE.jpg


S4B7tq.jpg


#3 benben26

benben26

    Hobbyist

  • Members
  • PipPip
  • 17 posts
  • Location:California

  • Flag: United States of America

  • Favorite Pinball: ACDC!!

Posted 08 February 2015 - 12:55 AM

I want to keep the original headbox hinges and headbox lock-down clip, However they do need to be stripped, sanded and re-sprayed, let them sit in coke over night, and then gave them a nice sanding, primed and sprayed in "Aluminium Silver" staying away from chrome sprays, I like the matt silver aluminium spray finish.


K4VfUf.jpg


JkXuFE.jpg


nMAufN.jpg


YIEzDU.jpg


lfWMAo.jpg


FHBhFe.jpg


d7qOLo.jpg


T2Ajxv.jpg


The metal rails on the side of the cab had been painted over in black over the years, they had since started peeling and rusting as seen in previous post photos, so I also began sanding back all the old paint off it to bring it back to bare metal and prep for prime then spray. The rail on the right hand side has a slight small dent in the top, its minimual and doesnt imapct the channel for the glass to slide up, it however does add a nice touch as it gives it that more used cabinet feel.


9rfhKS.jpg


C8R9KL.jpg


566U6v.jpg


fQEW2G.jpg


afyj7A.jpg


jHkXLS.jpg


Edited by benben26, 08 February 2015 - 07:33 AM.


#4 benben26

benben26

    Hobbyist

  • Members
  • PipPip
  • 17 posts
  • Location:California

  • Flag: United States of America

  • Favorite Pinball: ACDC!!

Posted 08 February 2015 - 07:49 AM

Purchased the Playfield screen, PC Components, Headbox screen and some other bits and pieces, this is the exciting nerdy fun part! Hardest part was trying to to find the playfield screen, the width of this Gottlieb cab is 520mm inside to inside, I didnt want to rebate into the side of the cab if I didnt need to, alot of 40inch LED screens were anywhere from 545 to 535mm 'bezel to bezel'....


I ended up finding a Samsung 40inch LED TV which was about 535mm 'bezel to bezel', I guessed the bezel would have to be at least about 10mm clearance either side, which would land me under 520mm, so I took the gamble and purchased the screen, brought it home, de-bezled it and it was exactly 520mm 'screen edge to screen edge' now thats a win, its the best fit into the cab you could imagine, slightly tight but just enough to sit in perfect!


lPwLHt.jpg


IwfNj5.jpg


  • Below: No more space in the Garage!! Cabinet takeover!


d9W1uT.jpg


  • Below: I decided to spray the top part of the inside of the cab aluminium silver to match the metal rails on the side of the cab, just thought overall will flow nice with the headbox when I get to do that as well, the nice straight blue line you can see is the marker line I made for the angle of the playfield screen.


urVbla.jpg


  • Below: Screwed & glued some blocks to the side of that blue spray line from above photo and the playfield screen fitted in perfect with no room for it to move, a tight fit!


695mP7.jpg


  • Below: New playfield looks really sexy in that cab!!


bvVSNn.jpg


3sFHKx.jpg


  • Below: Bottom infill piece of mdf which will be sprayed gloss black later on.

y69dF6.jpg


Edited by benben26, 08 February 2015 - 07:58 AM.


#5 gStAv

gStAv

    Pinball Lover

  • Members
  • PipPipPipPip
  • 1,331 posts

  • Flag: Sweden

  • Favorite Pinball: TOM, IJ, AFM, WC94

Posted 08 February 2015 - 08:09 AM

looking super tight! :D


3rs054-6.png


#6 zany

zany

    3D Beer Drinker

  • VIP
  • 1,644 posts

  • Flag: Sweden

  • Favorite Pinball: Medieval Madness


Posted 08 February 2015 - 09:28 AM

Agree...looks really nice! :D


#7 jorro666

jorro666

    dam typos with auto correct on tablet sorry for jibba jabba

  • Members
  • PipPipPip
  • 138 posts
  • Location:multiverse universe milkyway earth europe netherlands noord holland zaandam

  • Flag: Netherlands

  • Favorite Pinball: sttng ,addams fam.,attack from mars jurassic park,enz.

Posted 08 February 2015 - 10:22 AM

WOW realy nice man!

#8 STAT

STAT

    Pinball and Arcade Freak

  • VIP
  • 4,981 posts
  • Location:Wels - Austria

  • Flag: Austria

  • Favorite Pinball: Twilight Zone

Posted 08 February 2015 - 10:32 AM

Very nice Ben !! :tup:

Your Works on the Iron parts are great ! Have never seen it before, with a "Coke" ! (i do know it only with Vinegar )


Edited by STAT, 08 February 2015 - 10:40 AM.


#9 benben26

benben26

    Hobbyist

  • Members
  • PipPip
  • 17 posts
  • Location:California

  • Flag: United States of America

  • Favorite Pinball: ACDC!!

Posted 08 February 2015 - 10:48 AM

Cheers thanks everyone for the kind words, will upload some more pics shortly,


Very nice Ben !! :tup:

Your Works on the Iron parts are great ! Have never seen it before, with a "Coke" ! (i do know it only with Vinegar )


I should also note that once its been in the coke for a while (overnight I did) use some aluminium foil with sandpaper and it also helps!


  • Below: View inside cab from rear with playfield screen installed.


XFP01a.jpg


  • Below: Rear access hatch with latches, 2 x 120mm exhaust fan cut outs, as you can see the back of the cab looks pretty shabby, it doesn't really matter since its against a wall, but my OCD prevailed and I have since sprayed it gloss black, 


aaXHp8.jpg


HbPNh6.jpg


Z9t9Vj.jpg


  • Below: PC Built and installed onto draw runner system.


Fyz1qf.jpg


  • Below: View inside cab from top down with PC on draw, also note that I have decided to spray a few studs back to silver as they were also rusted.


8Cc2xE.jpg


2w1VYa.jpg


  • Below: Playfield screen & MDF bottom insert sprayed gloss black and installed, all metal parts have now been stripped, sanded, primed & re-sprayed,


dX7wqV.jpg


85nh4K.jpg


  • Below: I purchased a second hand coin door from ebay also, this one was actually in pretty good condition, a couple of small minor scratch's, but it blends into the old artwork of the cab perfect, who knows might have even been from this machine! Stranger things have happened! Oh and I installed a new Launch Ball button as well!!


gWBm7X.jpg


Edited by benben26, 08 February 2015 - 11:18 AM.


#10 benben26

benben26

    Hobbyist

  • Members
  • PipPip
  • 17 posts
  • Location:California

  • Flag: United States of America

  • Favorite Pinball: ACDC!!

Posted 08 February 2015 - 09:06 PM

Have started getting all the pinball software setup, man does this stuff take a while to get up and running! But its all for a good cause! Also got the iPac ready to install in the the cab as well!


pLLRMh.jpg


hOqks3.jpg


  • Below: Testing the Super Mario Bros table!! Cant wait to see this in the original cab!!

ixvzDS.jpg


ED0WLJ.jpg


#11 nebrunner

nebrunner

    Enthusiast

  • Platinum Supporter
  • 259 posts
  • Location:Omaha

  • Flag: ---------

  • Favorite Pinball: BIG GUNS!!!

Posted 09 February 2015 - 03:52 PM

Nice build.  This is the exact same cabinet that I am using in my build.  It looks like you got a better fit on your playfield, I had to cut my tv apart with a dremel AND rout slots into the cabinet sides to get it to fit.


#12 BzZziLLa

BzZziLLa

    Enthusiast

  • Members
  • PipPipPip
  • 69 posts

  • Flag: ---------

  • Favorite Pinball: Top Card

Posted 10 February 2015 - 01:30 PM

Now that's a sexy cab. I hope you end up keeping those SMB graphics.


2dsgy9i.pngwet.jpg4hsh37.png


#13 gStAv

gStAv

    Pinball Lover

  • Members
  • PipPipPipPip
  • 1,331 posts

  • Flag: Sweden

  • Favorite Pinball: TOM, IJ, AFM, WC94

Posted 10 February 2015 - 02:28 PM

Show us your forearm dude! I can see the gaming theme from here 😇😇

3rs054-6.png


#14 LoadedWeapon

LoadedWeapon

    The Night Owl..

  • Members
  • PipPipPipPipPip
  • 2,572 posts
  • Location:South Carolina USA

  • Flag: United States of America

  • Favorite Pinball: Star Trek TNG


Posted 10 February 2015 - 03:37 PM

Great job and you will love that screen its the same one I use.. :)

#15 mlenardon

mlenardon

    Hobbyist

  • Platinum Supporter
  • 36 posts
  • Location:Thunder Bay, ON

  • Flag: Canada

  • Favorite Pinball: Black Knight

Posted 15 February 2015 - 12:43 AM

I recommend sliding the screen forward over the buttons if possible to the lock down bar and putting the spacer at the rear.  My buddy put his LED feedback facing up on his using the lower profile round covers.  It really looks nice not having that big black spacer in front of the screen.  I did mine the same in a repro STTNG cab with a 42" and I like it also.  My flashers and LEDs are facing foward with a Zeb bar.


I really wish I had gone with a 46" to get rid of any sort of bezel.


Michael


Edited by mlenardon, 15 February 2015 - 12:45 AM.


#16 benben26

benben26

    Hobbyist

  • Members
  • PipPip
  • 17 posts
  • Location:California

  • Flag: United States of America

  • Favorite Pinball: ACDC!!

Posted 19 February 2015 - 07:35 AM

:otvclap:


Edited by benben26, 30 January 2017 - 09:17 AM.


#17 benben26

benben26

    Hobbyist

  • Members
  • PipPip
  • 17 posts
  • Location:California

  • Flag: United States of America

  • Favorite Pinball: ACDC!!

Posted 19 February 2015 - 09:26 AM

I have started working on the headbox now, fitting 2x screens, The backglass screen will be a Samsung 24inch LED Monitor and the DMD will be a Samsung 20inch monitor, both spare monitors I had so might as well use them! I will also replace the old T-Moulding on the headbox with some new Black T-Moulding as the old stuff is pretty crappy now.


  • Below: Quick framing out to fit the 2x screens! 


8hhtCM.jpg


  • Below: 2x screens fit perfect!! No need to de-bezel these as they will be concealed,

DoO1RZ.jpg

  • Below: Cut and fit a piece of 16mm MDF and will use that to cut out the backglass and DMD, the speaker grills as seen will be drilled out and the speaker grill screwed on top, I chose these speaker grills because they are easy to install and the pop out  a little bit as well, they will also be sprayed aluminium silver.

PfsQkL.jpg


  • Below: Cut out for the backglass screen!

ErArNS.jpg


  • Below: Template all finished, ready to be painted up! Going to paint this Gloss Black, Since this isnt original I didnt want to try and get a blue colour similiar to the cab to match, so I figured gloss black will look nice and i might make some small decals later on to stick on top to make it all that bit nicer!


iVURuX.jpg


  • Below: Cut out & hinged a rear access door in the back of the headbox, gives easy access to the 2xscreens and also the speakers for cable connection / repairs and anything else in the future.


Rrozqv.jpg


Below: These are the speaker grills im going to use on the Headbox for the speakers, I will spray theme Aluminium silver.


CCtjGt.jpg


1xfLqL.jpg


Edited by benben26, 19 February 2015 - 09:50 AM.


#18 benben26

benben26

    Hobbyist

  • Members
  • PipPip
  • 17 posts
  • Location:California

  • Flag: United States of America

  • Favorite Pinball: ACDC!!

Posted 01 March 2015 - 03:12 AM

Another Update:


Finishing of the headbox, since im keeping the original artwork on this cab I thought that I would restore some parts best I could, the very top of the headbox was the worst damage which was a bonus being the top because you actually dont really see it! However I did want to re-spray it and make it look a little nicer since I have worked alot on this cab, so I lightly sanded, re-primed and re-sprayed a blue to try match the blue the orginal cabinet uses.


Have also sprayed the inside walls of the headbox the aluminium silver, I did this with the main cabinet body as well and wanted the theme to run from the cabinet sides to the headbox, so I have matched everything best I could, also new Black T-Moulding will be installed as the old T-Moulding had seen better days,


  • Below: Headbox getting closer to completion!

CVFEjl.jpg


  • Below: Headbox Faceplate sprayed in gloss black

N1rWOr.jpg


  • Below: The top of the headbox had some light water damage and had caused the old wood to fluff and alot of the paintwork was not as good, so I have re-sanded lightly to remove bad parts of woodwork and any bumps.


nDYzig.jpg


CS14Pu.jpg


CSml7v.jpg


  • Below: Final coat finished on the top of the headbox, colour actually slightly different to the cabinet blue, however like I said you dont ever really see the top!

GNo7CQ.jpg


  • Below: Headbox installed without screens:

dtzASF.jpg


  • Below: Playfield screen & DMD Screen fitted, tested, working!! Getting exciting now!

bHyNbu.jpg


  • Below: Playfield screen, DMD Screen & Backglass Screen, all tested & working!!

9GoeRy.jpg


  • Below: A quick test with Visual Pinball!, oh look at!! Exciting!

LADG2I.jpg


Edited by benben26, 01 March 2015 - 03:25 AM.


#19 blashyrk

blashyrk

    Pinball Fan

  • Members
  • PipPipPipPip
  • 549 posts
  • Location:Norway

  • Flag: Norway

  • Favorite Pinball: Attack from Mars, Medieval Madness, White Water

  • PS3 Gamer Tag: Blashyrk

Posted 01 March 2015 - 08:33 AM

Very nice build, I'm looking for a nice 42" tv for my widebody build, what model is that 40" Samsung?(is it a smartTV,3d?) And how's the viewing angles?


#20 takedown

takedown

    Hobbyist

  • Platinum Supporter
  • 26 posts

  • Flag: ---------

  • Favorite Pinball: mario

Posted 22 April 2015 - 04:01 AM

Great looking build! That is one of my favorite pinballs and of course game series of all time. I'm working on a cabinet right now and I've thought about theming it like your original. Great work.


Also tagged with one or more of these keywords: hyperpin, visual pinball, super mario, gottlieb