Time for the ramps. This particular table has three ramps and cross over each other. This will make things a little tricky because we need to make sure that the ball always has plenty of clearance when traveling on a particular ramp so that it wont get hung up by a ramp above it. Also, some ramps will need to be built with multiple sections to make sure that the ramps will clear possible plastic pieces or metal guides that fall below.
We are going to start with the ramp that is at the lowest level of the three. This happens to be the ramp that is kind of in the center. Since this ramp is the lowest of the three, we really only need to make sure that it is high enough to clear any objects it goes over on the playfield and is high enough for the ball to be able to roll under it wherever that may take place.
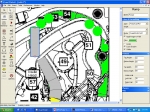
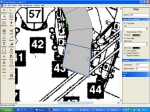
To make things easier, Ive taken our ID-Plastic guide image and colored in green the shape of the ramp. Also note, in front of the ramp is a ramp flap (colored in yellow). We will re-create this in
VP as well to add a little more realism. Download the following image:

To make things a little easier to build the ramp, we will build it in a new blank table and then copy and paste the ramp objects into our working table.
Start up
VP and load in your working ID table. Create a new table and switch over to it. Delete the outer wall object. Under Physics, change the table height to 2300 (the width should already be set to 1000) to match the dimensions of our working table. Import the Ramp1-guide image into your table and set the table image to it (make sure Display in editor is checked and turn off Show Grid):

Zoom in once around the ramp area (use the magnify tool and click once on your table).

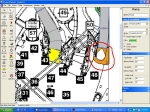
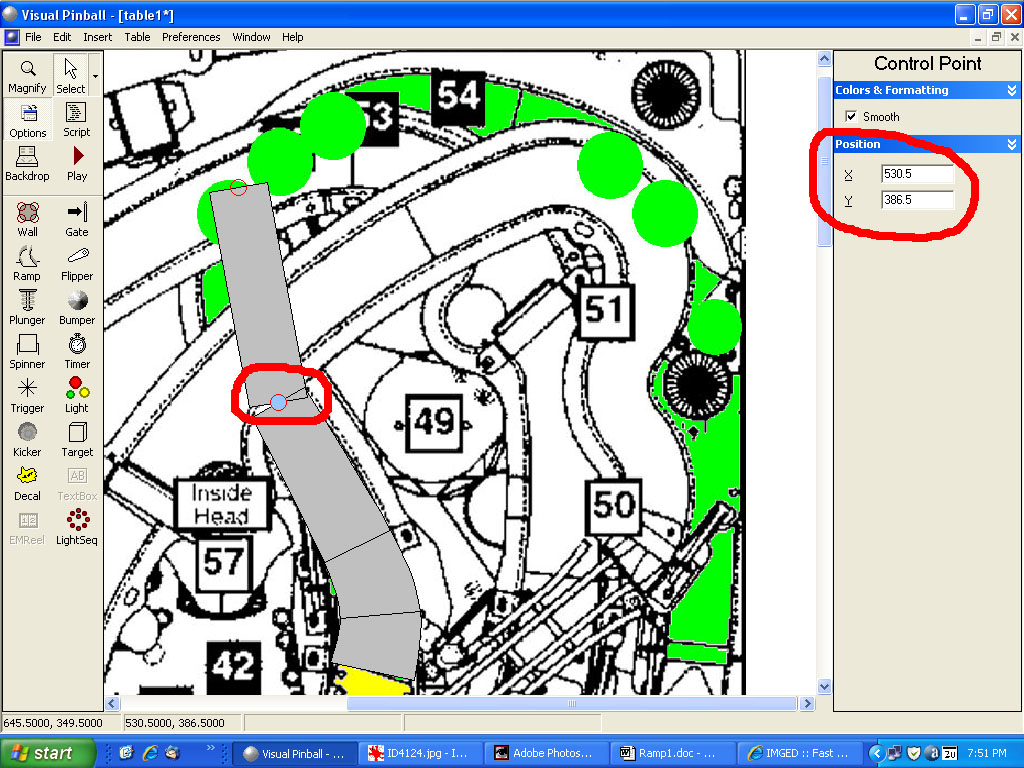
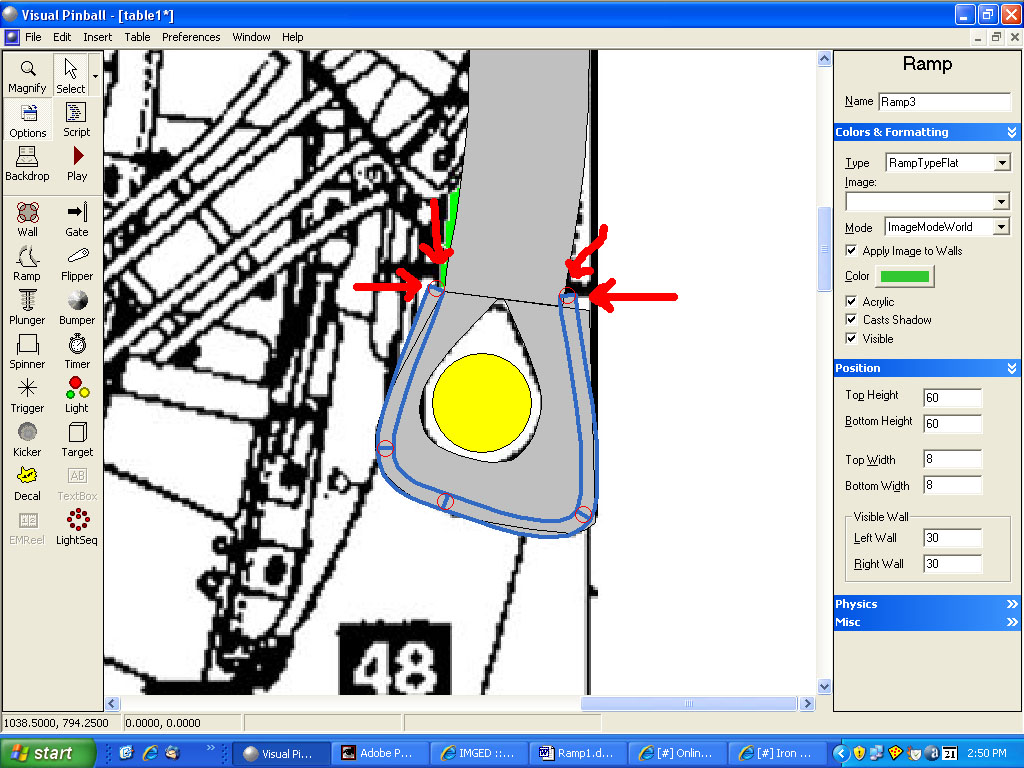
We are going to make the ramp in two sections. The reason is that we need to clear the large plastic piece that this ramp goes over. If we just made one ramp object and had the bottom height set to 0 and the top set to 60 our ramp wont clear objects already on the table and also wouldnt be high enough in places for the ball to roll underneath (see the areas in the red circles in the following image where the ramp isnt tall enough to go over the plastic objects):

Lets start building. Add a ramp object to the table near the area the ramp goes. Set the top height to 60 and the bottom width to 85:

Add points to shape it to match the green area. When you are done it should look like this:

Now we need to add the next section. Add another ramp near the end of the section you just built. Set the bottom and top height to 60 and the bottom and top width to 60:
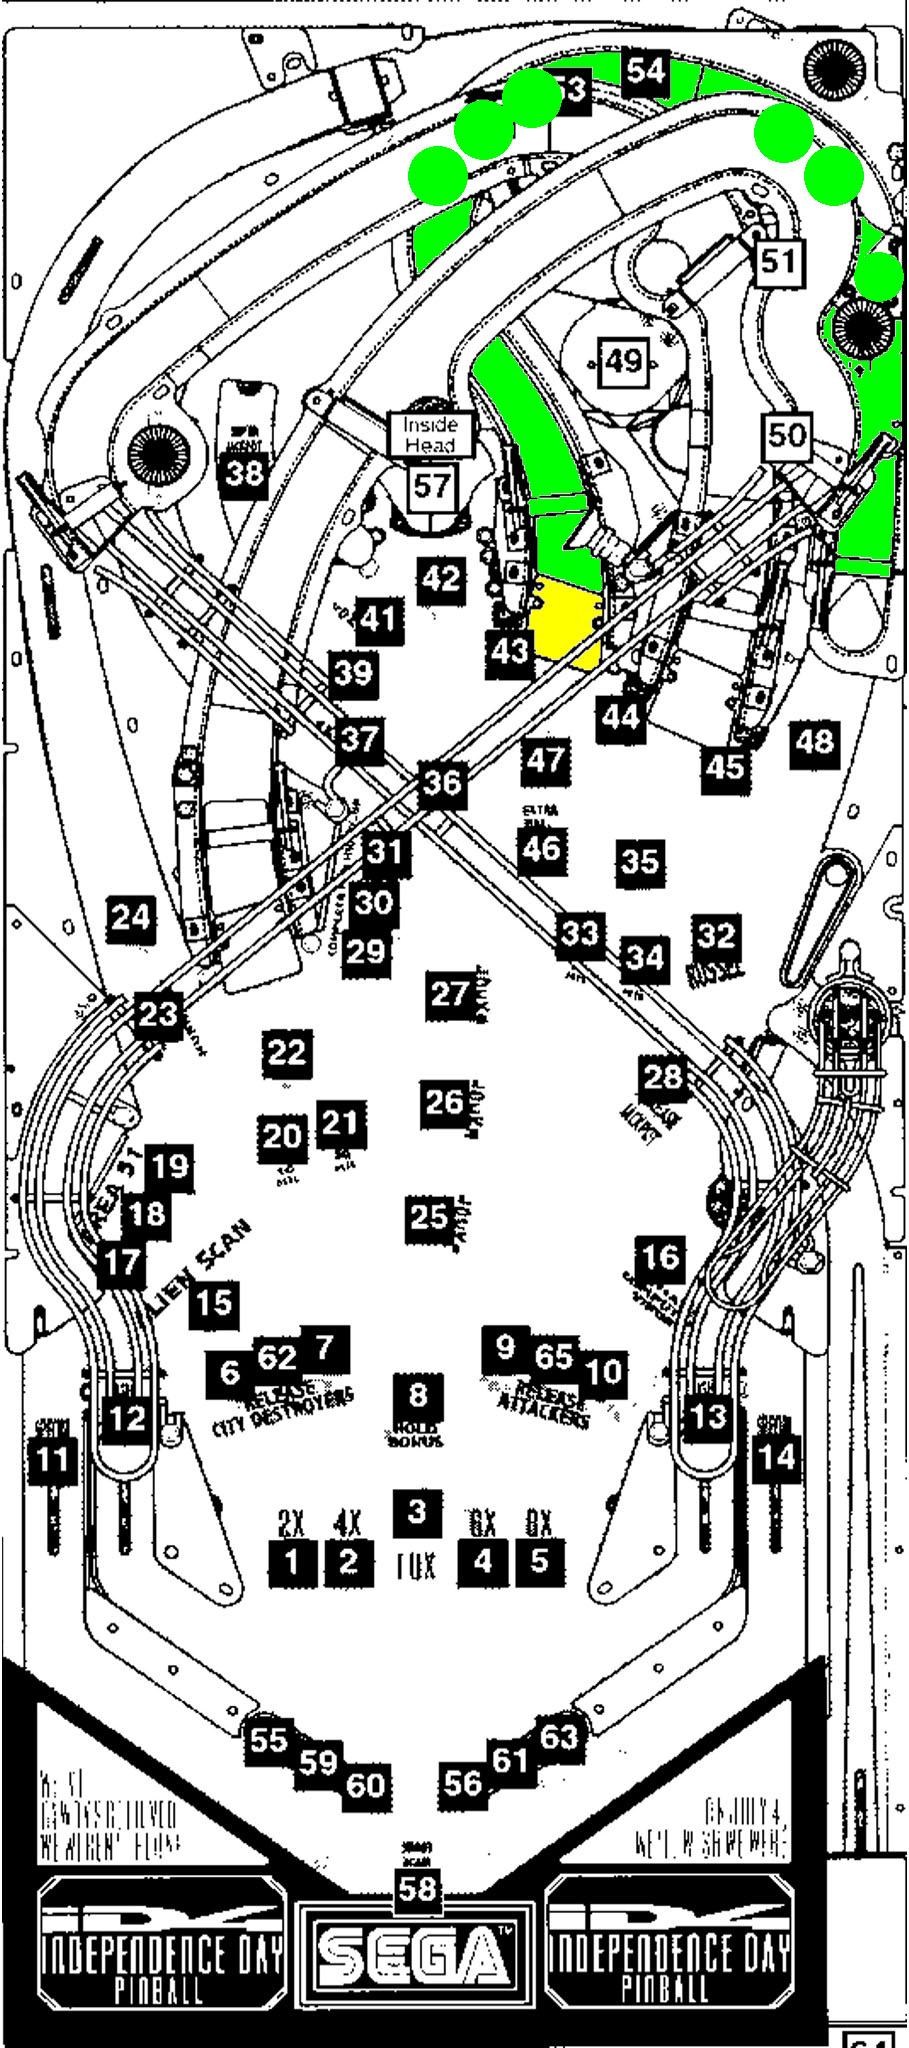
Now click on the ramp section you first added to select it. Click on the very end point and write down the X and Y position:
Now click on the second ramp object and click on the very bottom control point. Manually set the X and Y position to match the end point values you just wrote down. This will align the end of the first ramp object with the beginning of the second one:

Now its a matter of adding more points and moving them to match the shape we want:

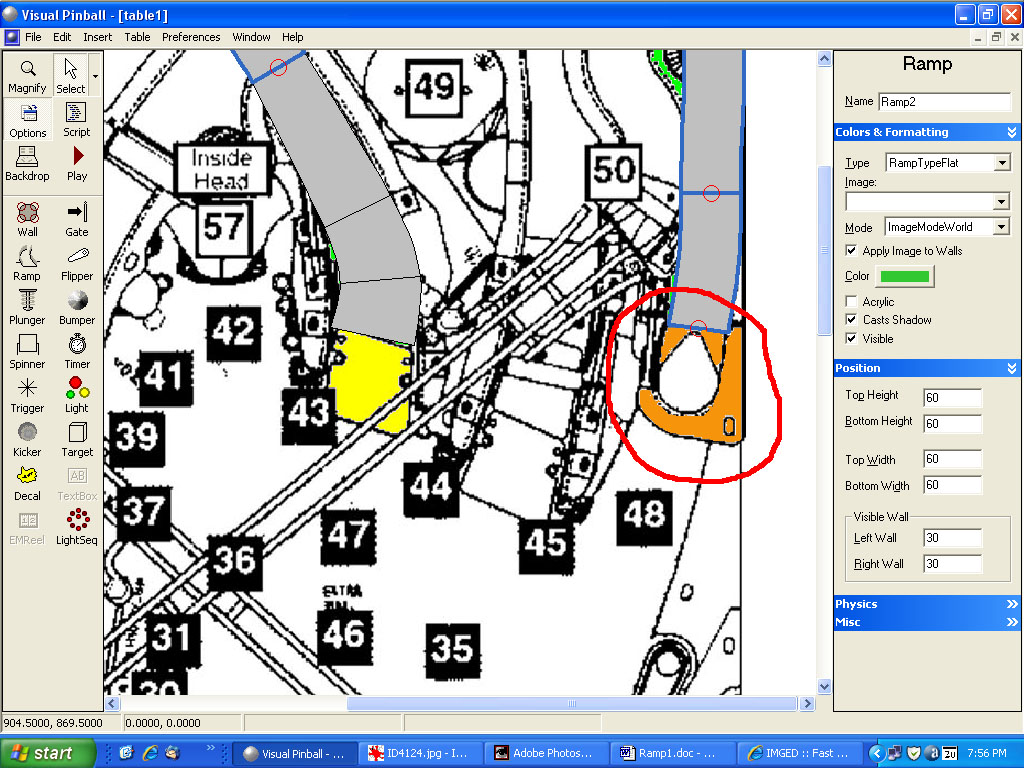
To build the very end of the ramp, we will make a wall for the area that has a hole cut out and then we will use a ramp object in a U shape. First well build a wall in the shape of the orange area:
Add a wall object in that area. Set the top height to 60 and the bottom height to 58. Shape it to match the orange. Heres how it should look when you are done. Note make sure a light object of radius 25 will fit inside the hole otherwise your ball wont fall through:
We need to now add something to contain the ball so it wont roll off the end of the ramp. We will accomplish this by using a ramp object. Add a ramp object next to the wall you just created. Change the top and bottom heights to 60 and set the top and bottom width to 8:

Add points and shape it so it roughly follows the outer edge of our wall object. Make sure the two ends overlap a little bit on our actual ramp (make sure that the ends are on the outside edges of the ramp object otherwise they could interfere with the ball):

For the ramp flap, well start out by adding two wall objects in the shape of a circle sized to about the size of a 6 unit radius circle. Set the top and side color to a dark gray. Set the top height to .7 and the bottom height to .6:

For the rest of the flap create a wall object and shape it to match the yellow shape. Set the top and side color to black. The top height should be set to .5 and the bottom to 0:
If you want, you can save this table as Ramp1. Select all the objects (use the selection tool and make a rectangle around everything) and copy them (CTRL-C or Edit Copy). Switch over to your ID table and paste them in. Now looking at things in the editor I see two areas of the first ramp section that overlap some of our plastic pieces:

We need to adjust the ramp slightly otherwise the plastic objects will protrude up into our ramp and block the ball.
After adjusting a couple points on the ramp as well as the top of the ramp flap, I no longer have any overlapping areas. I also had to re-match the beginning control point of the next ramp segment to the end of the first ramp:

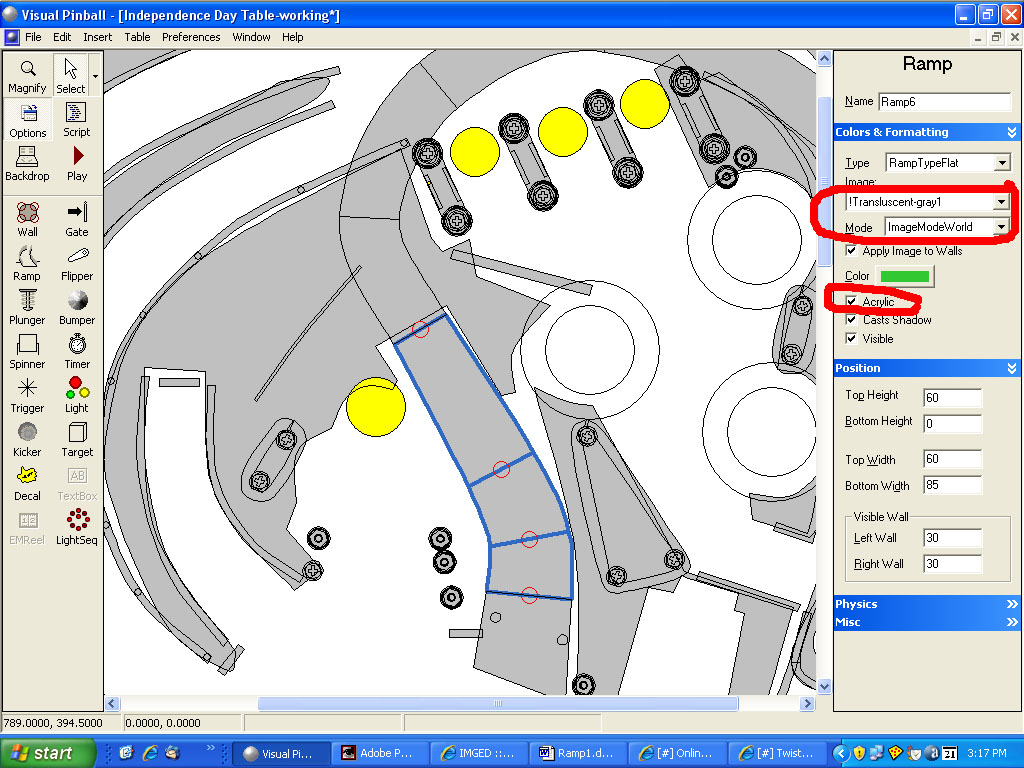
To make the ramps transparent import the following image named transluscent-gray1.bmp:

Now select the first ramp segment and select this as the image. Make sure Mode is set to ImageModeWorld and Acrylic is checked:

Repeat this for the second ramp segment as well as the U shaped ramp object at the end of our ramp. Select the wall object we made with the hole in it and set the image to the transluscent-gray1.bmp image. Change the top and side colors to dark gray.
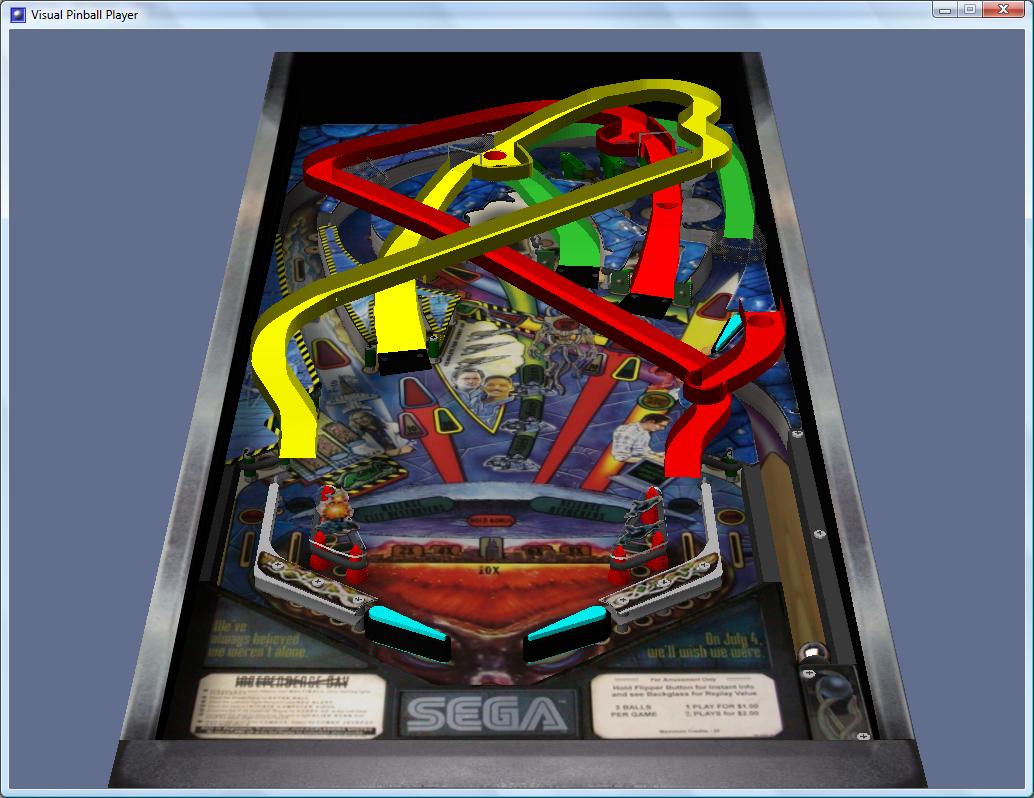
Save your table and click on play. Your table should look like this:


 Contributor


 are all trademarks of VPFORUMS.