Jump to content


Photo

90's Workshop: Buildin' The Table


  • Please log in to reply
369 replies to this topic

#81 faralos

faralos

    VPF Veteran

  • Members
  • PipPipPipPipPipPip
  • 7,838 posts
  • Location:Eastern Pa,USA

  • Flag: United States of America

  • Favorite Pinball: Flash (Williams) 1979, Flash2 Updated


  • Trophies:

Posted 09 May 2009 - 03:08 AM

told ya' i was slower, I'm still doing posts and rubbers and you guys are way past that. biggrin.gif so just leave me access to here and eventually I'll figure it out. Hopefully, I can catch up this Sunday as I have the entire day to build the id pin with your tutorials
"Don’t let the noise of others’ opinions drown out your own inner voice.
And most important, have the courage to follow your heart and intuition.”
----Steve Jobs


#82 neoblood

neoblood

    Enthusiast

  • Charter Member
  • 381 posts
  • Location:USA

  • Flag: United States of America

  • Favorite Pinball: bop

Posted 09 May 2009 - 05:19 AM

You'll be fine, it's mostly just copy/paste, adjust, add points, adjust, copy paste. It takes a little bit but not as long as you think I bet.
A Pinball a day takes the boredom away

#83 wtiger

wtiger

    Pinball Fan

  • VIP
  • 1,148 posts
  • Location:Los Angeles, CA

  • Flag: United States of America

  • Favorite Pinball: Junkyard


Contributor

Posted 10 May 2009 - 12:38 AM

Now lets work on the apron area at the bottom of the table. With your table loaded in scroll down to the bottom and make sure the options are turned on. We want to add a wall in the shape of the blue/purple color: You will have an overlap on the left and right side where we made the two pieces earlier that represent the two pieces of wood on the edge of the playfield. We actually didn’t need to go as low on the bottom when we made them. Before you begin the apron wall, you can move up the bottom of the two objects, or you can leave them where they are. It won’t hurt anything to have the objects overlap


Add a new wall and start adding control points and move them around to form the shape. Your wall should look like this when you are done (I went ahead and got rid of the overlap on the side objects):


For this wall, we don’t need to change any of its properties. This wall will catch the ball going through either outlanes or down the center and will capture it in the center with the drain kicker. Now what we want to do is duplicate this wall object, delete some of the points at the bottom that make up the area surrounding the drain kicker, and raise the height a little higher than the default of 50 units so it will be above the other object. We do this because later we will apply an apron image to it and it needs to be higher than the object below to show up. Let’s go ahead and do it. Make sure the apron wall object you just created is selected (click on it). Now perform a copy then paste (CTRL-C then CTRL-V). This will paste a new duplicate object right over it. Now refer to the picture below and delete the four control points below the drain (click on one of the control points, hold the shift key and keep it held down, click on the next control point, and then click on the third, and finally the fourth then let go of the shift key and hit the delete key):


Change the bottom height to 50 and the top height to 52. Change the name to Apron:


Your table should now look like this:


Edited by wtiger, 10 May 2009 - 12:41 AM.


#84 wtiger

wtiger

    Pinball Fan

  • VIP
  • 1,148 posts
  • Location:Los Angeles, CA

  • Flag: United States of America

  • Favorite Pinball: Junkyard


Contributor

Posted 10 May 2009 - 11:59 PM

Let’s add that third flipper to the table. Add a flipper object to the table near where it goes. I just realized that we also should move the two posts below the flipper to the left a bit (I had them too far to the right away from the flipper):


Now with the flipper object we just added selected, change the Rubber Thickness to 8, Base Radius to 20, length to 125, Start Angle to 203, and End Angle to 250. Now move it into place to match the guide image:


If you’d like, you can go ahead and set the colors too. Set the Color to a light blue color (Red=0, Green=255, Blue=255). Set the rubber color to black.

Now we need to make it work. We will do that in the script. With it still selected, change the name to RightFlipper1. Click on the Script button (above play). Your screen should look like this:


Where you see the text:

If keycode = RightFlipperKey Then RightFlipper.RotateToEnd PlaySound "FlipperUp" End If

We will add right below the RightFlipper.RotateToEnd a new line that has our RightFlipper1 object. This will tell VP that when we hit the right shift key we want both the RightFlipper and our new RightFlipper1 object to move to the end angle position. Go to the end of the line, hit the enter key and type in:

RightFlipper1.RotateToEnd

Your screen should look like this:


Now we need to do the same for when the shift key is let up and the flipper(s) return to their start angle. Look for the following text in the script:

If keycode = RightFlipperKey Then RightFlipper.RotateToStart PlaySound "FlipperDown" End If

Right after the RightFlipper.RotateToStart add the following:

RightFlipper1.RotateToStart


Close the script window and lets fix the two main flippers.

Click on the LeftFlipper to select it. Change the base radius to 22 and the length to 120. Set the X position to 293 and the Y to 1950. This will make it match the guide a little bit more. Go ahead and set the color to the same light blue as the flipper we added above (Red=0, Green=255, Blue=255) and set the rubber color to black, and the rubber thickness to 8.

For the RightFlipper, set its base radius to 22 and length to 120. Set the X position to 616 and Y to 1950. Change the color and rubber color as well as the rubber thickness as we did for the left flipper.

Your table should now look like this:


Edited by wtiger, 11 May 2009 - 12:01 AM.


#85 wtiger

wtiger

    Pinball Fan

  • VIP
  • 1,148 posts
  • Location:Los Angeles, CA

  • Flag: United States of America

  • Favorite Pinball: Junkyard


Contributor

Posted 13 May 2009 - 02:58 AM

Everyone ready to move on?

Lets fix the lane guides. We’ll start with the left one. Load your table up into VP and zoom in a bit on the left lane guide. If you want, you can delete the lane guide and try to build it from scratch. It’s up to you. If not, we’ll just modify the existing ones.

Go ahead and click on it to select it. Now we want to select the top five control points by first clicking on one of them. Hold the shift key down on the keyboard and continue to select the other four. Once all five are selected let go of the shift key.


Now we can use the up and down arrows on the keyboard to move all five at once into position. Hit the down arrow many times until the top of our object lines up with the guide (you want to line up the center of the top three control point circles with the top edge from the guide).


Now select the six control points towards the bottom left:


Now use the right arrow on the keyboard to move all six at once to the right until they line up with right edge of from the guide image:


Now select the four control points indicated where the red arrows are plus the five at the very top:


Move them to the right until the rightmost points line up with the guide image:


Now select the three control points (two at the top and one towards the bottom):


Now use the left arrow key on the keyboard to move them to the left until they align with the left edge of the guide image:


Now scroll over to where the left flipper is and add a point in the middle of the top and bottom control points. Right click on it to make it smooth. Re-shape the of the object so it somewhat matches the curve/shape of the guide image:


Now that we’ve duplicated the lane guide from the guide image, we can see that the left flipper isn’t in the right position. Click on the flipper and change the base radius to 22. You may need to move it’s position as well. I moved it to X=289, Y=1945 and that looks like it is better placed.

We need to fix the right lane guide as well. For this one we can cheat by duplicating the left, flipping it and then translating/moving it into position. Go ahead and delete the right lane guide. Click on the left lane guide to select it. Copy it, then perform a paste. This will put a copy directly over the original. Now right click inside the object and select Flip X. Now right click again and left click on translate. Translate this new object in the X direction until it comes close to where it should be on the right side of our table. You might want to translate about 100 units at a time until it comes close. After that, you can use smaller numbers, or use the right arrow key on the keyboard (holding it down and then let go when it is real close, when just tapping it until it where you want it). You will need to adjust the right flipper as well. Click on it to select it, change the base radius to 22 and set the X position to 621, Y to 1945. When you are all done, your table should look like this:


#86 wtiger

wtiger

    Pinball Fan

  • VIP
  • 1,148 posts
  • Location:Los Angeles, CA

  • Flag: United States of America

  • Favorite Pinball: Junkyard


Contributor

Posted 16 May 2009 - 12:46 AM

Let’s add the slingshot rubber and others. Refer to the image below and using the process discussed previously, go ahead and build the rubber objects indicated in green (there are 7 of them). You may want to move the pegs for the particular area you are working on out of the way. You can do this by making a selection rectangle around all of them and then right click in the center of one of them and select translate. You’d want to translate in the X direction 100 units or so.


After you are done with the seven rubbers, let’s finish the upper lane guides by adding a top piece and the two sides. Take a look at the following image:


Add four light objects of radius 12 to the left most upper lane guide. Use them as a guide to make the top part. Try to duplicate the object seen in the image above that is to the right of our lane guide (I moved the light objects to the left to make it easier to build the top piece). When done, move the lights and object you just created back into place. Set the elasticity to .4, the bottom height to 40 and the top height to 50. Set the top and side colors to a dark green (red=0, green=128, and blue=0).

Now we will make the two side pieces. Refer to the following image:


Make one of the left side piece about the width of a 2 unit radius light object. Start the top about ¾ of the way up from the bottom of the light object second from the top and make the side piece go to about ¾ of the way down on the second from the bottom light object. Set the elasticity to .4 and use the same green color for top side (red=0, green=128, and blue=0). We want this object to go from bottom height 0 to top height 50. Now copy and paste this object to the right side as shown in the image above.

Now copy and paste the three objects (top plus two sides) for the remaining three lane guides.

Your table should now look like this when done:


And like this with the actual playfield:


Edited by wtiger, 16 May 2009 - 12:49 AM.


#87 wtiger

wtiger

    Pinball Fan

  • VIP
  • 1,148 posts
  • Location:Los Angeles, CA

  • Flag: United States of America

  • Favorite Pinball: Junkyard


Contributor

Posted 17 May 2009 - 03:45 AM

Targets

We will now add the target objects to the table. Before we begin I’ll present a very brief explanation of how images mapped to a wall object need to be set up.

Start up VP and create a new table. Add a target object anywhere on the table. Click on it to select it.


If you click on either of the back two control points you will notice that the Auto Texture Coord option is checked and that the Texture Coord is set to 0. This is the default for a wall object in VP. If you click on the bottom left control point you will notice that the Auto Texture Coord is not checked and the Texture Coord is 0. This tells VP that we want to manually map an image to this side starting at position 0 or the beginning. Now click on the bottom right control point. This one also has the Auto Texture Coord off but the Texture Coord is set to 1. This tells VP to map the image across this side and finish at the end of the image (the range of the image goes from 0 to 1 kind of like 0 to 100%). If someone reading this has a better explanation/definition, please post it. Target objects are always set up this way with the front facing side being the one that would show your image. You could also add a plain wall object and set the control points yourself and accomplish the same thing.

Now lets start adding our targets to our table. Download the four images at the bottom of this post (the red, blue, yellow, and green target images). Load your working table into VP and import the four target images. The image below shows the various targets that we need to add:


Lets start out with the blue targets just above the left slingshot:


Add a light object of radius 4 near where the bottom target will go. Copy and paste the light object four times to that you have a total of five touching each other and following the direction that the target shape will be. Add a target object to your table and move it into the approximate spot it needs to be in. Start moving the various four control points around so that it ends up being the thickness of the one of the light objects and the length is four and a half of the light objects. Make sure that the bottom edge when you first added the target object is on the right side. If not, when we apply the image it won’t show properly (it will be on the back side not the front side).

Your target should look like this:


Now set the top and bottom color to blue (Red=0, Green=128, Blue=255). Set the Side Image to Blue_Target.jpg. Now copy and paste the target object right next to the fifth light object. Copy and paste one more. Your three targets should look like this:


Repeat this process for the three bank yellow targets and add the other single yellow, red, and the green targets. When you are all done, your table should look like this:


Here are the target images you will need:


Edited by wtiger, 17 May 2009 - 03:48 AM.


#88 neoblood

neoblood

    Enthusiast

  • Charter Member
  • 381 posts
  • Location:USA

  • Flag: United States of America

  • Favorite Pinball: bop

Posted 17 May 2009 - 06:20 PM

This is coming along nicely, I'm a bit behind as I was distracted this weekend but I appreciate the work you're doing. Nice! I'll catch up this week.
A Pinball a day takes the boredom away

#89 wtiger

wtiger

    Pinball Fan

  • VIP
  • 1,148 posts
  • Location:Los Angeles, CA

  • Flag: United States of America

  • Favorite Pinball: Junkyard


Contributor

Posted 17 May 2009 - 06:53 PM

QUOTE (neoblood @ May 17 2009, 11:20 AM) <{POST_SNAPBACK}>
This is coming along nicely, I'm a bit behind as I was distracted this weekend but I appreciate the work you're doing. Nice! I'll catch up this week.


Thanks neoblood, I appreciate that! I'm trying not to go too fast, but also not too slow and trying not to put too much into each "exercise". Next up will probably be the objects and graphics for the plastics.

#90 faralos

faralos

    VPF Veteran

  • Members
  • PipPipPipPipPipPip
  • 7,838 posts
  • Location:Eastern Pa,USA

  • Flag: United States of America

  • Favorite Pinball: Flash (Williams) 1979, Flash2 Updated


  • Trophies:

Posted 17 May 2009 - 10:09 PM

I've been off for a week and don't even have gimp installed yet but those directions look too confusing for me to figure out on how to change the angle with gimp. I'll try but I told ya' I am slow but also couldn't work on it at all for the past week due to personal family stuff. I know you guys are way beyond this but if someone can just send me their copy of the table after it was angled but before any walls are on it, I'd really appreciate it. or post a partially completed wip fpr me if not then I will indeed bow out, after reading the printouts, I didn't know I'd need GIMP too just to make a table. I dont have it yet nor know how to use it at all. thanks anyone for any help you can toss my way... smile.gif
"Don’t let the noise of others’ opinions drown out your own inner voice.
And most important, have the courage to follow your heart and intuition.”
----Steve Jobs


#91 wtiger

wtiger

    Pinball Fan

  • VIP
  • 1,148 posts
  • Location:Los Angeles, CA

  • Flag: United States of America

  • Favorite Pinball: Junkyard


Contributor

Posted 17 May 2009 - 10:50 PM

QUOTE (faralos @ May 17 2009, 03:09 PM) <{POST_SNAPBACK}>
I've been off for a week and don't even have gimp installed yet but those directions look too confusing for me to figure out on how to change the angle with gimp. I'll try but I told ya' I am slow but also couldn't work on it at all for the past week due to personal family stuff. I know you guys are way beyond this but if someone can just send me their copy of the table after it was angled but before any walls are on it, I'd really appreciate it. or post a partially completed wip fpr me if not then I will indeed bow out, after reading the printouts, I didn't know I'd need GIMP too just to make a table. I dont have it yet nor know how to use it at all. thanks anyone for any help you can toss my way... smile.gif


faralos,
Post#64 (on page 4) of this thread has the images you need. I uploaded them for anyone who wants to get involved but is unable to do the graphics themselves (or doesn't have the time). Right now I don't plan on uploading my .vpt table file, but if someone else wants to make theirs available for others, that's OK.

#92 wtiger

wtiger

    Pinball Fan

  • VIP
  • 1,148 posts
  • Location:Los Angeles, CA

  • Flag: United States of America

  • Favorite Pinball: Junkyard


Contributor

Posted 20 May 2009 - 03:49 AM

I'm currently trying to figure out where the various plastics go. I may not have too much time between now and the weekend but we'll see. Here's the image I took from the manual to use for the guide:


I'm trying to place the various pieces from this image onto it:


My plan is to do the placement myself first to figure out where things need to be. Once I'm done I will point out where things go, but it will be up to all of you to do the copy/paste and fit onto the guide yourselves. Later if we wantm images from the resources Destruk posted could be used or if someone has other images to use as a source we can discuss that and share. Suggestions/comments are welcome.

Edited by wtiger, 20 May 2009 - 03:51 AM.


#93 wtiger

wtiger

    Pinball Fan

  • VIP
  • 1,148 posts
  • Location:Los Angeles, CA

  • Flag: United States of America

  • Favorite Pinball: Junkyard


Contributor

Posted 23 May 2009 - 11:30 PM

I haven’t worked on figuring out where the various plastics pieces go for a few days, but that shouldn’t stop all of you from continuing on and trying to figure it out on your own just like I am. We’ll go ahead and prepare the image we will use as a guide and at least get that part out of the way, then I’ll go over the first piece placement. For those who don’t have Photoshop, I’ll attempt to walk you through it using The Gimp. This will pretty much only be my second or third time using it, so bare with me.

Go ahead and start up The Gimp. Now load the pdf manual for the table that you downloaded from the IPDB into Acrobat Reader. Go to the last page of the manual which is page 26 of the file (the page number printed on the manual page is 27). Click on the page to select it (it should turn a light blue). Now go to the edit menu and select copy (or use the keyboard shortcut CTRL-C). This will put it into the clipboard. Switch over to The Gimp. Go to the File Menu, then Create, then From Clipboard:


Now we need to crop the image to just the portion we want. Select the Crop tool and make a rectangle selection somewhere on your image. Grab in the center and move it so that top and left guide is on the top and outer line of the playfield image:


Now grab on the right side of your crop selection in the center between the top and bottom so that you can move the selection to the right edge of the image:


Now do the same for the bottom:


Now hit enter on the keyboard to complete the crop. Your image should be around 534 x 1210. Now we want to resize it so that it matches the ID-Guide image we created previously. Go to the Image menu and select Scale Image:


For the width enter 909 (if the width of your ID-Guide image is different, then use that value) and click on the Scale button. Your image should now be around 909 x 2060.

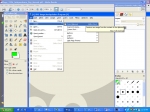
Now we want to copy this image so we can paste it over our ID-Guide image to make sure everything aligns equally. Go to the edit menu and select Copy. Now go to the file menu and load in your ID-Guide image. Now go to the Edit menu, select Paste As, and select New Layer:


Now set the transparency to about 50:


Now we want to zoom in so we can align the layer. Select 100% zoom by hitting the 1 key on the keyboard. I just realized that we actually should have matched our ID-Guide image both width and height earlier, but that’s OK. We’ll go ahead and fix that now. Select the move tool first (it’s two icons to the left of the crop tool). Right click on our image and select Layer then Scale Layer:


Now click on the chain link so we can change the height and not affect the width. Type in 2048 for the height (again, this is assuming that your ID-Guide image is 909 x 2048 – if not, make sure you use the height of your image):


Now align the two layers (you can use the flippers, the left inlane hole, and the bottom curve of the upper left plastic piece as guides):


Once you have both aligned as close as you can get make sure you turn the opacity back up to 100%.


At this point go ahead and save your image. We want to use a format that maintains the separate layers so either use the native Gimp format, or something like Photoshop’s .psd. Call the file ID-Plastic-Guide. We will be using this file to add more layers for the plastic images we copy and paste from pictures from the resource images that hopefully you already downloaded or from the image I previously posted that was from an eBay listing.
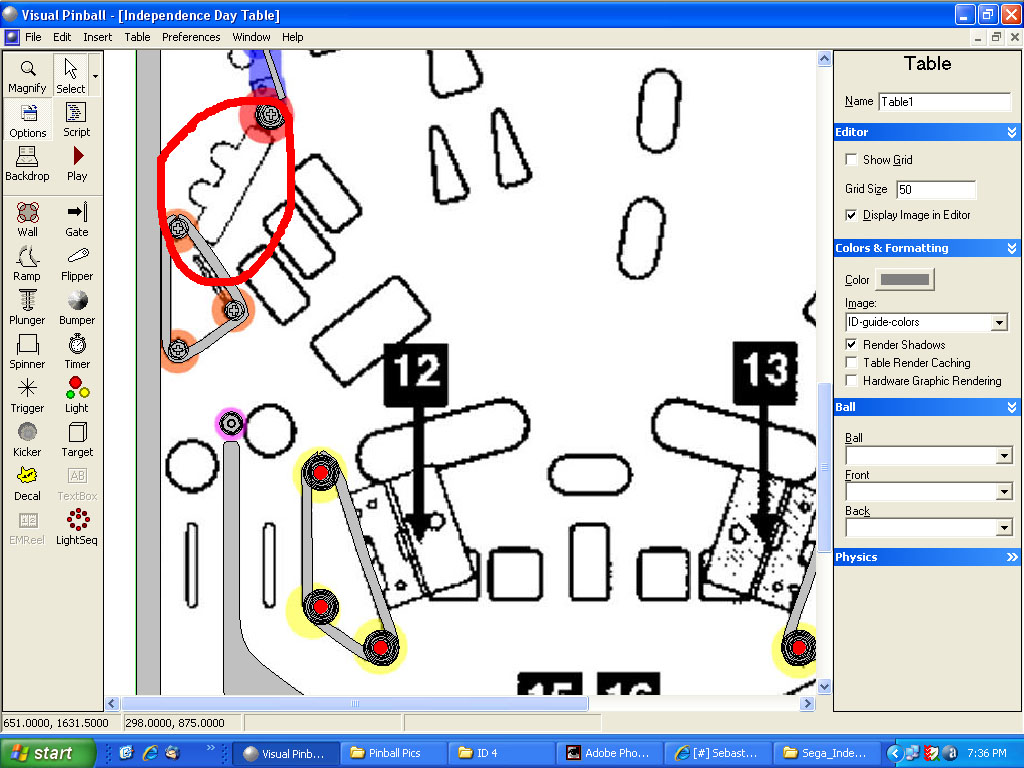
I’m going to use the eBay image for now. I’ve loaded that image into The Gimp and zoomed to 200%. I selected the Free Select Tool to make an outline around the portion I want (note, this particular plastic piece in the image I’m using apparently is broken and is missing part of the top portion). After you’ve completed your selection it should look something like this:


Copy the selection (Edit Copy or CTRL-C). Switch over to your ID-Plastic-Guide image and Edit, Paste as, New Layer:


Now rotate the selection 180 degrees and move it down to near where it belongs:


Now you must continue to move, rotate, and scale until it is lined up as best as you can get it (don’t forget to turn the transparency to 50 so you can see where it needs to be aligned to). NOTE: When scaling, hold down the CTRL key so that it scales uniformly. When done, it should look something like this:


Turn the opacity back up to 100. Now we must do this for all of the other pieces. I’m still figuring out where they all go, but see if you can figure it out.
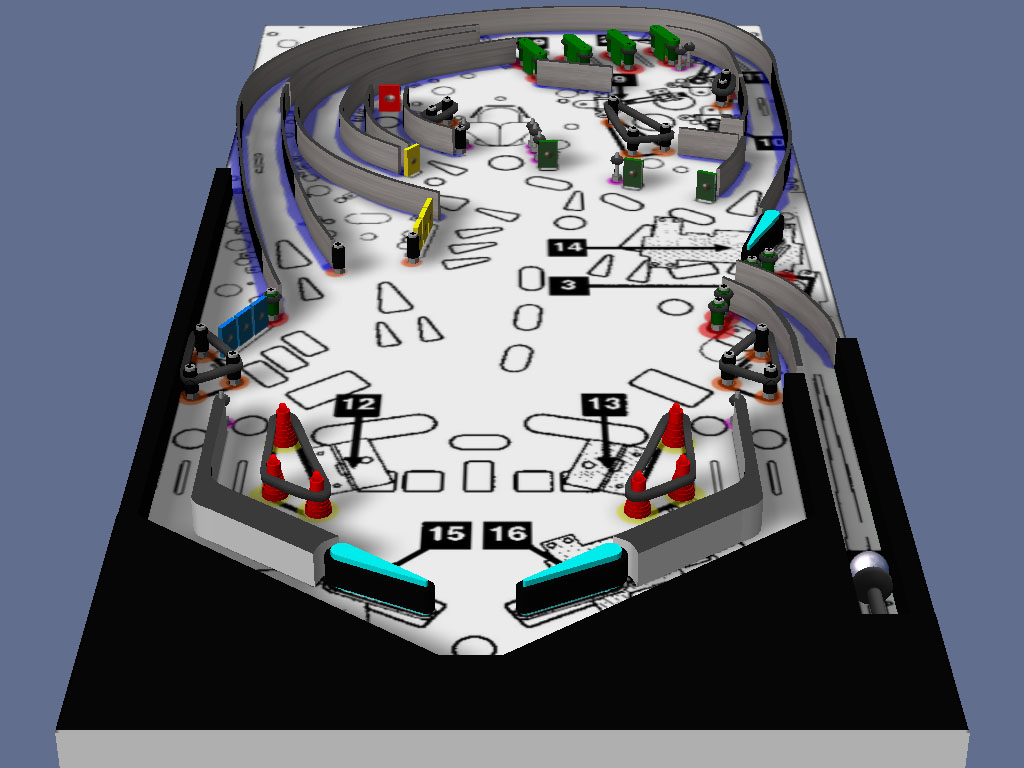

Here’s how this first piece looks on our table:


This was accomplished by saving the file as a jpg and then importing it into my table. To make things easier, you might want to make a dummy table for building your plastics. Just create a new table, make sure to set the table width to 1000 (which it should be by default) and the height to 2300. Import the plastic guide and start building your walls. You can then just copy the wall objects from your dummy table and paste them into your working table and they will copy into the same position. Set the bottom height to 50 and top height to 55.

Edited by wtiger, 23 May 2009 - 11:32 PM.


#94 ynneBBenny

ynneBBenny

    Benny

  • Charter Member
  • 419 posts
  • Location:Melbourne Australia

  • Flag: Australia

  • Favorite Pinball: Fire Power

Posted 24 May 2009 - 01:10 PM

Ha Tiger, the time taken to write up all that as well as get screen shots etc, you could have made 4 video tutorials. smile.gif ( You did such a great job on the last video)
I notice its been viewed 147 times already.
Thanks for taking the time to share all those tips though.

PS I made a video splash screen for the start of all videos if you want to use it

Let me know and I'll host the lossless file if needed.

#95 wtiger

wtiger

    Pinball Fan

  • VIP
  • 1,148 posts
  • Location:Los Angeles, CA

  • Flag: United States of America

  • Favorite Pinball: Junkyard


Contributor

Posted 24 May 2009 - 04:26 PM

I'll try to duplicate it in video this weekend. A lot of it was trial and error since I'm not really familiar with The Gimp.

#96 wtiger

wtiger

    Pinball Fan

  • VIP
  • 1,148 posts
  • Location:Los Angeles, CA

  • Flag: United States of America

  • Favorite Pinball: Junkyard


Contributor

Posted 25 May 2009 - 02:41 AM

www,
Nice splash screen. I'm not video savy, so I wouldn't know how to edit/merge it with the video from CamStudio. I made a video tutorial basically duplicating what I posted above. I will send a PM Noah so he can post it here like he did with the other tutorial I did.

Anyway, if you want it, it's here (about 36mb):

http://www.savefile.com/files/2114753

#97 ynneBBenny

ynneBBenny

    Benny

  • Charter Member
  • 419 posts
  • Location:Melbourne Australia

  • Flag: Australia

  • Favorite Pinball: Fire Power

Posted 25 May 2009 - 01:40 PM

QUOTE (wtiger @ May 25 2009, 12:41 PM) <{POST_SNAPBACK}>
www,
Nice splash screen. I'm not video savy, so I wouldn't know how to edit/merge it with the video from CamStudio. I made a video tutorial basically duplicating what I posted above. I will send a PM Noah so he can post it here like he did with the other tutorial I did.

Anyway, if you want it, it's here (about 36mb):

http://www.savefile.com/files/2114753


Hey Tiger,
I already saw the gem you added to the video gallery. http://vpforums.org/...d...l&f_id=2325
I'm wondering what was quicker to do, the text tute, or the video tute? (I'm not been smart, I'm genuinly interested)
All I can say, is for me the video tute is far easier to understand.
Thanks so much for playing ball, I think you are helping to set a trend for some great video lessons.
You should also know that such a tute will be of help to many hundred people, for years to come.
Oh BTW thats exactly the tutorial aspects I have envisaged. Using free software to create tables.

Ha the splash screen, I best put it to use and make a tutorial myself hey.

Sorry to temporarily hijack this thread guys. sad.gif

#98 wtiger

wtiger

    Pinball Fan

  • VIP
  • 1,148 posts
  • Location:Los Angeles, CA

  • Flag: United States of America

  • Favorite Pinball: Junkyard


Contributor

Posted 25 May 2009 - 04:11 PM

QUOTE (WWW @ May 25 2009, 06:40 AM) <{POST_SNAPBACK}>
QUOTE (wtiger @ May 25 2009, 12:41 PM) <{POST_SNAPBACK}>
www,
Nice splash screen. I'm not video savy, so I wouldn't know how to edit/merge it with the video from CamStudio. I made a video tutorial basically duplicating what I posted above. I will send a PM Noah so he can post it here like he did with the other tutorial I did.

Anyway, if you want it, it's here (about 36mb):

http://www.savefile.com/files/2114753


Hey Tiger,
I already saw the gem you added to the video gallery. http://vpforums.org/...d...l&f_id=2325
I'm wondering what was quicker to do, the text tute, or the video tute? (I'm not been smart, I'm genuinly interested)
All I can say, is for me the video tute is far easier to understand.
Thanks so much for playing ball, I think you are helping to set a trend for some great video lessons.
You should also know that such a tute will be of help to many hundred people, for years to come.
Oh BTW thats exactly the tutorial aspects I have envisaged. Using free software to create tables.

Ha the splash screen, I best put it to use and make a tutorial myself hey.

Sorry to temporarily hijack this thread guys. sad.gif


WWW,
As for speed/time, the Video was quicker, but for me difficulty was a little bit more. I'm trying not to mess up and say the usual "ummmm" kind of thing too much, etc. I did mess up a few times with the instructions and the mention of the CTRL key but I think all in all it's OK (just goes to show you that I didn't rehearse it first).

#99 neoblood

neoblood

    Enthusiast

  • Charter Member
  • 381 posts
  • Location:USA

  • Flag: United States of America

  • Favorite Pinball: bop

Posted 25 May 2009 - 04:37 PM

Wtiger, Thanks much for the video tuts. It's so much easier to follow along with the techniques when you have an example running right next to you. I agree with WWW that videos are easier for both the teacher and the students. Though I can also see the need for a quick reference that people can refer to when they need to. You've taken care of both here which is fantastic. I would geuss that making these videos will get easier as you do more and the "ahhh's" will taper off as you get more comfortable with the sound of your own voice tongue.gif Personally I don't mind natural pauses and a few ahhhh's here and there.

A Pinball a day takes the boredom away

#100 wtiger

wtiger

    Pinball Fan

  • VIP
  • 1,148 posts
  • Location:Los Angeles, CA

  • Flag: United States of America

  • Favorite Pinball: Junkyard


Contributor

Posted 25 May 2009 - 07:14 PM

neoblood,
Thanks for the feedback. I'll try to do more videos in the future along with the usual text/pictures posts.