Jump to content


Photo
- - - - -

UWQHD (3440x1440) 21:9 Playfield Cabinet Build Log

21:9 UWQHD Cabinet Build Log

  • Please log in to reply
100 replies to this topic

#61 BoltBait

BoltBait

    Software Developer

  • Members
  • PipPipPip
  • 456 posts
  • Location:Sacramento, CA

  • Flag: United States of America

  • Favorite Pinball: Elvira, Whitewater, Big Bang Bar, Fun House and All the old EM tables of the 70s that I played as a kid (including Buccaneer, Spirit of 76, and King Kool)

Posted 02 January 2026 - 06:08 AM

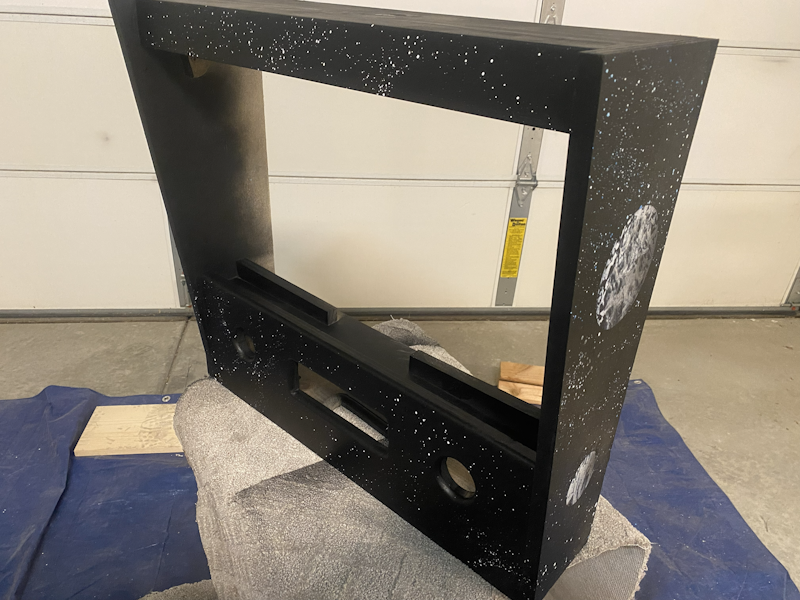
I tackled the backglass portion of the new cabinet today.
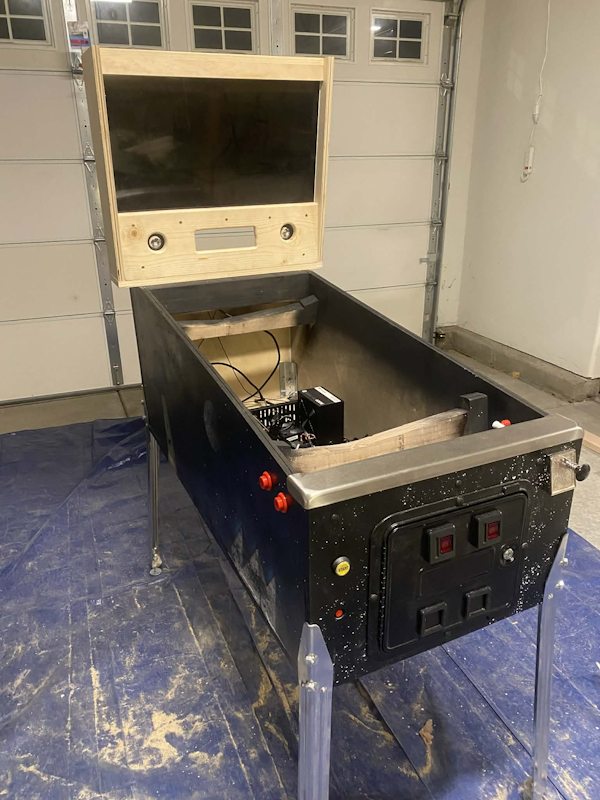
 

BackglassProgress.png


I'm using the same 27" monitor and speakers from the old build.
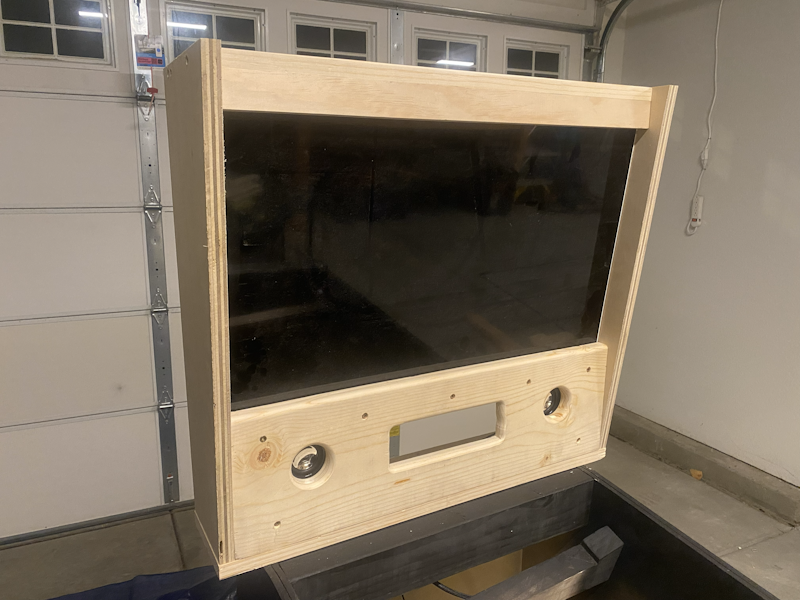
 

BackglassFont.png


I need to head back over to Home Depot and pick up some more wood filler so I can prep this for painting.


Here's the inside:
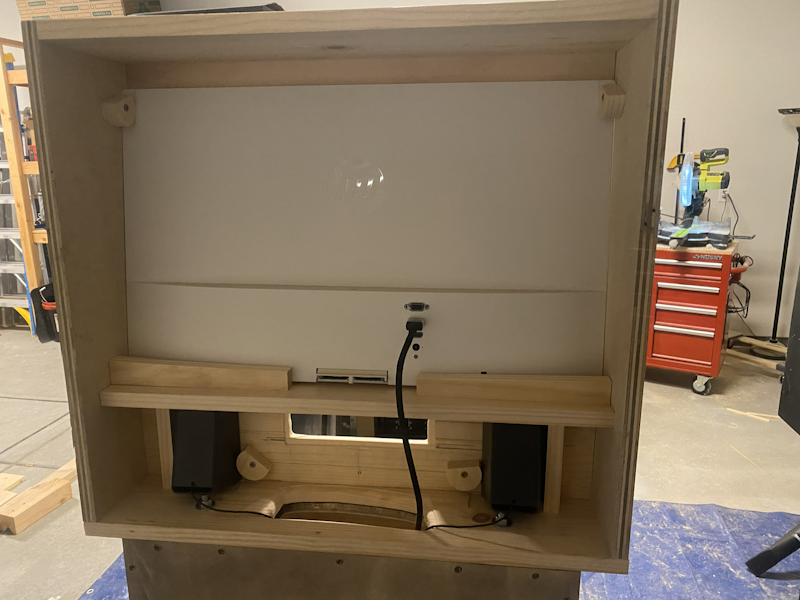
 

BackglassBack.png


Even though I'm using the same screen and speakers as my old build, I wanted to make the dimensions to be more square instead of somewhat squat.
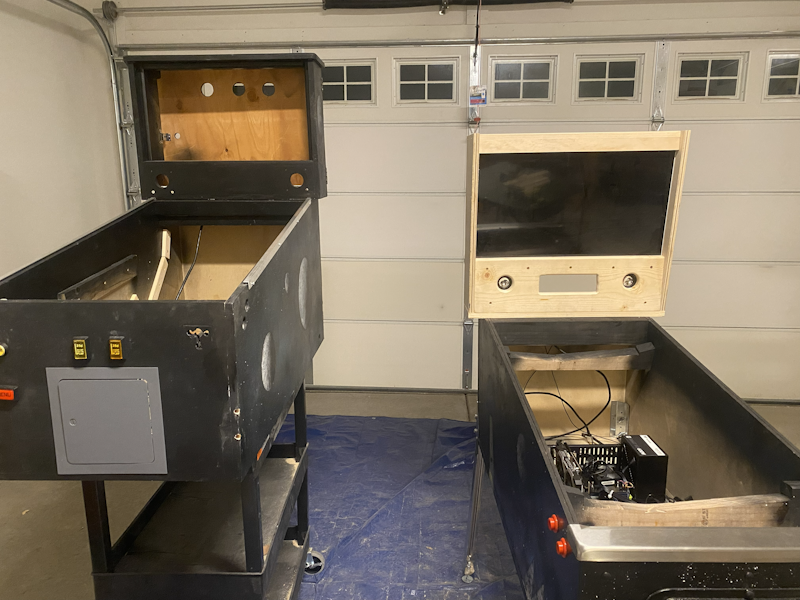
 

BackglassOldvsNew.png


I think it is really turning out nice.


Oh yeah, here's a picture of the inside so you can see where the PC is located:
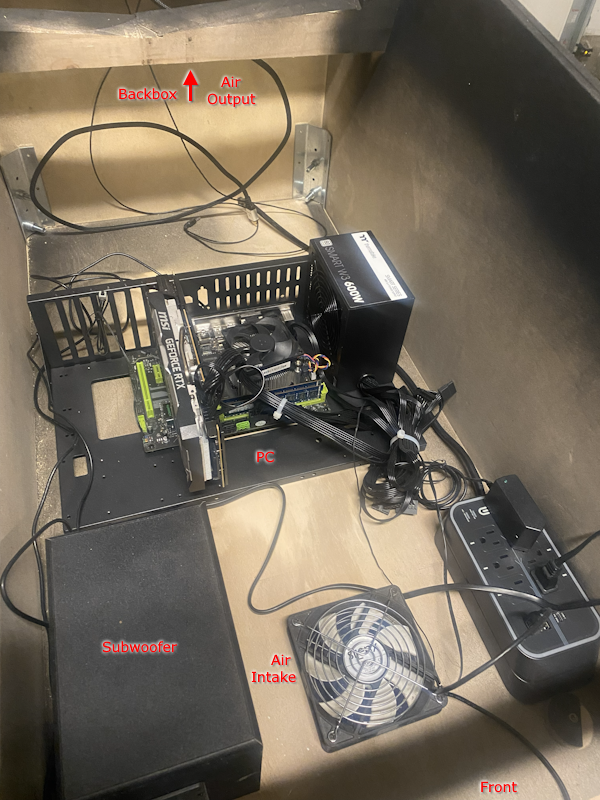
 

PCInstalled.png


Next up, prep and paint the backbox. 

Then, wiring up all the buttons. 

And finally, siderails and glass.


I'm a little behind my self-imposed schedule.  I wanted to be done by Christmas, but I also want to take my time to do it right.


How I built my B2S Pinball Cabinet, step-by-step, with pictures!  Full-sized cabinet for ~$700. Believe me, if I can do it, so can you!

"Making anything with your hands goes wonderfully with whatever in your life you would consider your grind." ~Nick Offerman


#62 digitalarts

digitalarts

    Pinball Fan

  • Members
  • PipPipPipPip
  • 874 posts
  • Location:Bavaria

  • Flag: Germany

  • Favorite Pinball: Judge Dredd (have the real one); all virtual EM's

Posted 02 January 2026 - 04:55 PM

I'm Sure you will be done with it before Christmas (don't name exactly the year 😉)
And if it will be the Same as mine (and a lot of Other Cab builders) it become NEVER Finish enough 😁😜

#63 BoltBait

BoltBait

    Software Developer

  • Members
  • PipPipPip
  • 456 posts
  • Location:Sacramento, CA

  • Flag: United States of America

  • Favorite Pinball: Elvira, Whitewater, Big Bang Bar, Fun House and All the old EM tables of the 70s that I played as a kid (including Buccaneer, Spirit of 76, and King Kool)

Posted 05 January 2026 - 01:37 AM

Working on the backglass today.
 
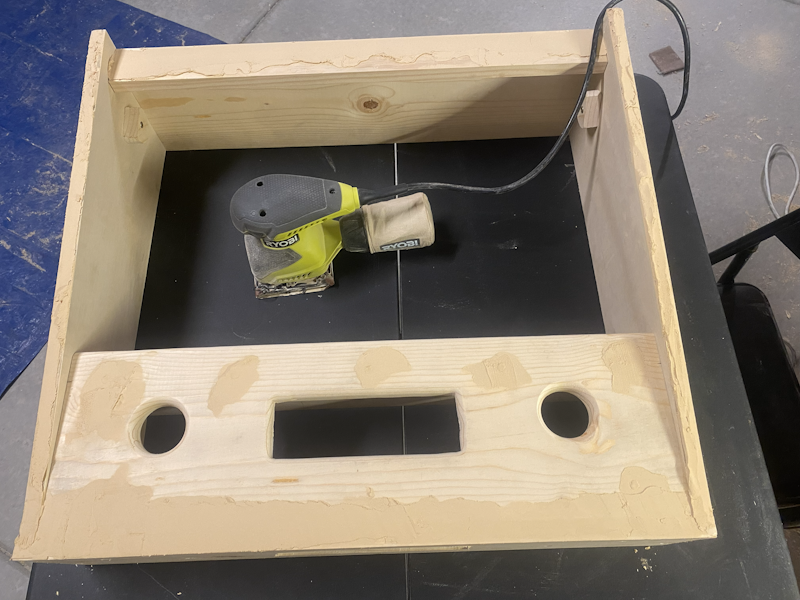
I put wood filler on all the screw holes and seams:
 
BackglassPatched.png
 
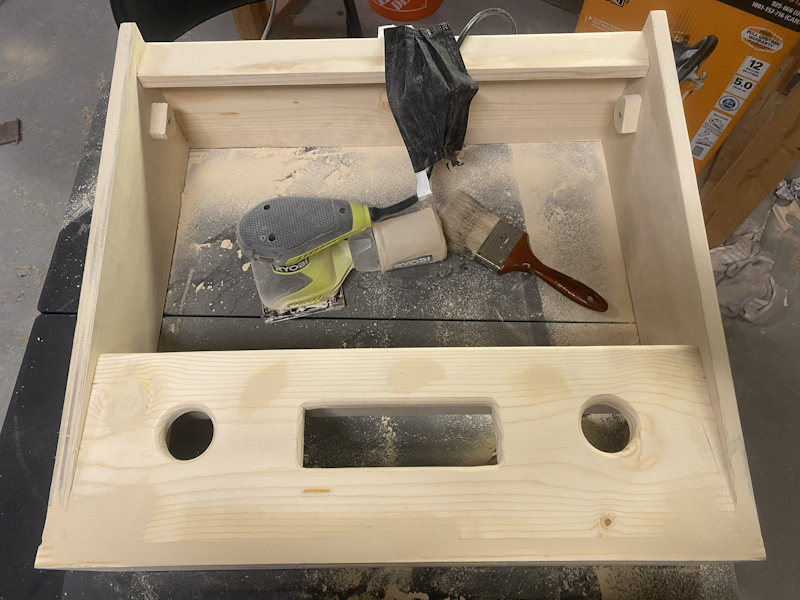
Next, I waited over night for it to dry, then I sanded everything smooth.
 
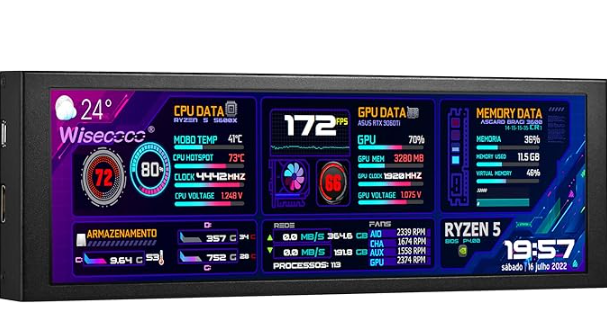
BTW, You've probably noticed the hole between the speakers. That's for the DMD.  I went a little "off script" for this one. I bought this:
 
DMD.png
 
https://www.amazon.com/dp/B0BXL2Q53Y  it was only $45!  It's a little small (at 7.84" HD IPS 1280x400), but I think with my build, it fits nicely.
 
(This screen is normally used by gamers inside of their transparent cases to display CPU thermal and fan speed.)
 
My previous build did not have a DMD, so this will be a nice addition.
 
 BackglassSanded.png
 
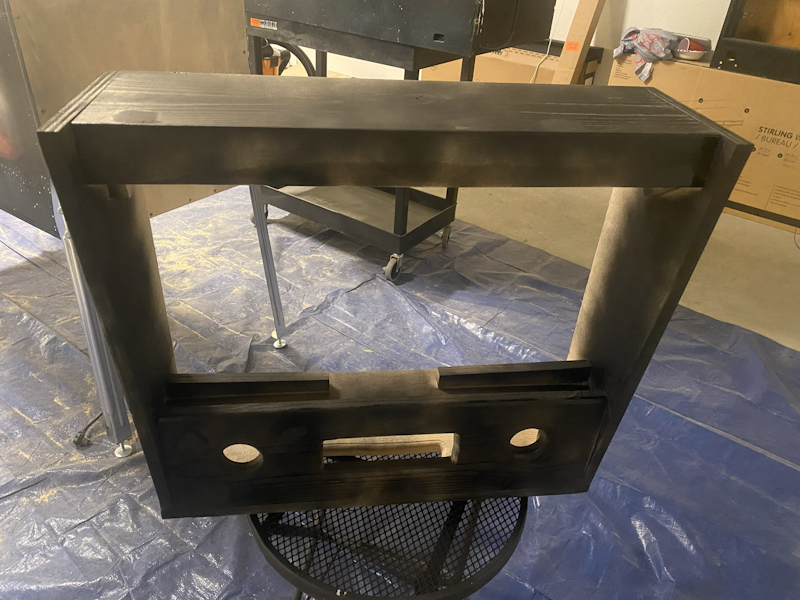
Now that everything's looking good, it's time to paint the backglass portion.
 
 BackglassPaint1.png
 
Just a light coat of black to start.
 
Friendly reminder, be sure to always wear a mask when sanding or painting.  I'm sure you don't want to paint the inside of your lungs black!


EDIT:  And, the backglass paintjob is complete:


BackglassPaint2.png


Next up, wiring up all the buttons. 
 
And finally, siderails and glass.

Edited by BoltBait, 05 January 2026 - 08:25 AM.

How I built my B2S Pinball Cabinet, step-by-step, with pictures!  Full-sized cabinet for ~$700. Believe me, if I can do it, so can you!

"Making anything with your hands goes wonderfully with whatever in your life you would consider your grind." ~Nick Offerman


#64 BoltBait

BoltBait

    Software Developer

  • Members
  • PipPipPip
  • 456 posts
  • Location:Sacramento, CA

  • Flag: United States of America

  • Favorite Pinball: Elvira, Whitewater, Big Bang Bar, Fun House and All the old EM tables of the 70s that I played as a kid (including Buccaneer, Spirit of 76, and King Kool)

Posted 06 January 2026 - 02:37 AM

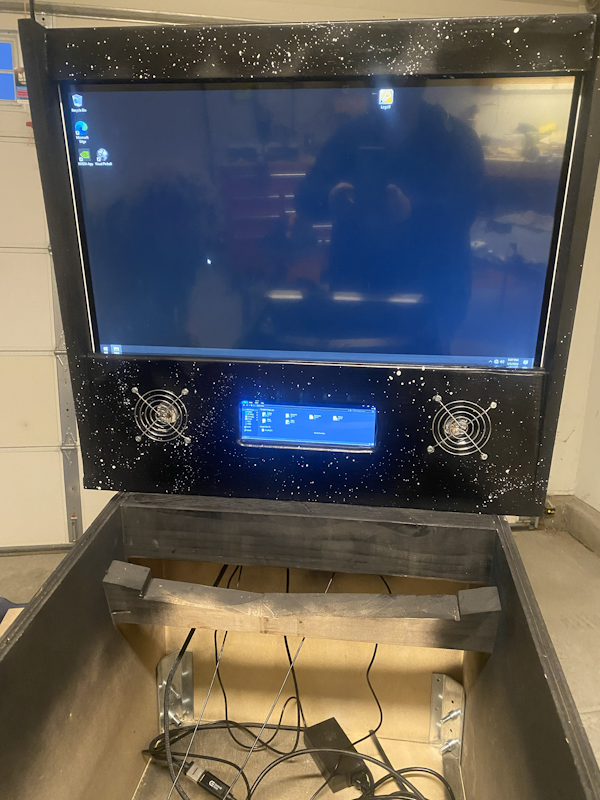
A friend came over and helped with the new pinball cab.


He removed the password from the local Windows account and got it powering up right to the desktop (which will eventually automatically run PinballY).


I got the DMD mounted and working:


DMDInstall.png


Plus, I mounted the speaker covers (fan finger guards).  Those came straight over from the old build.


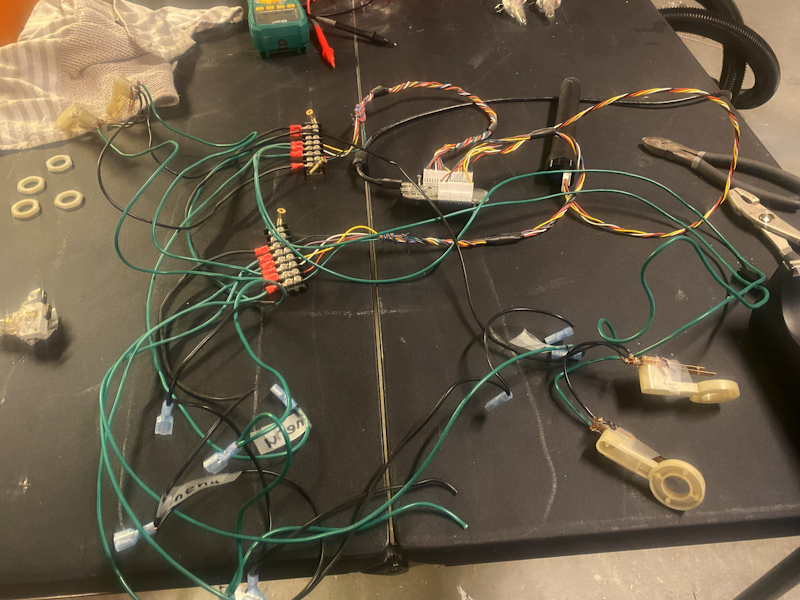
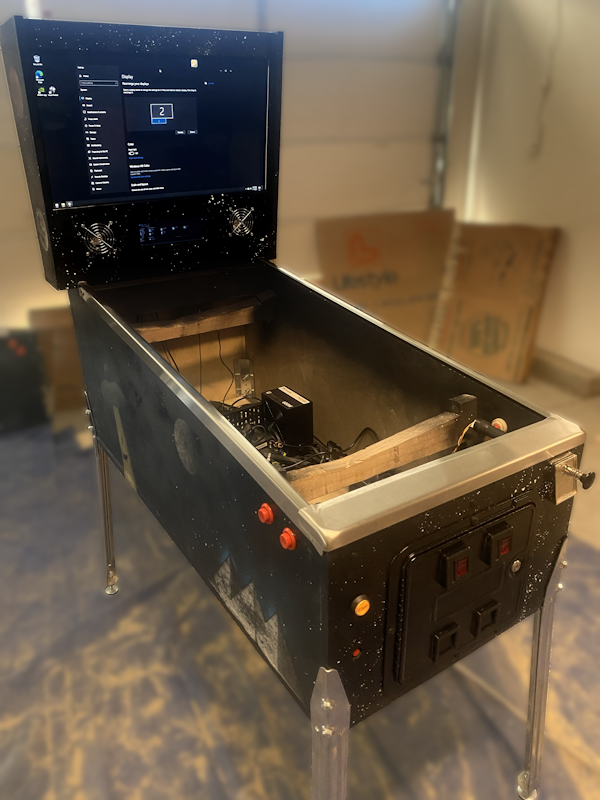
Next, I started working on the wiring.  I ripped the guts out from the old system...


Guts.png


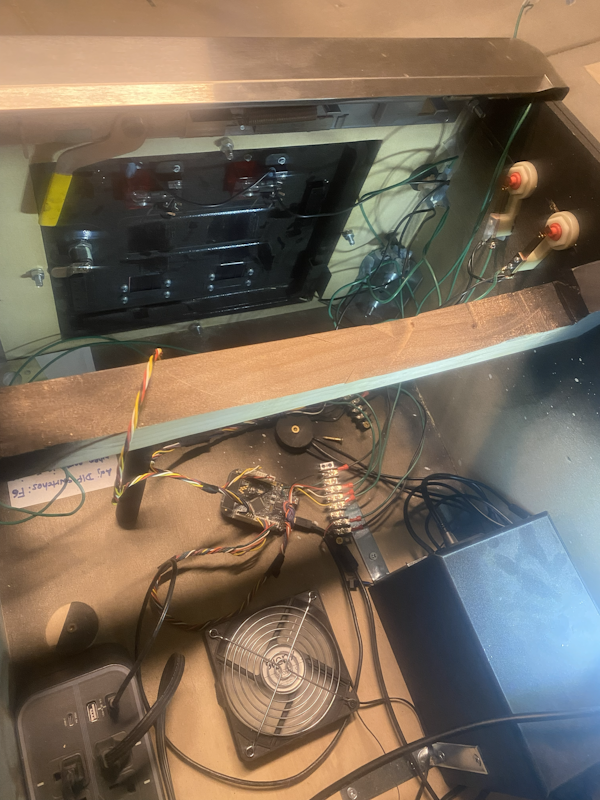
Then, I transplanted it right into the new cabinet:


Transplant.png


I still have a lot to fix up wiring wise. For example, the coin in buttons need completely new wiring.


I'm starting to see the light at the end of the tunnel!


Current plan:


1. Fix up the wiring

2. Hookup main playfield monitor

3. Install side rails

4. Order the new glass

5. Install pinball tables

6. Have fun!


Somewhere along the way, I need to figure out what to do with the space between the playfield monitor and the sides of the case.  Still thinking... thinking...


Edited by BoltBait, 06 January 2026 - 02:46 AM.

How I built my B2S Pinball Cabinet, step-by-step, with pictures!  Full-sized cabinet for ~$700. Believe me, if I can do it, so can you!

"Making anything with your hands goes wonderfully with whatever in your life you would consider your grind." ~Nick Offerman


#65 Tesla

Tesla

    Pinball Fan

  • Silver Supporter
  • 1,422 posts
  • Location:Texas, USA

  • Flag: United States of America

  • Favorite Pinball: Star Trek - TNG

Posted 06 January 2026 - 03:09 AM

1. He removed the password from the local Windows account and got it powering up right to the desktop ... which will eventually automatically run PinballY.


2. I got the DMD mounted and working:


3. Next, I started working on the wiring.  I ripped the guts out from the old system...


1. Right. Mine enters the password for me and boots directly into PinballY after everything else loads.


2. Nice


3. Looks like a KL25z with some headers soldered-into it. I use a Pinscaped-KL25z for buttons and variable-nudging support. I even got DOF running with it recently.


Edited by Tesla, 06 January 2026 - 04:47 AM.


#66 BoltBait

BoltBait

    Software Developer

  • Members
  • PipPipPip
  • 456 posts
  • Location:Sacramento, CA

  • Flag: United States of America

  • Favorite Pinball: Elvira, Whitewater, Big Bang Bar, Fun House and All the old EM tables of the 70s that I played as a kid (including Buccaneer, Spirit of 76, and King Kool)

Posted 06 January 2026 - 04:10 AM

3. Looks like a Pinscaped KL25z with the headers soldered-into it. That's what I use also (for buttons and variable-nudging support). I even got DOF running with it recently.


I have the Virtuapin controller.  https://virtuapin.ne...products_id=105


Looks like it is out of stock.


How I built my B2S Pinball Cabinet, step-by-step, with pictures!  Full-sized cabinet for ~$700. Believe me, if I can do it, so can you!

"Making anything with your hands goes wonderfully with whatever in your life you would consider your grind." ~Nick Offerman


#67 BoltBait

BoltBait

    Software Developer

  • Members
  • PipPipPip
  • 456 posts
  • Location:Sacramento, CA

  • Flag: United States of America

  • Favorite Pinball: Elvira, Whitewater, Big Bang Bar, Fun House and All the old EM tables of the 70s that I played as a kid (including Buccaneer, Spirit of 76, and King Kool)

Posted 08 January 2026 - 12:10 AM

Last night, I put the new side rails on the cabinet.  Looking good!


SideRailsOn.png


Just got back from the glass shop.  I ordered a piece of glass for the new cabinet.


Seven years ago, during my original build, I paid $47, today... $85.  Ouch!


Oh well, it should be ready by Friday Monday.


What's left?


  1. I just have to wire up the RESET button and the two COIN IN buttons. (Left for last because... soldering)
  2. Install the playfield monitor.
  3. Move it from the garage to the arcade room.
  4. Start loading tables. This will take a while as I have to tinker with the scale/zoom for each one.
  5. Install PinballY menu system.
  6. Play some Pinball!


I should be in business "Real Soon Now" ™  :lusty:  


Edited by BoltBait, 11 January 2026 - 07:29 AM.

How I built my B2S Pinball Cabinet, step-by-step, with pictures!  Full-sized cabinet for ~$700. Believe me, if I can do it, so can you!

"Making anything with your hands goes wonderfully with whatever in your life you would consider your grind." ~Nick Offerman


#68 mjr

mjr

    Pinball Wizard

  • Members
  • PipPipPipPipPip
  • 3,334 posts

  • Flag: United States of America

  • Favorite Pinball: Medieval Madness

Posted 08 January 2026 - 01:16 AM

> Just got back from the glass shop.  I ordered a piece of glass for the new cabinet.

> Seven years ago, during my original build, I paid $47, today... $85.  Ouch!


Inflation at work.


For anyone else looking for glass, I'll put in a plug for Marco Specialties (marcospecialties.com) here.  If you have any use for TWO pieces of playfield glass, you can get a cheaper per-piece rate from Marco by ordering their 2-pack, which is currently $125.  And you can often get it shipped free - they run free shipping promotions every couple of months.  So if you have a friend who's also building a cab and you time it right, you can get them for basically $65 apiece, which is probably better than any local glass shop will offer.  Kind of hard to believe that you can have it shipped cross-country for cheaper than buying it locally, but that's probably because the local glass shop is treating it as a custom job and marking it up accordingly.


Edited by mjr, 08 January 2026 - 01:16 AM.


#69 BoltBait

BoltBait

    Software Developer

  • Members
  • PipPipPip
  • 456 posts
  • Location:Sacramento, CA

  • Flag: United States of America

  • Favorite Pinball: Elvira, Whitewater, Big Bang Bar, Fun House and All the old EM tables of the 70s that I played as a kid (including Buccaneer, Spirit of 76, and King Kool)

Posted 08 January 2026 - 01:34 AM

> Just got back from the glass shop.  I ordered a piece of glass for the new cabinet.

> Seven years ago, during my original build, I paid $47, today... $85.  Ouch!


Inflation at work.


Very true.


the local glass shop is treating it as a custom job and marking it up accordingly.


That's because my cabinet IS a custom job.  The tempered glass I ordered is 3/16" thick (standard), 21" wide (standard) by 42" tall (def not standard).


I also ordered it WITHOUT the tempered glass logo.


How I built my B2S Pinball Cabinet, step-by-step, with pictures!  Full-sized cabinet for ~$700. Believe me, if I can do it, so can you!

"Making anything with your hands goes wonderfully with whatever in your life you would consider your grind." ~Nick Offerman


#70 BoltBait

BoltBait

    Software Developer

  • Members
  • PipPipPip
  • 456 posts
  • Location:Sacramento, CA

  • Flag: United States of America

  • Favorite Pinball: Elvira, Whitewater, Big Bang Bar, Fun House and All the old EM tables of the 70s that I played as a kid (including Buccaneer, Spirit of 76, and King Kool)

Posted 10 January 2026 - 01:18 AM

What's left?


  1. I just have to wire up the RESET button and the two COIN IN buttons. (Left for last because... soldering) DONE
  2. Install the playfield monitor. DONE
  3. Move it from the garage to the arcade room. DONE
  4. Start loading tables. This will take a while as I have to tinker with the scale/zoom for each one.  IN PROCESS
  5. Install PinballY menu system.  LATER!
  6. Play some Pinball!  IN PROCESS!


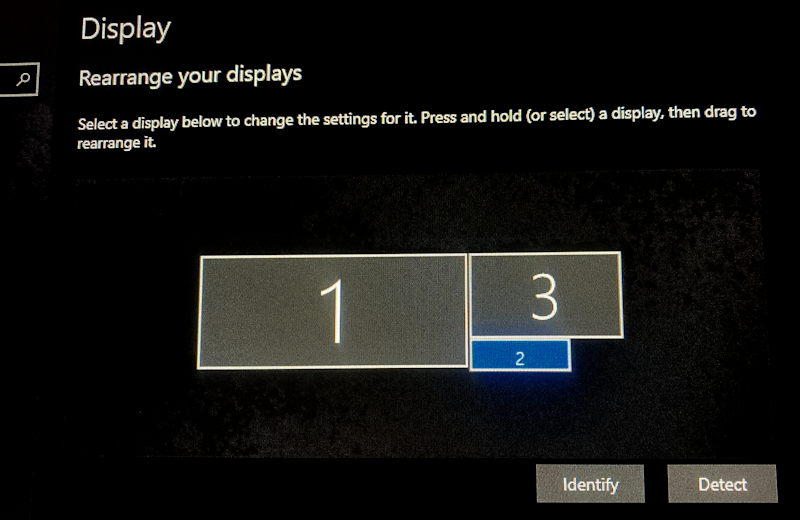
After I wired up the rest of the buttons, I installed the main playfield screen:


ScreenLayout.png


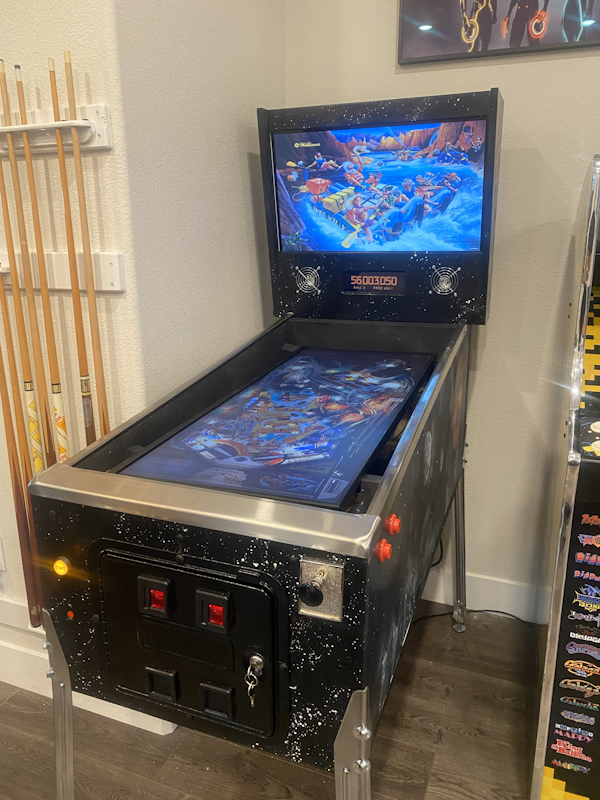
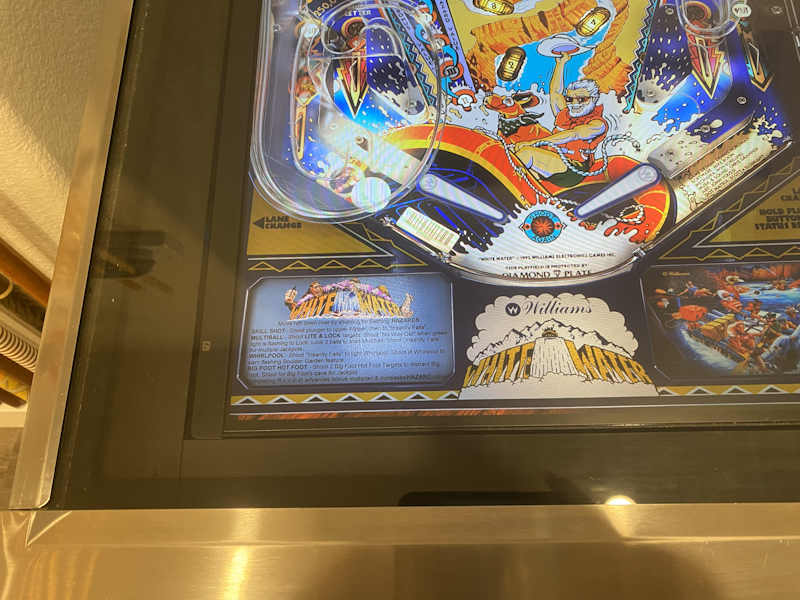
While I'm waiting for the glass to arrive (Monday) I'm loading up some tables and tweaking them to look good on the 21:9 playfield.


ReadyForGlass.png


I was initially a little concerned that the DMD that I chose was too small, I no longer think that!


My first pinball machine didn't have one, so I'm finding that I really like the look of it.


Some of my old EM tables utilize the DMD screen to show the manufacturer's logo--I had no idea this was a function.  That's a nice touch!


So, what's left?


  1. Pick up the glass and install it (Monday)
  2. Install the rest of the tables and tweak them to look good on the 21:9 playfield
  3. I still need to cut some wood for the playfield frame.
  4. Install PinballY and capture video for all the tables.
  5. Play more pinball!


BTW, I was wondering what kind of framerate my new setup was getting... 1500+ fps on VP9.  On VPX 144+ fps with a demanding table (Funhouse)!  My graphics card is running at about 35% during all of this.  Fan noise is very low, so I'm very happy with my build.


Edited by BoltBait, 15 March 2026 - 09:11 AM.

How I built my B2S Pinball Cabinet, step-by-step, with pictures!  Full-sized cabinet for ~$700. Believe me, if I can do it, so can you!

"Making anything with your hands goes wonderfully with whatever in your life you would consider your grind." ~Nick Offerman


#71 Smitty2k1

Smitty2k1

    Hobbyist

  • Members
  • PipPip
  • 29 posts

  • Flag: ---------

  • Favorite Pinball: test

Posted 10 January 2026 - 02:31 AM


What's left?
 

  • I just have to wire up the RESET button and the two COIN IN buttons. (Left for last because... soldering) DONE
  • Install the playfield monitor. DONE
  • Move it from the garage to the arcade room. DONE
  • Start loading tables. This will take a while as I have to tinker with the scale/zoom for each one.  IN PROCESS
  • Install PinballY menu system.  LATER!
  • Play some Pinball!  IN PROCESS!
 
After I wired up the rest of the buttons, I installed the main playfield screen:
 
ScreenLayout.png
 
While I'm waiting for the glass to arrive (Monday) I'm loading up some tables and tweaking them to look good on the 21:9 playfield.
 
ReadyForGlass.png
 
I was initially a little concerned that the DMD that I chose was too small, I no longer think that!
 
My first pinball machine didn't have one, so I'm finding that I really like the look of it.
 
Some of my old EM tables utilize the DMD screen to show the manufacturer's logo--I had no idea this was a function.  That's a nice touch!
 
So, what's left?
 
  • Pick up the glass and install it (Monday)
  • Install the rest of the tables and tweak them to look good on the 21:9 playfield
  • I still need to cut some wood for the playfield frame.
  • Install PinballY and capture video for all the tables.
  • Play more pinball!
 
BTW, I was wondering what kind of framerate my new setup was getting... 1500+ fps on VP9.  On VPX there's a graph, but no numbers on it, so all I can tell is that the fps rating is off the chart!  My graphics card is running at about 35% during all of this.  Fan noise is very low, so I'm very happy with my build.

Easily some of the best cab art I've seen and I'm super excited to see some photos/videos of how the playfield looks with the 21:9 dialed in. I guess I didn't realize you made the playfield horizontal with ground instead of following the glass angle. Any specific reason?

#72 BoltBait

BoltBait

    Software Developer

  • Members
  • PipPipPip
  • 456 posts
  • Location:Sacramento, CA

  • Flag: United States of America

  • Favorite Pinball: Elvira, Whitewater, Big Bang Bar, Fun House and All the old EM tables of the 70s that I played as a kid (including Buccaneer, Spirit of 76, and King Kool)

Posted 10 January 2026 - 03:19 AM


Easily some of the best cab art I've seen and I'm super excited to see some photos/videos of how the playfield looks with the 21:9 dialed in. I guess I didn't realize you made the playfield horizontal with ground instead of following the glass angle. Any specific reason?


Thanks!  The art is surprisingly easy. I just watched a few youtube videos about spray can space scenes and gave it a try.


No, the angle of the monitor is about 6-8° and the side rails is about 10°.  The playfield monitor is very close to the glass at the bottom (near the lockdown bar) and a couple of inches from the glass at the far end (near the backglass).  Visually, I think it tricks your brain into thinking there's more depth there than there really is--like a real pinball machine.  It just adds to the depth simulated by the table rendering.


Edited by BoltBait, 10 January 2026 - 03:38 AM.

How I built my B2S Pinball Cabinet, step-by-step, with pictures!  Full-sized cabinet for ~$700. Believe me, if I can do it, so can you!

"Making anything with your hands goes wonderfully with whatever in your life you would consider your grind." ~Nick Offerman


#73 Tesla

Tesla

    Pinball Fan

  • Silver Supporter
  • 1,422 posts
  • Location:Texas, USA

  • Flag: United States of America

  • Favorite Pinball: Star Trek - TNG

Posted 10 January 2026 - 05:41 AM

Easily some of the best cab art I've seen 


Agreed. Nice work there @BoltBait . 


#74 digitalarts

digitalarts

    Pinball Fan

  • Members
  • PipPipPipPip
  • 874 posts
  • Location:Bavaria

  • Flag: Germany

  • Favorite Pinball: Judge Dredd (have the real one); all virtual EM's

Posted 10 January 2026 - 11:34 AM

One hint about the Display rearrangement:
At best, from left to right, with alignment of the upper Edge:
Playfield - Backglass - DMD
So you have fix positions of all screens, in the different vpin Program settings
(as vpinmame/registry, DMDext/dmddevice.ini, ZEN PFX-2-3, ...)

#75 BoltBait

BoltBait

    Software Developer

  • Members
  • PipPipPip
  • 456 posts
  • Location:Sacramento, CA

  • Flag: United States of America

  • Favorite Pinball: Elvira, Whitewater, Big Bang Bar, Fun House and All the old EM tables of the 70s that I played as a kid (including Buccaneer, Spirit of 76, and King Kool)

Posted 12 January 2026 - 06:45 AM

FYI, this following monitor was just announced:


Dell UltraSharp 52 Thunderbolt Curved Monitor - U5226KW | Dell USA


It may be the PERFECT 21:9 monitor for a digital pinball playfield.


It is curved, but just slightly at 4200R.  The width is 20.8" and the height is 48" which makes it perfectly standard playfield sized. It would fit like a glove!


Resolution is 6144 x 2560 at 120Hz


A total bargain at $2900.  :dblthumb:  


I may have to restart my cabinet project!  :bye2:


How I built my B2S Pinball Cabinet, step-by-step, with pictures!  Full-sized cabinet for ~$700. Believe me, if I can do it, so can you!

"Making anything with your hands goes wonderfully with whatever in your life you would consider your grind." ~Nick Offerman


#76 Smitty2k1

Smitty2k1

    Hobbyist

  • Members
  • PipPip
  • 29 posts

  • Flag: ---------

  • Favorite Pinball: test

Posted 12 January 2026 - 07:00 PM

FYI, this following monitor was just announced:
 
Dell UltraSharp 52 Thunderbolt Curved Monitor - U5226KW | Dell USA
 
It may be the PERFECT 21:9 monitor for a digital pinball playfield.
 
It is curved, but just slightly at 4200R.  The width is 20.8" and the height is 48" which makes it perfectly standard playfield sized. It would fit like a glove!
 
Resolution is 6144 x 2560 at 120Hz
 
A total bargain at $2900.  :dblthumb:  
 
I may have to restart my cabinet project!  :bye2:


The curve would drive me crazy! Even at that very high radius.

#77 Itchigo

Itchigo

    Pinball Wizard

  • Members
  • PipPipPipPipPip
  • 2,774 posts
  • Location:Chicago, Illinois

  • Flag: United States of America

  • Favorite Pinball: All


  • Trophies:

Posted 12 January 2026 - 07:52 PM


The width is 20.8" and the height is 48"

Too big for a standard cab. I'm using an old Sharpshooter (Game Plan) cab and it's 20.5" max wide, and about 41" max length. For a custom build it would be fine though- If you can afford it...


Founder of Rogue Pinball! https://roguepinball.com/index.php                 Making Pinball great again!!


partylikeits1776-.jpg


#78 PaKilter

PaKilter

    Neophyte

  • Members
  • Pip
  • 1 posts

  • Flag: United States of America

  • Favorite Pinball: Elvira and The Party Monsters

Posted 12 January 2026 - 07:57 PM

Nicely done!  I have a 29" 21:9 gaming monitor along with my retired gaming PC (circa 2018) that I am going to set up in a mid sized cab soon so I was happy to find your thread here.  I too prefer the older tables so I think I am on the right track.  


#79 BoltBait

BoltBait

    Software Developer

  • Members
  • PipPipPip
  • 456 posts
  • Location:Sacramento, CA

  • Flag: United States of America

  • Favorite Pinball: Elvira, Whitewater, Big Bang Bar, Fun House and All the old EM tables of the 70s that I played as a kid (including Buccaneer, Spirit of 76, and King Kool)

Posted 14 January 2026 - 01:48 AM

Update:


So, what's left?


  1. Pick up the glass and install it (Monday)  More like Tuesday.  DONE
  2. Install the rest of the tables and tweak them to look good on the 21:9 playfield  IN PROCESS
  3. I still need to cut some wood for the playfield frame. DONE Pictures below!
  4. Install PinballY and capture video for all the tables. LATER
  5. Play more pinball!  IN PROCESS


BTW, I was wondering what kind of framerate my new setup was getting... 1500+ fps on VP9.  On VPX there's a graph, but no numbers on it, so all I can tell is that the fps rating is off the chart!  My graphics card is running at about 35% during all of this.


The glass came in today. I picked it up and TRIED to install it on my cab. Boy is it tight!  I managed it, but I probably should have ordered it a little smaller than needed.  I'm not sure I'll ever be able to remove it!


I also finished the wooden frame around the playfield monitor:


Frame1.png


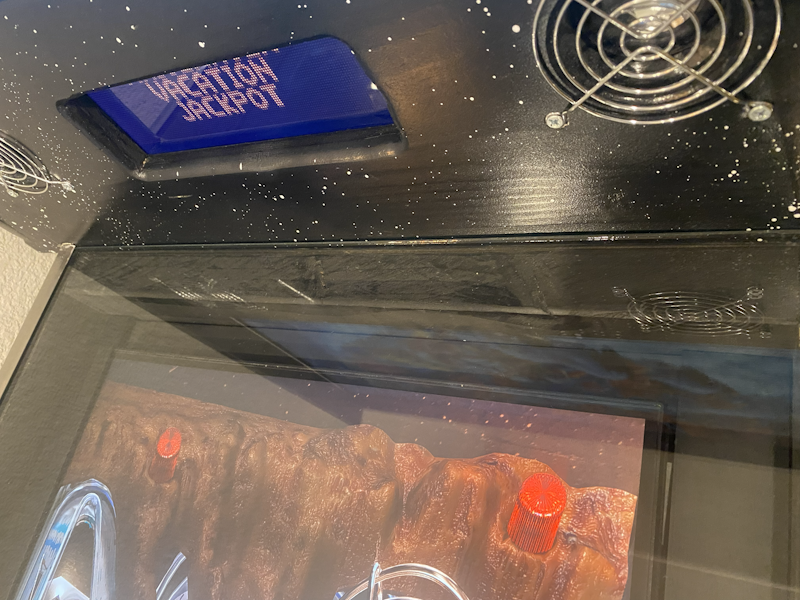
Kind of hard to see what's going on at the top of the playfield because of all the reflections, but here's a view of it:


Frame2.png


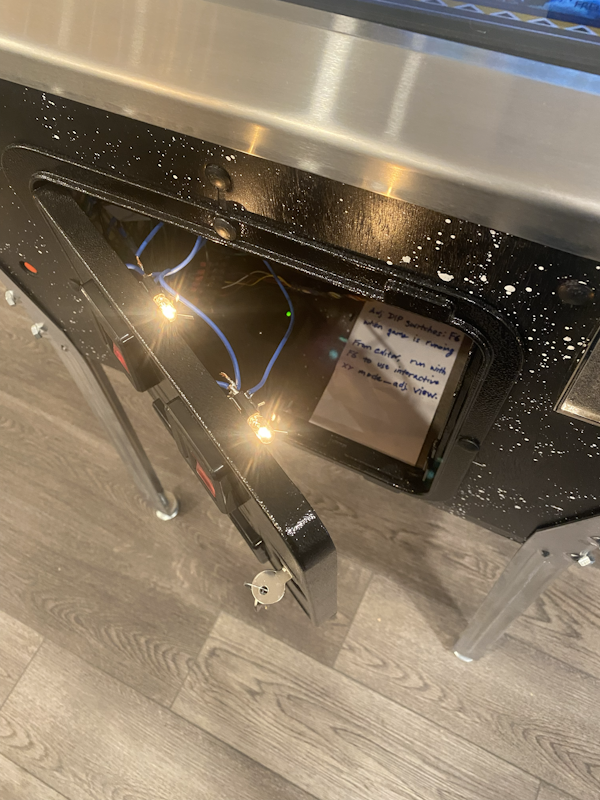
Here's what's behind the coin door:


CoinDoor1.png


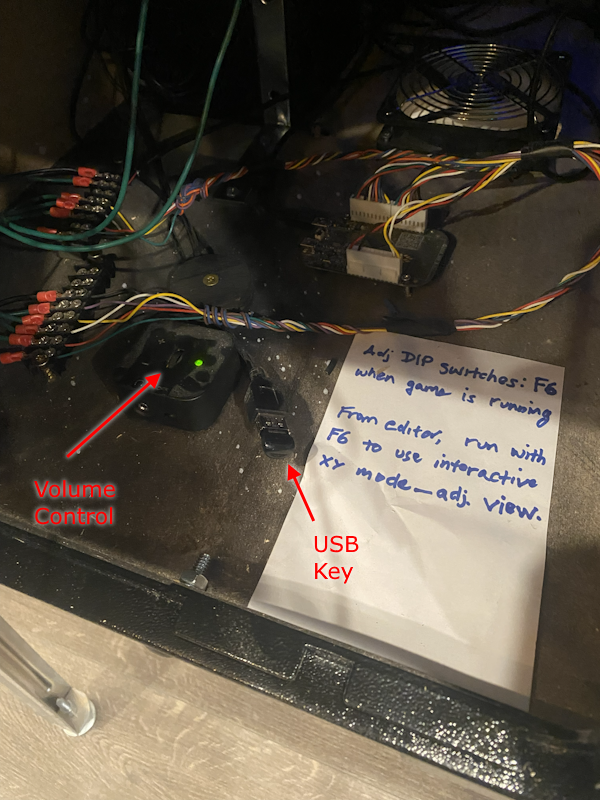
Detail view:


CoinDoor2.png


I have access to the volume control and a USB extension cord so I can transfer tables to the PC.


And, with that, I'd say the physical build is done!


What's left?

  1. Install more tables and tweak them for 21:9
  2. Configure the VirtuaPin Plunger Kit (https://virtuapin.ne...Guide v3.12.pdf)
  3. Install PinballY and capture attract videos
  4. And, as always, PLAY MORE PINBALL!


Anyone want to see pictures of my game room and how the pinball looks in the room?


Edited by BoltBait, 16 January 2026 - 06:55 PM.

How I built my B2S Pinball Cabinet, step-by-step, with pictures!  Full-sized cabinet for ~$700. Believe me, if I can do it, so can you!

"Making anything with your hands goes wonderfully with whatever in your life you would consider your grind." ~Nick Offerman


#80 rickh

rickh

    Enthusiast

  • Gold Supporter
  • 436 posts
  • Location:Raleigh

  • Flag: United States of America

  • Favorite Pinball: I love them all

Posted 14 January 2026 - 01:20 PM

Update:


So, what's left?


  1. Pick up the glass and install it (Monday)  More like Tuesday.  DONE
  2. Install the rest of the tables and tweak them to look good on the 21:9 playfield  IN PROCESS
  3. I still need to cut some wood for the playfield frame. DONE Pictures below!
  4. Install PinballY and capture video for all the tables. LATER
  5. Play more pinball!  IN PROCESS


BTW, I was wondering what kind of framerate my new setup was getting... 1500+ fps on VP9.  On VPX there's a graph, but no numbers on it, so all I can tell is that the fps rating is off the chart!  My graphics card is running at about 35% during all of this.


The glass came in today. I picked it up and TRIED to install it on my cab. Boy is it tight!  I managed it, but I probably should have ordered it a little smaller than needed.  I'm not sure I'll ever be able to remove it!


I also finished the wooden frame around the playfield monitor:


Frame1.png


Kind of hard to see what's going on at the top of the playfield because of all the reflections, but here's a view of it:


Frame2.png


Here's what's behind the coin door:


CoinDoor1.png


Detail view:


CoinDoor2.png


I have access to the volume control and a USB extension cord so I can transfer tables to the PC.


And, with that, I'd say the physical build is done!


What's left?

  1. Install more tables and tweak them for 21:9
  2. Install PinballY and capture attract videos
  3. And, as always, PLAY MORE PINBALL!


Anyone want to see pictures of my game room and how the pinball looks in the room?

Yes, I do!


Rickey

Intense Arcade

http://www.intensearcade.com