Jump to content


Photo

90's Workshop: Buildin' The Table


  • Please log in to reply
369 replies to this topic

#301 wtiger

wtiger

    Pinball Fan

  • VIP
  • 1,148 posts
  • Location:Los Angeles, CA

  • Flag: United States of America

  • Favorite Pinball: Junkyard


Contributor

Posted 31 January 2010 - 12:14 AM

QUOTE (destruk @ Jan 29 2010, 03:33 PM) <{POST_SNAPBACK}>
The ramps you guys are doing here take the most time. They look real good.


Thanks Destruk! Also thanks go out to JP for this technique.

I've spent a bit of time this afternoon learning The Gimp in preparation for how we will be doing the light inserts. It's been a while since I used it (at the beginning of this workshop) and prior to this workshop I had never used it before. It got a little frustrating trying to get it to do what I wanted it to do, but I think I finally figured things out.

Here's a preview of a light off test:


Here's a preview of a light on test:


I will hopefully make a post in little bit but it won't be using The Gimp quite yet.

#302 kruge99

kruge99

    Pinball Wizard

  • VPF Staff
  • 3,901 posts
  • Location:Markham, Ont.

  • Flag: Canada

  • Favorite Pinball: Black Knight, High Speed and Pin*Bot


Posted 31 January 2010 - 12:22 AM

Looks sweet!!


Best Regards,
Todd.

[proud owner of a Williams Solar Fire]

- It's called "The American Dream" because you have to be asleep to believe it.
George Carlin
- Truly great madness cannot be achieved without significant intelligence.
Henrik Tikkanen
- "Reality check, Michelle, Talk about composure, Total lack of. He's a man-- About-- 12 Feet Tall--"
Carrie Kelly
Posted Image

#303 wtiger

wtiger

    Pinball Fan

  • VIP
  • 1,148 posts
  • Location:Los Angeles, CA

  • Flag: United States of America

  • Favorite Pinball: Junkyard


Contributor

Posted 31 January 2010 - 02:01 AM

Lights

For the lights we will be doing a four image fading light version. I’ve never done this before so I will be learning this too. Originally I thought we’d only do a two image light on and light off, but I think it will be quite simple to do the four image version (at least for the four playfield images).

To build the playfield lights on our image, we need to add light inserts to our playfield in the right color and shape, and apply any text or graphic that appear on top. We will be doing all this using The Gimp.

We will start off working on the lights that have text on them. The first thing we need to do is to identify what font was used, and hopefully download that font from the internet. If there are any fonts used that we can’t identify or find a downloadable True Type font, we will either have to draw it ourself (using something like Inkscape) or cut it out from a picture.

Lets try to identify one of the font used for text. We need to find a good source image from the playfield. I went through my images and found this:


Now let’s cut out the portion we need and change it a bit so the text stands out more (basically use The Gimp to make a selection around the portion we want and then copy it to a new image, change the brightness and contrast so the black font stands out and rotate it so it’s straight). We want to use the Release City Destroyers on the left bottom.

Here’s the portion cut out and rotated:


Here’s after adjusting it a bit:


I’ve also found an image from the side of the cabinet that we could use as well (I did a bit of perspective correction to get the letters a little bit straighter):


Now go to the following website:

http://new.myfonts.com/WhatTheFont/

and upload either the adjusted image above, or the one from the side of the cabinet. After you upload the image click on the green continue button. The website will attempt to separate individual letters from the image you uploaded and guess at what letter they are. If it guessed wrong, you have the opportunity to tell it what the correct letter is by typing the correct letter in the box:


Once you have finished correcting any mistakes, go to the next step where the website will then come up with what it believes to be the typeface. It will come up with several. Some will come close and others will be way off:


The first font it came up with is Modula Sans Black. That look pretty much like it. Now you have to try to find that font on the Internet. A couple weeks ago I found it on a free font website:
http://www.fonts101.com/

but it’s not there anymore. I then use the following website:

http://www.identifont.com/

and entered Modula Sans Black (or just Modula Sans) and it came up with a list of similar fonts. One of them is called Baucher. The funny thing is that when I try to find do this now it only comes up with places to purchase Modula Sans (it doesn’t have a link for showing similar fonts). This alternate font was available for download at thw fonts101 website too, but it’s not there anymore. If you can find either of these two fonts, great – otherwise… on to plan B (we’ll just have to use images of the text rather than a font that we’d just type the text into The Gimp).

While still at the http://new.myfonts.com/WhatTheFont/
Website click on the font name Modula Sans Black:


Now in the text box enter RELEASE CITY DESTROYERS


Hit Print Screen on your keyboard to take a snapshot of the screen, fire up your graphic editing program and paste the image in and save it where you have all the images you are using for your ID table (or create one).

Now do the same with the following text:

RELEASE ATTACKERS

HOLD BONUS

SPECIAL

LIGHT COMBO

SHOOT AGAIN

SUPER JACKPOT

I think that’s it for this font. I tried to identify some of the other fonts used (the 10 MIL) and the LOCK1, 2, and 3 but was not successful. We will deal with those later as well as all the others.

I think that’s it for now as this exercise was just to give you an idea of how to identify the font used. Obviously one other option would be to post a message asking if anyone knows the name of a font used on a particular table.


#304 kruge99

kruge99

    Pinball Wizard

  • VPF Staff
  • 3,901 posts
  • Location:Markham, Ont.

  • Flag: Canada

  • Favorite Pinball: Black Knight, High Speed and Pin*Bot


Posted 02 February 2010 - 11:19 AM

c00L Stuff wtiger! So I couldn't find the font anywhere for free either. Seems like all of a sudden free fonts were considered to be illegal or something.

And Faralos! get back at it man! I'm feeling kind of like a tiny bug on an awefully big, empty microscope slide in here!! I would feel more comfortable if a few more people filled up the seats in this theatre!! LoL!


Best Regards,
Todd.
[proud owner of a Williams Solar Fire]

- It's called "The American Dream" because you have to be asleep to believe it.
George Carlin
- Truly great madness cannot be achieved without significant intelligence.
Henrik Tikkanen
- "Reality check, Michelle, Talk about composure, Total lack of. He's a man-- About-- 12 Feet Tall--"
Carrie Kelly
Posted Image

#305 wtiger

wtiger

    Pinball Fan

  • VIP
  • 1,148 posts
  • Location:Los Angeles, CA

  • Flag: United States of America

  • Favorite Pinball: Junkyard


Contributor

Posted 03 February 2010 - 03:53 AM

QUOTE (kruge99 @ Feb 2 2010, 03:19 AM) <{POST_SNAPBACK}>
c00L Stuff wtiger! So I couldn't find the font anywhere for free either. Seems like all of a sudden free fonts were considered to be illegal or something.

And Faralos! get back at it man! I'm feeling kind of like a tiny bug on an awefully big, empty microscope slide in here!! I would feel more comfortable if a few more people filled up the seats in this theatre!! LoL!


Best Regards,
Todd.


As for the fonts, we'll just use images since we have to do that for some of the other lights anyway. I need a bit more time to get a little more familiar with The Gimp so I should have more posted some time on Friday (my day off).

I know that there are a couple other people following along but they came in late and don't have posting privileges. They are here, but silent.


#306 wtiger

wtiger

    Pinball Fan

  • VIP
  • 1,148 posts
  • Location:Los Angeles, CA

  • Flag: United States of America

  • Favorite Pinball: Junkyard


Contributor

Posted 05 February 2010 - 10:09 PM

Lights part 2

Now the real fun begins. In this next part we will be preparing our playfield image so that we can add some nice light inserts. We will start out with lights on our playfield that do not have any text on top of them.

I’ve found three red lights on our playfield that we will start with:


We will also refer to the following image taken from the pinball manual so that we can refer to the lights by their number:


The basic concept is to take our playfield image and remove the inside portion of a light so that we can add a better looking light image to it.

As earlier in this workshop we will be using the freely available graphic program The Gimp. Go ahead and start up The Gimp and load in your playfield image.


Now in order for us to actually delete the area of a light that we don’t want (rather than just painting it with white or some other color) we need to add an alpha channel to our playfield image. This is accomplished by going to the Layer menu, then Transparency, then Add Alpha Channel:


Now when we delete an area on our playfield we will have a transparent background in that area that looks like a checkerboard.

Lets start with the lower left light that I circled. Looking at the ID-light numbers image above we can see that this light is light number 22.

Zoom in to about 300% (you can use the + key on the number pad to zoom in, or you can manually enter a number at the bottom of the screen). Once you are zoomed in select the Free Select Tool (the one that looks like a rope lasso):


Now using the Free Select Tool we trace on the inside of the light so that we can delete all the red (I ended up zooming in a bit more to 500%). Start at the bottom right of the straight part and click to set the start point. Move to the left end of the straight part and click again. You will see that you have made a straight line. Now follow the inside shape of the light and click each time you want to create another line and end up clicking where you started to comple your selection shape.


When you are finished it should look like this:


Now hit the delete key on the keyboard to delete the pixels inside the selection shape we just created:


We still have the selection shape showing on the screen. Go to the Select menu and choose None, or use the keyboard shortcut of CTRL-SHIFT-A to get rid of the selection shape so that we don’t have anything selected on our playfield image.

Now lets move on to light number 35 (it’s the one on the right side). Zoom in again and still using the Free Select Tool trace around the inside of the light for the portion we want to remove.


When you are done with the selection, hit the delete key on the keyboard to remove the inside:


Now lets tackle the third light. This one happens to be a round light, so we will use the Ellipse Selection Tool:


Zoom in around your light and select the Ellipse Selection Tool.

Start near the upper left of the inside of the light and click the left mouse button and hold it down. Now move towards the bottom right of the light (you don’t need to be exact yet) and let go of the mouse button:


Now adjust the selection we just made by either grabbing one of the corners or one of the edges so that is goes to the edges where our light changes from red to it’s black border:


Once you are satisfied of your selection, hit the delete key on the keyboard to remove the inside of our selection:


Here’s how your playfield image should now look:


Make sure you save your playfield image as something like Playfield-lights (don’t save over your existing playfield image) and use either The Gimp’s native format or save it in Photoshop’s .psd format. The reason for this is we will be using layers in the next part and we need to save it in a format that supports layers as well as alpha channels.


#307 wtiger

wtiger

    Pinball Fan

  • VIP
  • 1,148 posts
  • Location:Los Angeles, CA

  • Flag: United States of America

  • Favorite Pinball: Junkyard


Contributor

Posted 06 February 2010 - 06:18 PM

Lights part 3

Now let’s put a nice light insert object into our playfield where we made the cutouts.


Download the the following image and load it into The Gimp (along with your playfield-light image):


Now using the Fuzzy Select Tool (the one that looks like a magic want with a yellow light at the end) click somewhere in the white background area of our red light insert:


You will see a dashed selection around the outer edge of the insert and on the four images of the whole image. What it has selected is all the white background. We now want to inverse this selection so that rather than everything outside the red insert is selected, we want everything inside. Go the to Select menu and select


Now perform a copy command (Edit menu, Copy, or CTRL-C). Switch over to your playfield image and perform a paste (Edit, Paste, or CTRL-V):


You will notice on the right side of the screen in the Layers section that you now have a Floating Selection (pasted layer). We want to add this floating selection to our image as a new layer. At the bottom portion of the Layer area there is a white icon that looks like a sheet of paper. Click on it.


You will now see that our layer changes from Floating Selection to Pasted Layer:


Now select the Scale tool and then click on our red insert and hold down the CTRL key on the keyboard (so that it scales and maintains it’s proportion) and shrink it down to about half it’s original size (or thereabout). Just make sure that you don’t make it smaller than the cutout on the actual playfield where it goes into place:


Now click on the Move icon and move it a little closer to where it will go:


Now click on the Rotate tool and rotate so that it’s roughly the right orientation:


Now continue to scale and if necessary rotate and move closer to where it will eventually go making sure you leave it a little bit larger than the cutout:


Now go ahead and actually move it into position (just make sure that you can’t see any of the checkerboard showing):


Now to see how it will look in it’s final state, we need to change the order of our layers so that the background comes after this light insert layer. Also, to make things easier if we need to make any changes later, let’s rename our light insert layer. Right click on the Pasted Layer area and then left click on Edit Layer Attributes. Change the layer name to Light23 and click OK.


Now left click on the Background layer in the layer area and drag it up above our Light23 layer:


Wow, that looks pretty nice!

Are you wondering how we are going to make four different versions for our fading lights? Well, that’s easy. Move the Background image back down below the Light23 layer. Right click on the Background image and select Duplicate Layer. Rename the Background copy layer to playfield and then click on the little eye to the left of the original Background layer (this will turn it off). We made a copy of the Background layer so that we can have it at the very top of our layers list so that once we do all the lights and text and any other graphic that needs to show up on top of a light we don’t have to move the background all the way up through the various layers. We want the original background layer to still be on the bottom of the layer list so we can use it for placement reference as we continue to add more light insert layers. Also, we still need to do a lot more cutouts from our playfield. We would do this on the original background layer and then eventually delete the copy we made and make a new copy.

Now make another copy of the original background layer and rename it to 50%. Move it right above the Light22 layer:


Change the Opacity to about 50:


Now go to the Edit menu and select Fill with FG color:


Your 50% layer will be filled with black and since the transparency was set to about 50% you will see that our light on the playfield just got dim. You can click on the eye icon to the left of our 50% layer to toggle it on and off. Make two more copies of your 50% layer and rename one to 30, change the Opacity to around 30, rename the second to 15% and change the Opacity to around 15%. You now have your four different intensities of the light by turning on/off the various layers (I’m not sure if the values 50, 30, and 15 are ideal. You can experiment now or later and change them to suit your liking or to what looks good):


To add the next light (light 35) all we need to do is duplicate our Light22 layer, rename it to Light22 and rotate it to the proper orientation. Also, turn off our top playfield layer as well as the 15, 30, and 50% layers. Turn back on the original Background layer:


Here’s how it should look when done:


In the next part we’ll tackle that round light we cutout.

#308 wtiger

wtiger

    Pinball Fan

  • VIP
  • 1,148 posts
  • Location:Los Angeles, CA

  • Flag: United States of America

  • Favorite Pinball: Junkyard


Contributor

Posted 06 February 2010 - 06:44 PM

Lights part 4

For the third light we cutout of our playfield we need a round light insert image. I just happen to have one of those. Download it, save it, and load it into The Gimp along with your playfield-light image:


Your screen should now look like this:


Uhh oh, it’s yellow. We need a red one. No problem, we’ll just change it’s color.

Like we did before, click on the Fuzzy Select Tool and click on the white background of our yellow light. Now invert the selection (Select menu, Invert). To change the color, go to the Colors menu and go to the Hue-Saturation:


Adjust the Hue slider to about -65 and click on OK. You now have a red round light insert:


Copy it and paste it into our playfield image. Remember to click on the white page icon in the Layer area to change it from a Floating Selection to a Pasted layer. Rename it to Light41 (I think that it’s number). Move it right below your 50% layer and make sure all layers above it are off and all layers below it are on:


Now do the same as we did before, scale and move (we don’t need to rotate it) until you are satisfied with it:


Turn back on the top playfield layer and see how it looks in it’s final state:


If it’s not quite centered properly, you can use the arrow keys on the keyboard (with the move tool still selected) to move it a pixel at a time until it looks good.


#309 wtiger

wtiger

    Pinball Fan

  • VIP
  • 1,148 posts
  • Location:Los Angeles, CA

  • Flag: United States of America

  • Favorite Pinball: Junkyard


Contributor

Posted 14 February 2010 - 04:21 AM

Lights part 5

For this part we will work on some lights that have text. We’ll start out working on light 6/7 which is the one that has the text RELEASE CITY DESTROYERS:


Like we did before using The Gimp, we will first cut out the existing light from our playfield image, add the new light image as a new layer, then add our text as an additional layer.

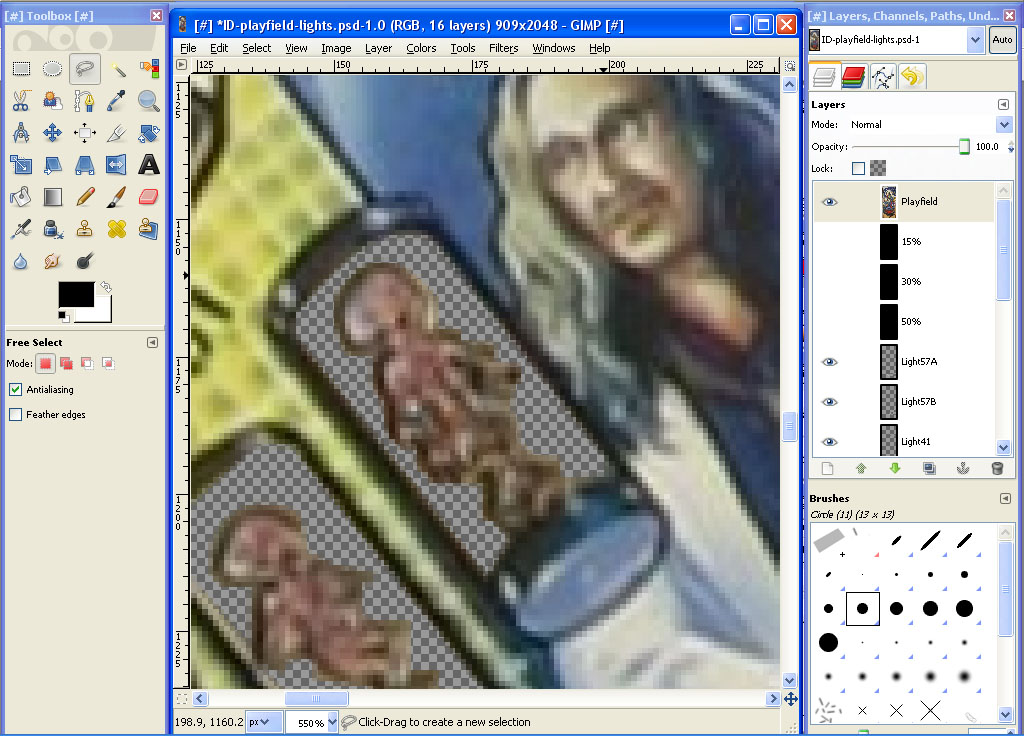
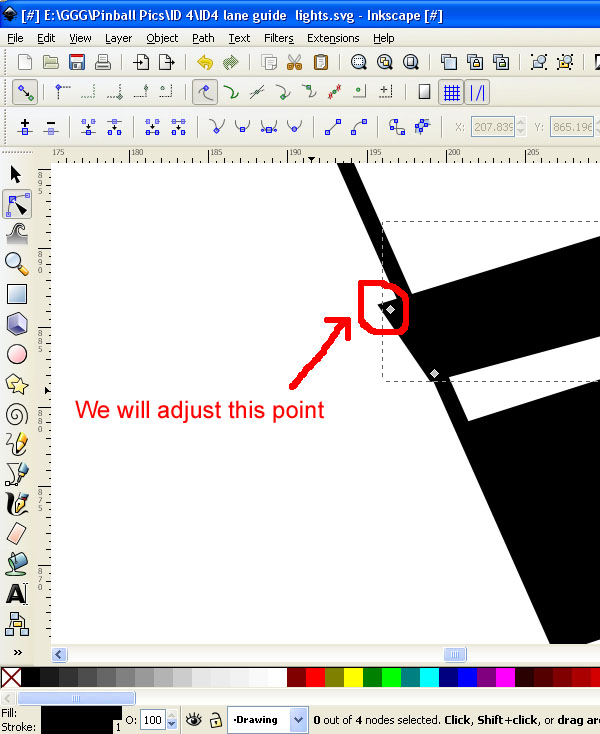
Load your playfield lights image into The Gimp and zoom in to the area we will be working on. Make sure that you have the playfield layer selected (not your background image). Turn off the background playfield image so that it won’t show up (click on the little eye to the left of the layer name). Click on the Ellipse select tool:


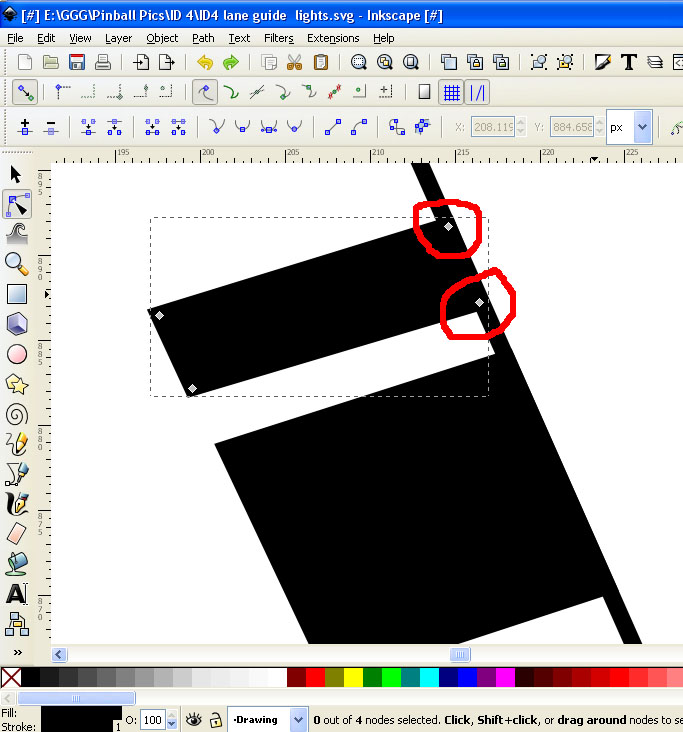
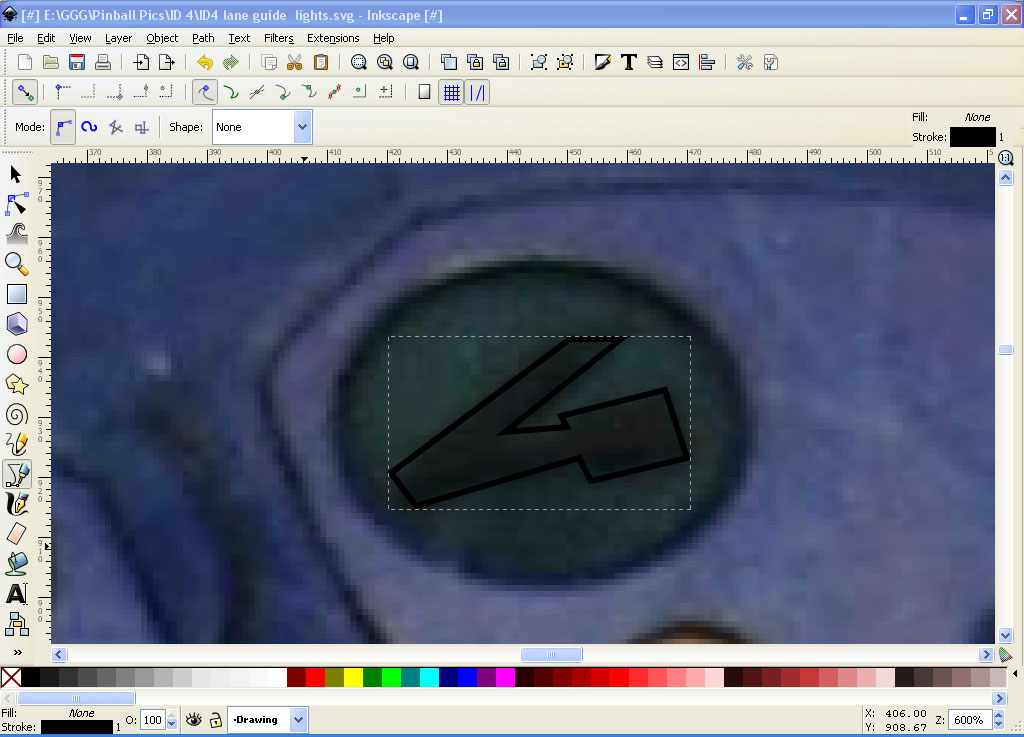
Add an Ellipse on the left side. Adjust the edges so that it goes to the edge of the green playfield light and the black border. Hit the delete key on the keyboard to remove the portion inside our selection. Now repeat for the right side:


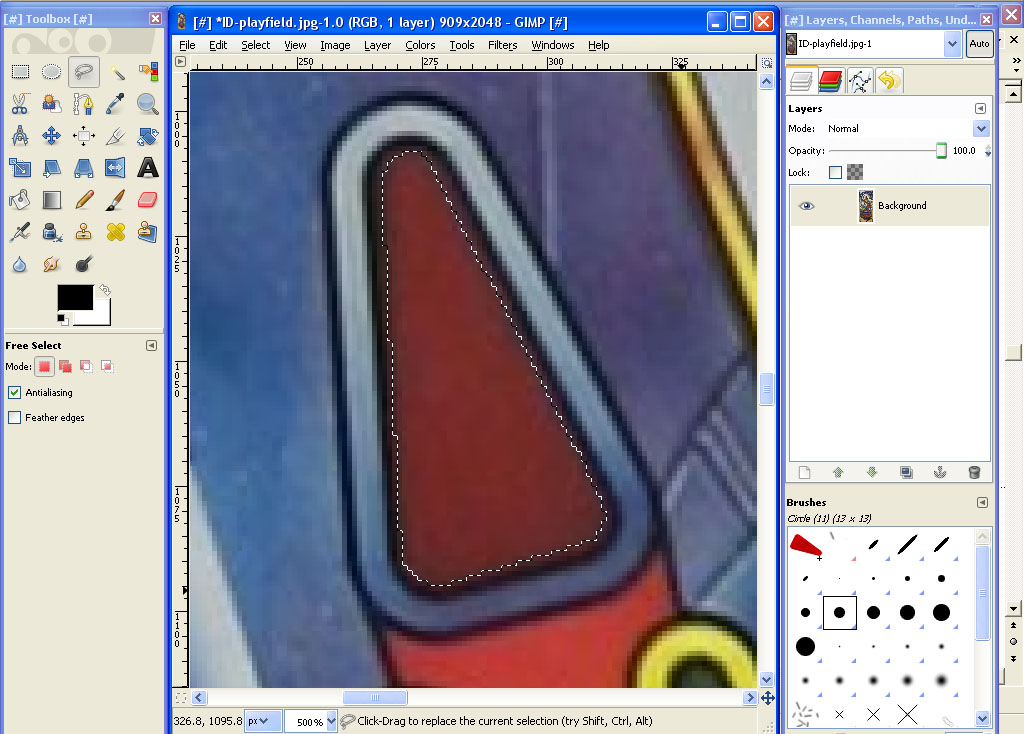
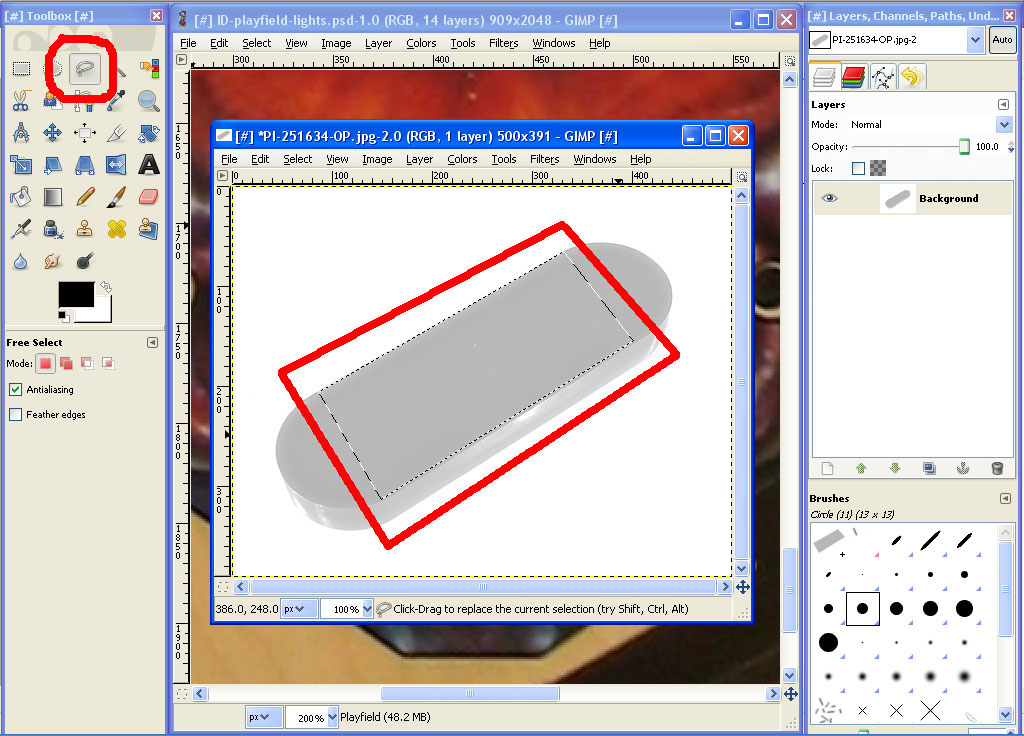
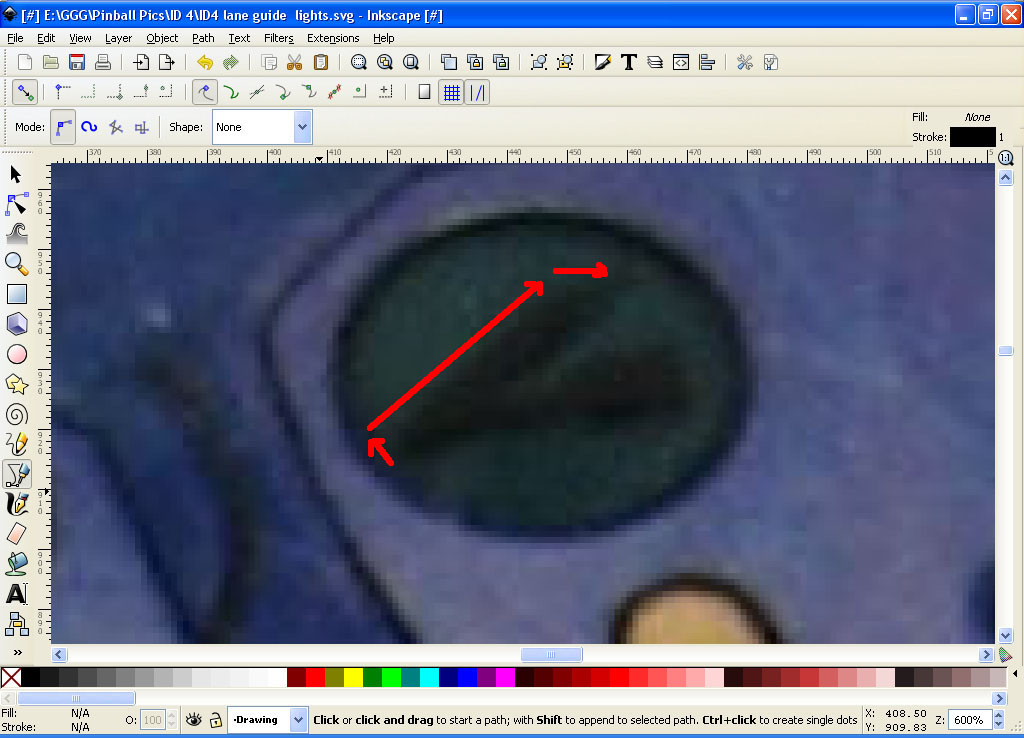
Now using the Free Select tool make a rectangle to surround the rest of the playfield light:


Now hit the delete key on the keyboard to remove that portion:


If you need to find tune anything, you can use the Free Select tool to remove small portions until you are satisfied with it.

Now we need a new light insert image. I’m not sure what kind of insert the original ID playfield has, so I’m going to guess and use a rectangle one I found online. Click on the image below and save it somewhere on your computer:


Now load it into The Gimp alongside your playfield image:


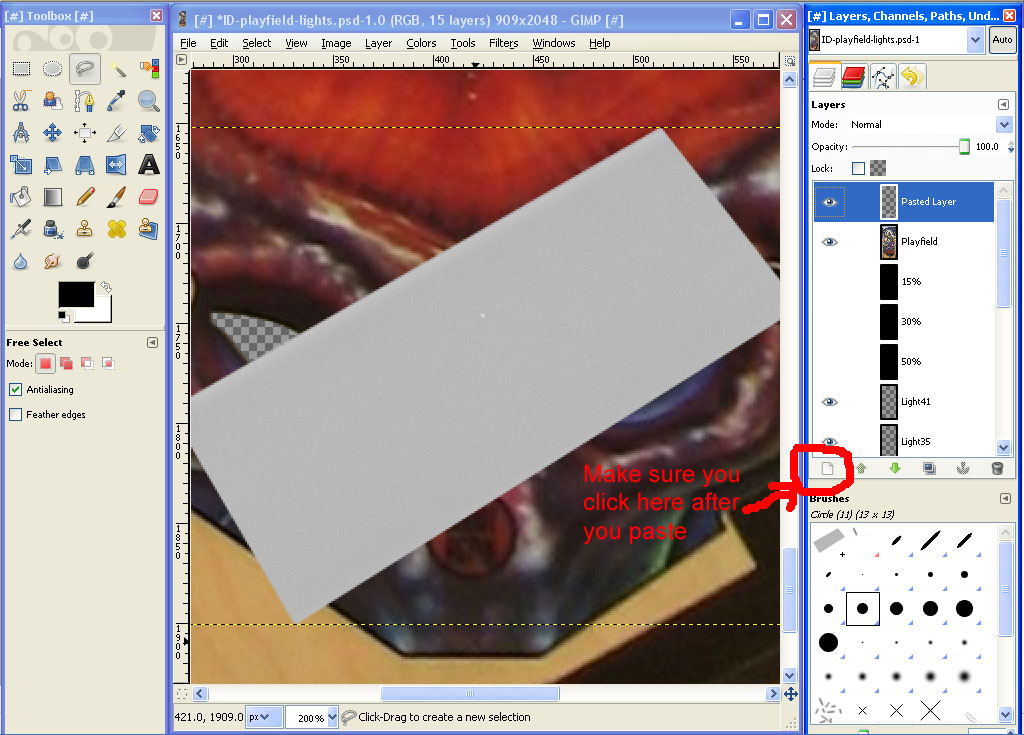
Now copy it (edit, copy) and then switch over to your ID playfield and hit paste. Make sure after you paste that you click on that little white paper icon in the layer section to change it from a floating selection to a pasted layer). Zoom out so we can see where our paste layer is. Select the Move tool and move it near where it needs to go:


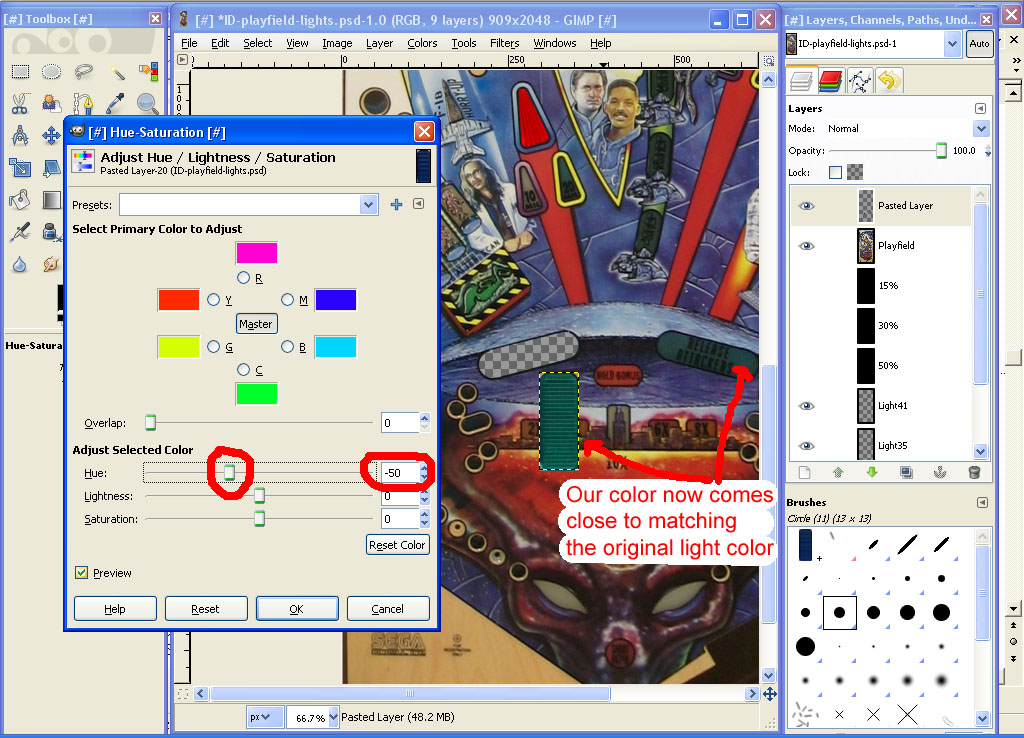
We need to change the color to match the green what it needs to be. Go to the Color menu and select Hue-Saturation. Move the Hue slider to the left to -50:


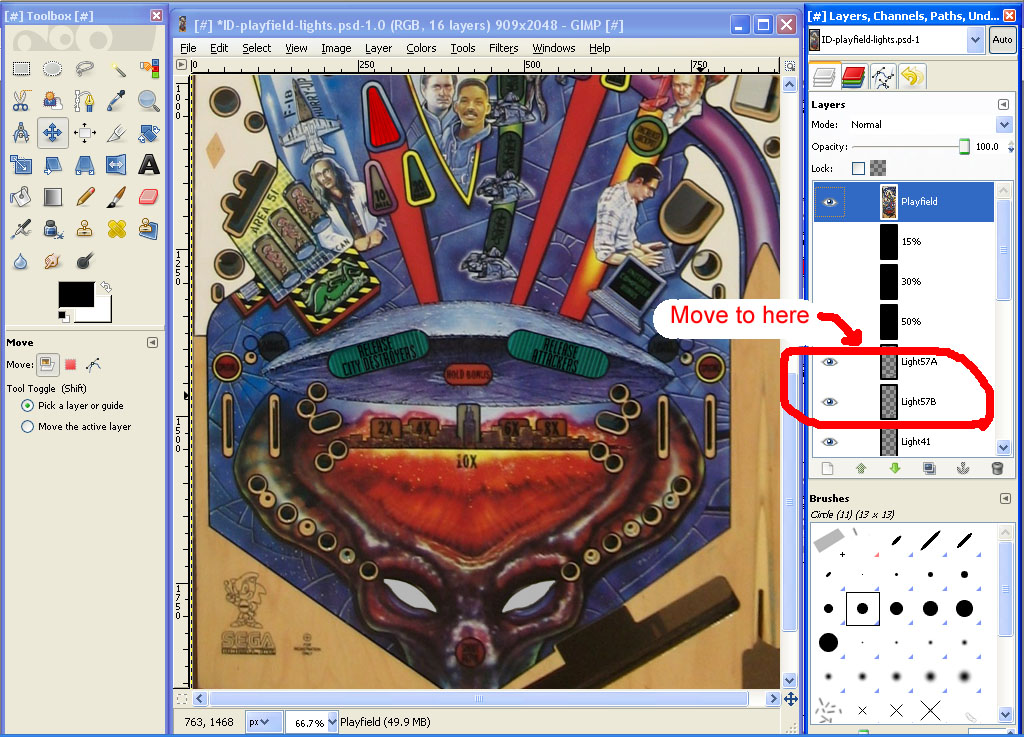
Now rotate, move, and if necessary scale (I had to a little bit) get our new image into place. You should turn off your background layer and make sure your playfield layer at the top of the layer list it on and move our pasted layer down below the 50% black layer


Oh yeah, go ahead and rename the layer to Light 6/7.

The last thing to do is to add the text. Since we couldn’t find a free version of the font we needed, we luckily have an image that we made with the appropriate text.
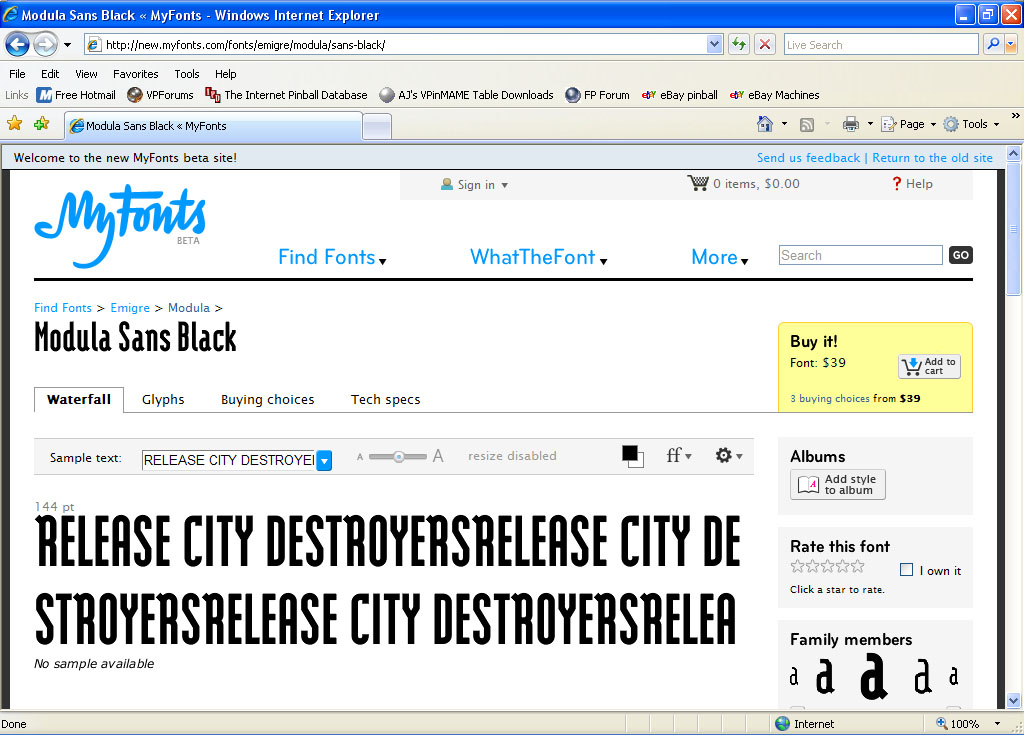
In case you didn’t create the image with the words “RELEASE CITY DESTROYERS”, click on the image below and save it:


Load the image into The Gimp:


Zoom in a bit on the largest one so we can work easier. Using the Rectangle Selection tool make a rectangle around RELEASE. It’s OK to make your selection a bit larger than the text.


Now go to the Layer menu and select Crop Selection. You should be left with just the portion of your image that was inside the selection area:


Right click inside your image and add an alpha channel (Layer, Transparency, Add Alpha Channel). Now using the Fuzzy Select Tool (the one that looks like the magic wand) click on the white inside the top part of the letter R and hit delete to remove that portion. Do the same for the white area of the letter A. Now click anywhere on the white portion that surrounds the overall text and then hit delete. You should be left with just the black text and your background should have the checker look:


If you zoom in you will notice there are some white areas on the edges of some of characters:


Use the eraser tool to remove them as well as any gray:


Now go to the Select menu and pick All (or hit CTRL-A). Now perform a Copy. Switch over to your playfield and paste then click on the white paper icon to change the selection from Floating to Pasted:


Now perform a move, rotate, and scale to get the text where it needs to go. Remember to hold down the CTRL key when scaling so we maintain the same aspect ratio and don’t distort it:


Rename your layer Light 6/7 Text1 or something like that. Move it down to right above the Light 6/7 layer:


Now so repeat this whole process for the text “CITY DESTROYERS”. Load the Release.jpg file back in (close and don’t save the current one we have, then go to the File menu and select Recent. You should see it at the top of the list).

Make a rectangle selection around the CITY DESTROYERS and then crop it like before. Add an alpha channel and using the Fuzzy Selection tool remove all white areas inside D, Rs, and O characters:


Remove the rest of the white and then do any necessary erasing/cleanup. Select all, copy, then paste into our playfield image. Now perform the familiar rotate, move, and scale until it’s in its proper position. Rename the layer to Light 6/7 Text2 and move it to just above your Light 6/7 Text1 layer:


See if you can to the RELEASE ATTACKERS (Light 9/10) on your own. I think I forgot to have you make the sample text ATTACKERS when we were at that font site previously. Here it is if you need it:

Attackers.jpg

Note: You can make a copies of the green light insert image and rename it as well as the RELEASE text layer. The only new thing you need to do is the cut out and adding the ATTACKERS layer.

When you are done it should look like this:


#310 wtiger

wtiger

    Pinball Fan

  • VIP
  • 1,148 posts
  • Location:Los Angeles, CA

  • Flag: United States of America

  • Favorite Pinball: Junkyard


Contributor

Posted 19 February 2010 - 05:15 PM

Does anyone out there have the .psd file that I uploaded to savefile a while ago that has the plastic pieces on it. I believe the filename is ID-guide-plastic1.psd (or .zip). Someone is looking for it and I lost it when I lost my drive partition last Summer. If you have it, could you post it to mediafire or something and either post the link on here or PM me with it so I can post the link.

Thank you.

#311 kruge99

kruge99

    Pinball Wizard

  • VPF Staff
  • 3,901 posts
  • Location:Markham, Ont.

  • Flag: Canada

  • Favorite Pinball: Black Knight, High Speed and Pin*Bot


Posted 19 February 2010 - 06:29 PM

Didn't I carbon copy it to you when I sent it to him? Dang I must be braindead!! I'll forward it to you too - check your PM's in a few minutes. biggrin.gif


Best Regards,
Todd.

p.s. -it's sent and should be in your inbox now.
[proud owner of a Williams Solar Fire]

- It's called "The American Dream" because you have to be asleep to believe it.
George Carlin
- Truly great madness cannot be achieved without significant intelligence.
Henrik Tikkanen
- "Reality check, Michelle, Talk about composure, Total lack of. He's a man-- About-- 12 Feet Tall--"
Carrie Kelly
Posted Image

#312 wtiger

wtiger

    Pinball Fan

  • VIP
  • 1,148 posts
  • Location:Los Angeles, CA

  • Flag: United States of America

  • Favorite Pinball: Junkyard


Contributor

Posted 19 February 2010 - 06:58 PM

QUOTE (kruge99 @ Feb 19 2010, 10:29 AM) <{POST_SNAPBACK}>
Didn't I carbon copy it to you when I sent it to him? Dang I must be braindead!! I'll forward it to you too - check your PM's in a few minutes. biggrin.gif


Best Regards,
Todd.

p.s. -it's sent and should be in your inbox now.


Thanks Todd!

#313 kruge99

kruge99

    Pinball Wizard

  • VPF Staff
  • 3,901 posts
  • Location:Markham, Ont.

  • Flag: Canada

  • Favorite Pinball: Black Knight, High Speed and Pin*Bot


Posted 19 February 2010 - 07:05 PM

Glad I could help. I've been messing about with the lights at lunch finally today. I'm going to work on the text either tonight or this weekend I hope. I've been so busy lately that I stalled after doing the ramps and vuk. Is there a way to clean up those screenshots of the text without anti-aliasing in TheGIMP? AA can be a real pain sometimes and sometimes it's really good. But trying to delete all that white leaves behind a lot of grey around the edges. It would be cool if you could select the black, do an invert by colour that deletes everything except the colour that's highlighted.


Best Regards,
Todd.

[proud owner of a Williams Solar Fire]

- It's called "The American Dream" because you have to be asleep to believe it.
George Carlin
- Truly great madness cannot be achieved without significant intelligence.
Henrik Tikkanen
- "Reality check, Michelle, Talk about composure, Total lack of. He's a man-- About-- 12 Feet Tall--"
Carrie Kelly
Posted Image

#314 wtiger

wtiger

    Pinball Fan

  • VIP
  • 1,148 posts
  • Location:Los Angeles, CA

  • Flag: United States of America

  • Favorite Pinball: Junkyard


Contributor

Posted 19 February 2010 - 09:19 PM

QUOTE (kruge99 @ Feb 19 2010, 11:05 AM) <{POST_SNAPBACK}>
Is there a way to clean up those screenshots of the text without anti-aliasing in TheGIMP?


I believe the main problem lies in the actual screenshot from the font website. It put the gray in. That's why it's ideal if you can find the font then you have pure black text.

What you can try is load the image into The Gimp, crop just the portion of the text you want, then select the Fuzzy Select tool. Change the Threshold to about 122 then click on the outer white background in your image, then delete. By changing the Threshold you the selection tool won't select some of the gray on the outer edges of the text. You can experiment with different Threshold values to see what works best. You can also uncheck Antialiasing in the tool too.


I just did some more experimenting and a Threshold value of higher (around 160) works pretty good. I also did it twice (click on white background area, then hit delete, click on white background area again and then delete).

#315 wtiger

wtiger

    Pinball Fan

  • VIP
  • 1,148 posts
  • Location:Los Angeles, CA

  • Flag: United States of America

  • Favorite Pinball: Junkyard


Contributor

Posted 19 February 2010 - 11:10 PM

More lights

Before we continue, it might be a good idea to arrange our light layers in numeric order.

Here’s how things currently are:


Go ahead and rearrange the layers by clicking on the name and dragging them up or down into order by number. When you are done the light6/7 layer should be right above the background layer and light41 should be just below our 50% layer (we still want our 50%, 30%, 15%, and playfield layer with all the cutouts above all the light layers):


Well, now that we did that rearranging I was looking over the Lamp Matrix Grid from the manual and it looks like we might need to do some layer renaming later on. I noticed for instance light 6 and 7 are labeled as Release City Destroyers but also light 62. We won’t worry about this for now, but keep in mind that we will need to re-visit this later.

Lets work on the alien eyes in the middle of the flipper area. According to the lamp matrix both of these are labeled as light number 57. We start by using the Free Select Tool (the one that looks like the rope lasso). Click on it to select it. Zoom in on the left eye to about 400% or 550% using the + key. Make sure you have your playfield layer selected and tracing around the inside white area of the eye making sure you end at the same point where you start.


Start:


Finish:


Now hit the Delete key on the keyboard to remove the inside area:


One down, one more to go. Go ahead repeat the process for the right eye:


Now we need an image for the light inserts. From what I can tell these inserts are just white/gray and smooth. I found the following insert which to me looks similar so I think we will us it. Download the following image (click on it to maximize it’s size)


and then load it into The Gimp:


Once again the color isn’t quite right for what we need. Go to the Colors menu and select Hue-Saturation. Move the Hue and Lightness slider all the way to the right and move the Saturation slider all the way to the left:


That looks much better.

Using the Free Select Tool select a rectangle area of our image then copy and paste it into our playfield image.

Area selected:


Pasted into our playfield:


Now scale down and rotate:


Then move into position (you want to make sure that the pasted light insert image is larger than the checkerboard area that we cut out of the playfield):


Now rename the layer to Light57A. Make a duplicate of it (right click and select Duplicate Layer). Rename this duplicate Light57B.

We should be able to flip horizontally our Light58B layer so that it is oriented properly, but every way I tried the program ended up flipping my playfield image. To get around this, we’ll just rotate it into the proper orientation:


Move your Light57A and Light57B layers down to right below your 50% layer:


We are now done with the Alien Eyes lights. If you are not happy with the light insert image used, you can further adjust it (color, brightness, etc) or use an entirely different image if you like.

#316 wtiger

wtiger

    Pinball Fan

  • VIP
  • 1,148 posts
  • Location:Los Angeles, CA

  • Flag: United States of America

  • Favorite Pinball: Junkyard


Contributor

Posted 20 February 2010 - 04:59 PM

Lights 15, 17, 18, and 19 on the left side of the playfield are very similar to the Alien Eyes lights.


We’ll start with light 17 which is the bottom alien in the tube. Using the Free Select Tool (making sure your playfield layer is selected) start at the bottom left of the white area then start tracing up and around clockwise. When you get to the bottom right, trace the inside area of the white light portion. Try to follow the contour of the alien.


Make sure you end at the same point where you started then hit delete to remove everything inside our selection. Continue on the same way with light 18:


Finally do the same for light 19:


Move on to light 15. This one is a little more tricky. Start out with the main portion:


Then do the arms and feet areas separately. When you are done it should look somewhat like this:


Make a duplicate layer of our Light57A layer and move the layer to the very top of our layer list. Now using the move tool move the image near where light 17 is:


Now scale the image a bit and if necessary rotate it. Move it into position its final position. Rename the layer to Light17:


Now move the layer down into its sequential order:


Duplicate the layer, rename it to Light18. Using the Move Tool move the image into position. Now do the same for Light19:


For light 15, make a duplicate of our Light19 layer, rename it to Light15 and move it all the way to the top of the layer list. Using the Move tool and the Rotate Tool move the image to a little below where it goes:


Now we need to change the color to a dark green. Go to the Colors menu and select Color Balance. Move the middle slider all the way to the right side against Green (or enter 100 in the value box).


Now go back to the Colors menu and select Hue-Saturation. Move the Lightness slider to the left ending at -75 (or enter -75 in the value box). This will change it to a darker green.

Use the Move tool and move it over the cutout area. Lastly, move the layer back down into sequential order:


#317 wtiger

wtiger

    Pinball Fan

  • VIP
  • 1,148 posts
  • Location:Los Angeles, CA

  • Flag: United States of America

  • Favorite Pinball: Junkyard


Contributor

Posted 21 February 2010 - 12:38 AM

After looking over some various Independence Day photos I have I’ve decided that lights 17, 18, and 19 should have a white light insert similar to the one we used for Release City Destroyers light. Not to worry, it’s pretty simple to “change out” our lights. Right click on our Light6/7 layer and make a duplicate. Rename it to Light17a and move it up to the very top of the layer list.


Now go to the Color menu and select Hue-Saturation. Move the Saturation slider all the way to the left and move the Lightness slider to 50.


Now move, rotate, and scale into place:


Move the layer down into sequential order and either turn off (the little eye to the left of the layer) your original Light17 layer, or delete it by dragging it into the trash can:


If you want to make the light a little bit brighter for its on state, go to the Colors menu and select Brightness-Contract and set the brightness to 82 and the contrast to 86 (or something like that):


Now all you need to do is duplicate this new layer, rename it to Light18A, move it into place, make another duplicate, rename it Light19A, move it into place and then you are done:


#318 wtiger

wtiger

    Pinball Fan

  • VIP
  • 1,148 posts
  • Location:Los Angeles, CA

  • Flag: United States of America

  • Favorite Pinball: Junkyard


Contributor

Posted 27 February 2010 - 05:11 PM

Lane guide lights – Part 1

The three lane guide lights (lights52, 53, and 54) at the top of the playfield have the letters I, D, and 4 done is an unusual font. I could not find a picture in my archives with a really good shot of these, so we will draw each of the three characters using the free program Inkscape which is similar to Adobe Illustrator or Corel Draw. The following image is cropped from our playfield image. Click on it to enlarge it and save it on your computer. We will use this image as a template in Inkscape:


The image is not the best, but I attempted to outline in red the characters (I just did a quick outline so it’s not perfect at all):


If you don’t have Inkscape already, download it from.www.inkscape.org and install it.

I am in no way going to write a tutorial on how to use Inkscape in detail, but hopefully I will explain it enough in a simple way that you will be able to duplicate what I write.

Start up Inkscape:


Let’s load in the image from above that we will use as a template to duplicate the characters. Go to the File menu and select Import. Navigate to where you saved the ID4 lights.jpg image and load it in:


Make sure the Select and transform objects tool (the one that looks like an arrow cursor) and then draw the image into the working area that looks like a blank page:


Inkscape lets you use layers similar to The Gimp where you can have various objects on different layers and make them visible or not. We are going to have our template bitmap image on one layer and do our actual drawing (or tracing) on another layer. Go to the Layer menu and select Rename layer. Type in Bitmap for the layer name. You will see at the bottom of the screen that Layer1 is now Bitmap:


Now add a new layer by going to the Layer menu and select Add Layer. Call it Drawing. You will now see at the bottom of the screen that this new Drawing layer is the current layer. Let’s zoom in a bit on the left light by using the Zoom in or Out tool (the one that looks like a magnifying glass). I clicked on our image 6 times (you could also manually type in a zoom percentage in the bottom right portion of the screen):


Using the Draw Bezier and Straight Line tool start at the bottom left of the lower portion of the I. Click to set a point and then move the mouse to the upper left portion and click again. You should now have a straight line:


Now click on the upper right:


Then the bottom right:


And finally click back on our starting point in the bottom left:


If you need to edit the object we just created, you do so by using the Select and transform objects tool. Clicking on one of the four lines that make up this object we just created allows you to scale/resize the object:


If you double click on one of the four lines that make up the object you can now move the four control points individually that make up the shape of our object:


If you are happy with the shape lets fill it in solid. Go to the Object menu then select Fill and stroke. On the right side of your screen a window will open up. Click on the solid box to the right of the box with an X in it. This will fill your object with solid black.


Now would be a good time to save your file. Go to the File menu and save your file as something like ID4 lane guide lights.

Select the Draw Bezier and Straight Line tool and draw the top portion of the I and fill it in black as well. Make sure that the Drawing layer at the bottom of the screen is still showing otherwise you will be drawing on the Bitmap layer.


Lets see how it looks by turning off the Bitmap layer. At the bottom of the screen switch over to the Bitmap layer by clicking on the little down arrow to the right of the displayed layer:


Our Bitmap layer is now turned off:


#319 wtiger

wtiger

    Pinball Fan

  • VIP
  • 1,148 posts
  • Location:Los Angeles, CA

  • Flag: United States of America

  • Favorite Pinball: Junkyard


Contributor

Posted 27 February 2010 - 07:46 PM

Lane Guide Lights – Part 2

Yikes, my top object doesn’t match the bottom one very good. No problem, we’ll just adjust the control points for it.


Switch back over to your Drawing layer (leaving the Bitmap layer still off). Lets draw a reference line so we can make our upper object’s left side match the lower object’s left side. Using the Draw Bezier and Straight Line tool click below the bottom left of our lower object and move the mouse above and to the left of our upper object making sure the line matches the left edge of our lower object and double click. This will make a single line. If the line doesn’t match the shape of the lower object, adjust either the upper of lower control point until it does:


Now we will double click on our upper object so we can adjust the two left control points (I zoomed in a bit to see it better):


Move the point until it matches up with the reference line and adjust the lower point if necessary:


When done, save your file and then move the reference line over to the right side:


Adjust the right two control points of the upper object as well as the right two control points of the lower object as necessary:


It may help to move the reference line away a little bit to make sure your right sides are parallel to it:


Move the reference line back to the left side away a little from the left edge of the lower object and make sure everything is parallel:


Delete your reference line. We will now do the same thing for the top and bottom lines. Make a new reference line this time move it so it is a little below our bottom line making sure it is parallel to it:


Move the reference line to the top of the lower object and make the necessary adjustments:


Move the reference line up but a little below the bottom of the upper object:


Adjust the upper object control point as necessary.


Finally, move the reference line to the top of the upper object and make any necessary adjustments:


Delete the reference line and save your file. Your “I” should look uniform and somewhat like this:


#320 wtiger

wtiger

    Pinball Fan

  • VIP
  • 1,148 posts
  • Location:Los Angeles, CA

  • Flag: United States of America

  • Favorite Pinball: Junkyard


Contributor

Posted 03 March 2010 - 04:51 AM

Lane Guide Lights – Part 3

The number 4

Lets skip the middle light which has the letter “D” on it since it will be a little more difficult.

For the number 4 on the far right, we will make the shape using all straight lines.

If you are continuing from making the letter “I” switch back to the Bitmap layer and make it visible (click on the eye icon to the left of it at the bottom of the screen). Now switch back over to our drawing layer so that our object we draw is on the right layer.

Start out by selecting the Draw Bezier curves and straight lines tool. Scroll so that the 4 is in the center of the screen and zoom in. This number is a little hard to see the shape clearly so refer to the ID4 lights-redoutline.jpg image from the previous post. Start at the left side and work your way around:


Finish by ending at the same point where you started and double clicking to complete the shape. It should look something like the object in the image below. Don’t worry if it doesn’t look too good yet since we will adjust the control points like we did for the letter “I”:


Now add a reference line on the left side making it parallel to the left edge of our “4”. Copy this reference line and paste two copied then move into the approximate position as shown below:


Now adjust the three sets of control points so that the line that connects them is parallel to the reference line:


Make a horizontal reference line then make three copies and place them according to the image below:


Now adjust the control points:


When done delete your reference lines:


Then fill with black: