Part 1
Ok, dust off your Independence table (I know its been a while since the last exercise). We are now going to make the metal wire ramp that goes from the left side, starting where the transparent ramp ends, to the right inlane.
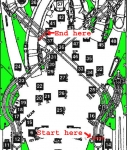
To make the building easier, we will build the ramp in a blank table and then import all the parts into our actual Independence table. Create a new table and delete all the objects in it. Change the table dimensions to match our working table of 1000 x 2300. Under the physics section change the table height to 2300 (the width should already be 1000). Now import the ID-guide-plastic.jpg image into this new table. This image is one what shows the ramps:

The first step is to make a flat ramp that the ball will actually travel on that we will make invisible. Due to this ramp that we are building going over another ramp below, we need to split up the flat ramp into two sections to make sure that there is enough clearance between the two.
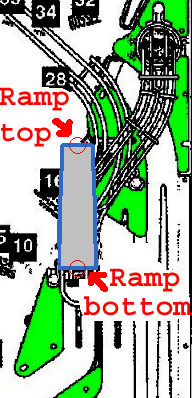
We will be adding the first section between the start and end in the following image:
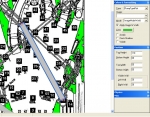
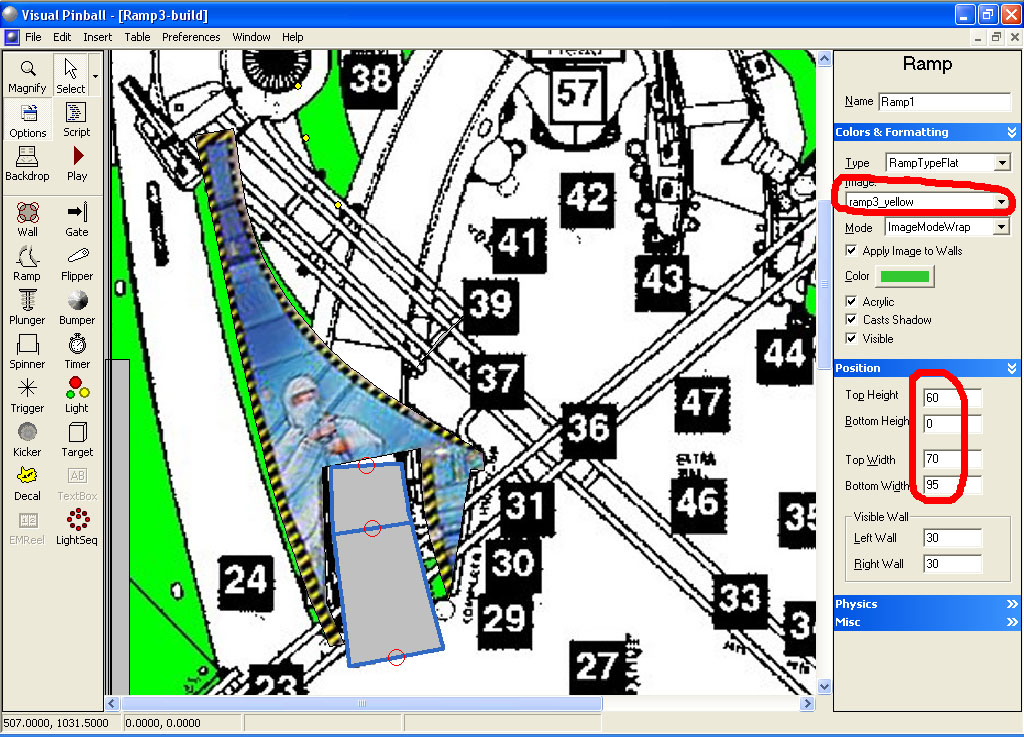
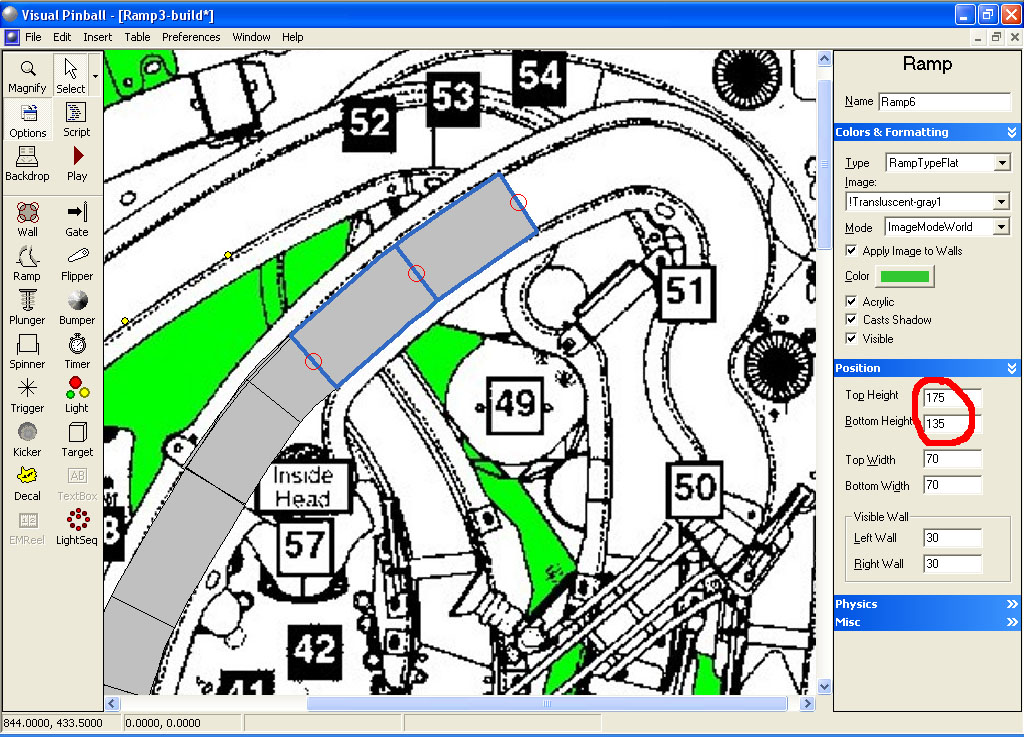
Add a ramp and move the bottom to our start position. Make sure the direction of the ramp matches the picture (the ramp bottom is at the bottom of the screen and the ramp top is at the top. The ramp will not work properly if the direction of the ramp is wrong):

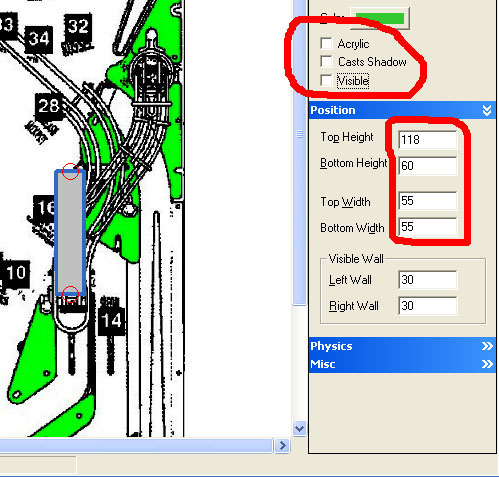
Make the ramp top and bottom width 55. Change the bottom height to 60 and top to 118. Unckeck both Cast Shadow and Visible:

Click on the ramp to select it then click and drag on the top control point to move it into the approximate position (we will fine tune the position later to match the end of the transparent ramp from our working table):
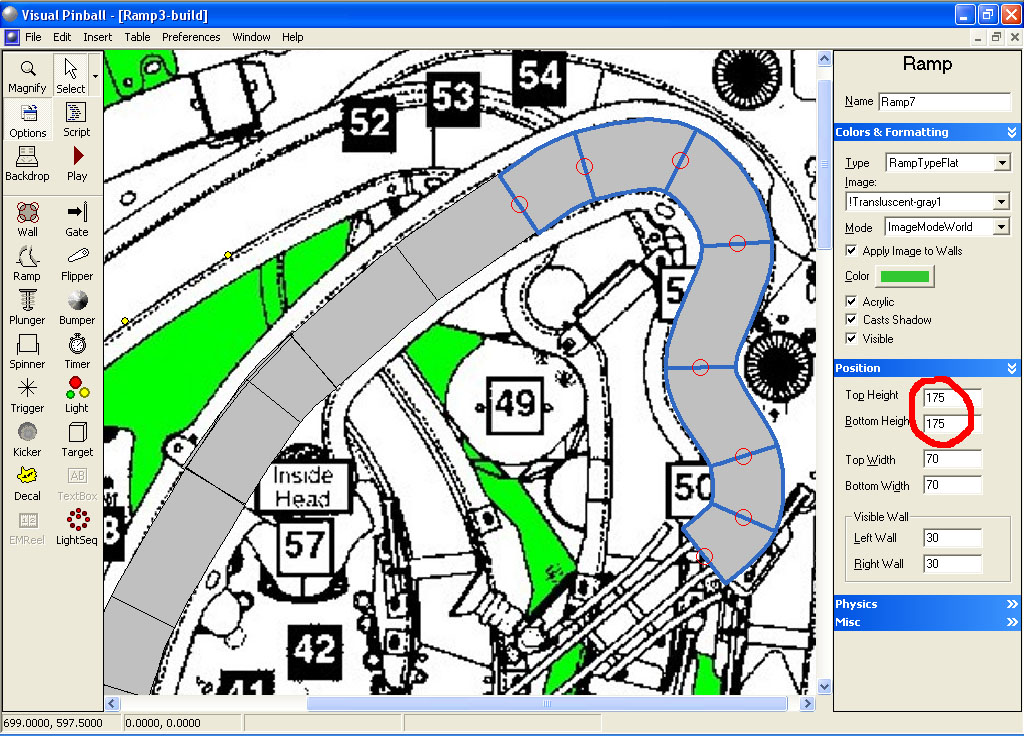
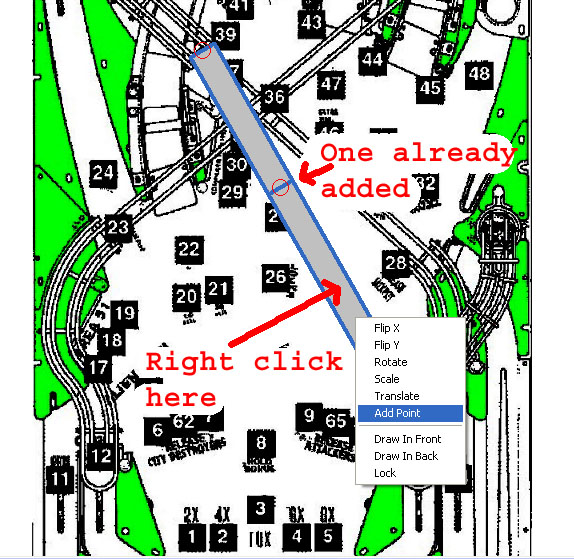
Now add a couple control points to the ramp (right click inside the ramp) and left click on add point:

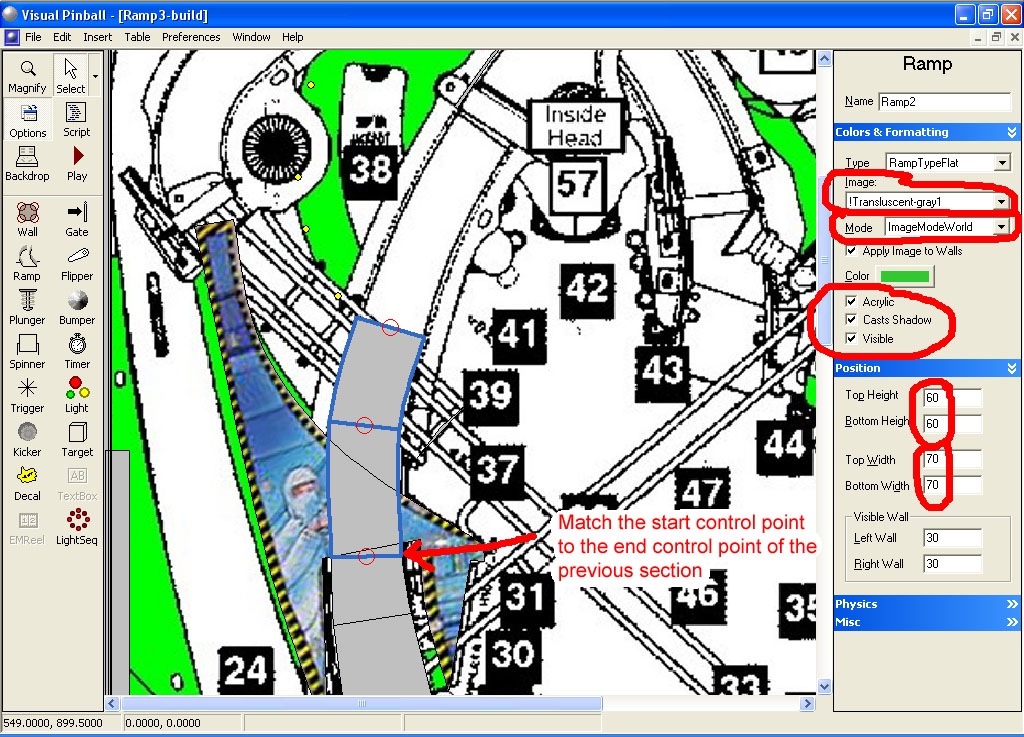
Start moving the control points around to make the ramp shape match the shape from the ID-guide-plastic:

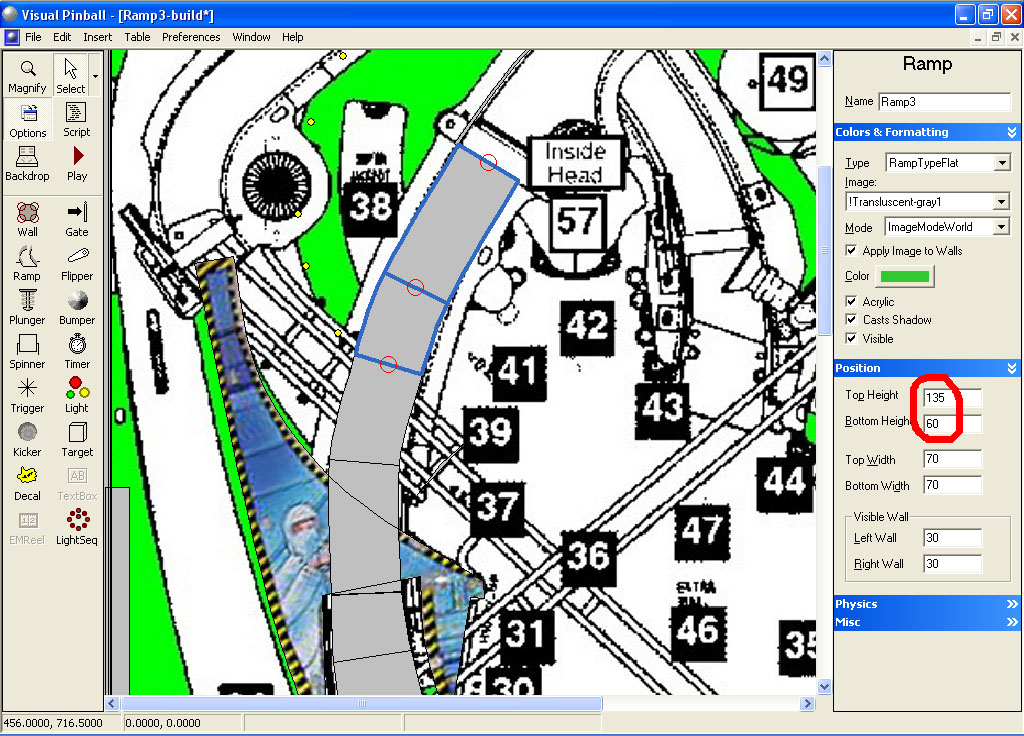
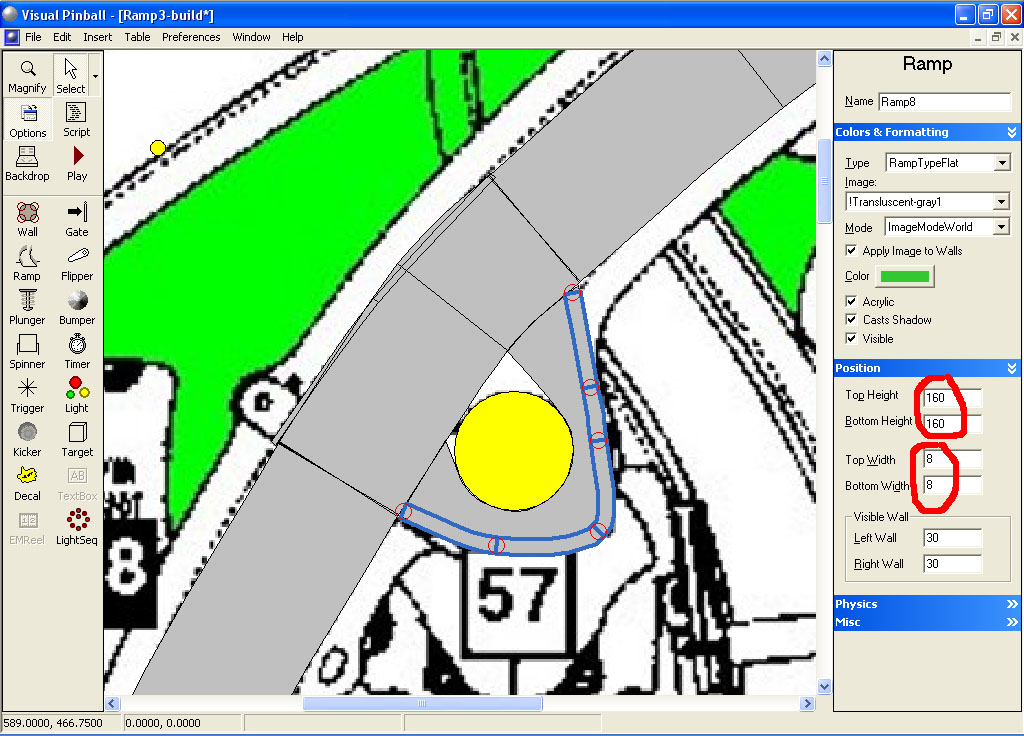
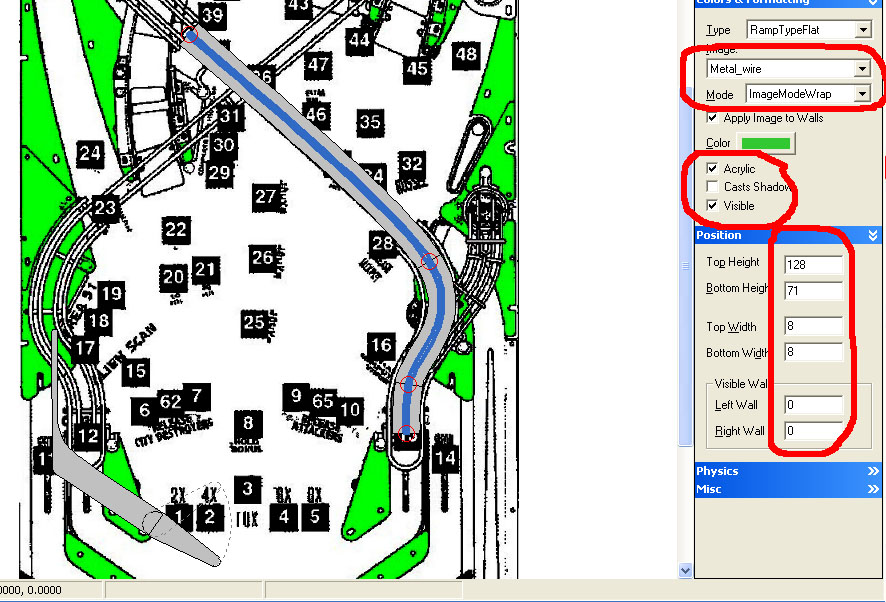
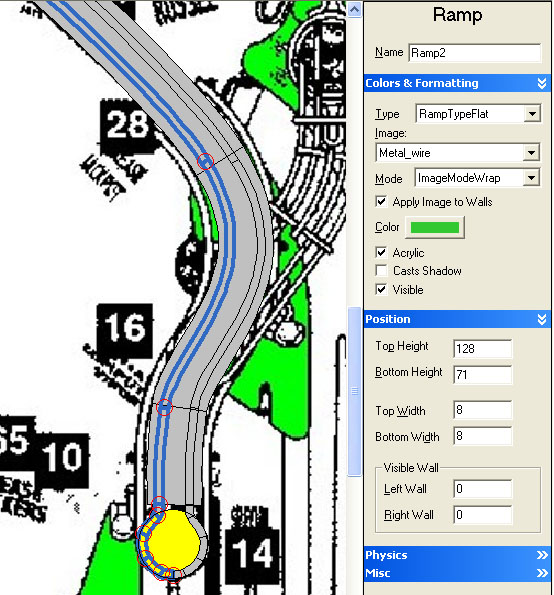
Now with the ramp highlighted, make a copy (hit CTRL-C or Edit Copy) then paste (CTRL-V or Edit Paste). Change this copied ramp top and bottom width to 8, Visible Wall left and right to 0, Bottom height to 71 (11 units higher than our ramp floor bottom height) and top height to 128 (10 units high than our ramp floor top height). Click on Visible and Acrylic so it will show up.
Import the Metal_wire.jpg image right below:

and select it for the ramp image and set the Mode to ImageModeWrap:

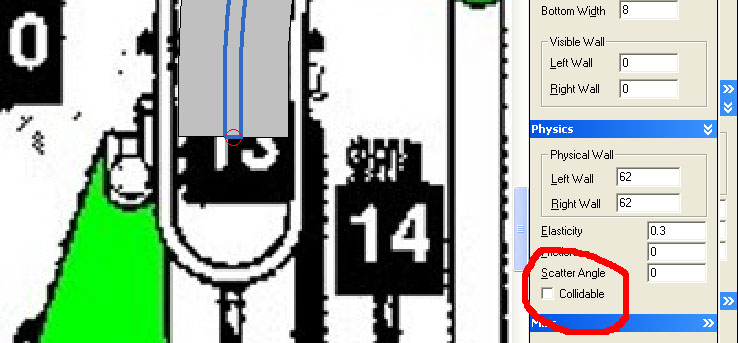
Very important, under physics, un-check Collidable (otherwise the ball wont travel on the ramp):

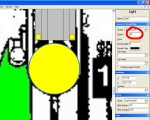
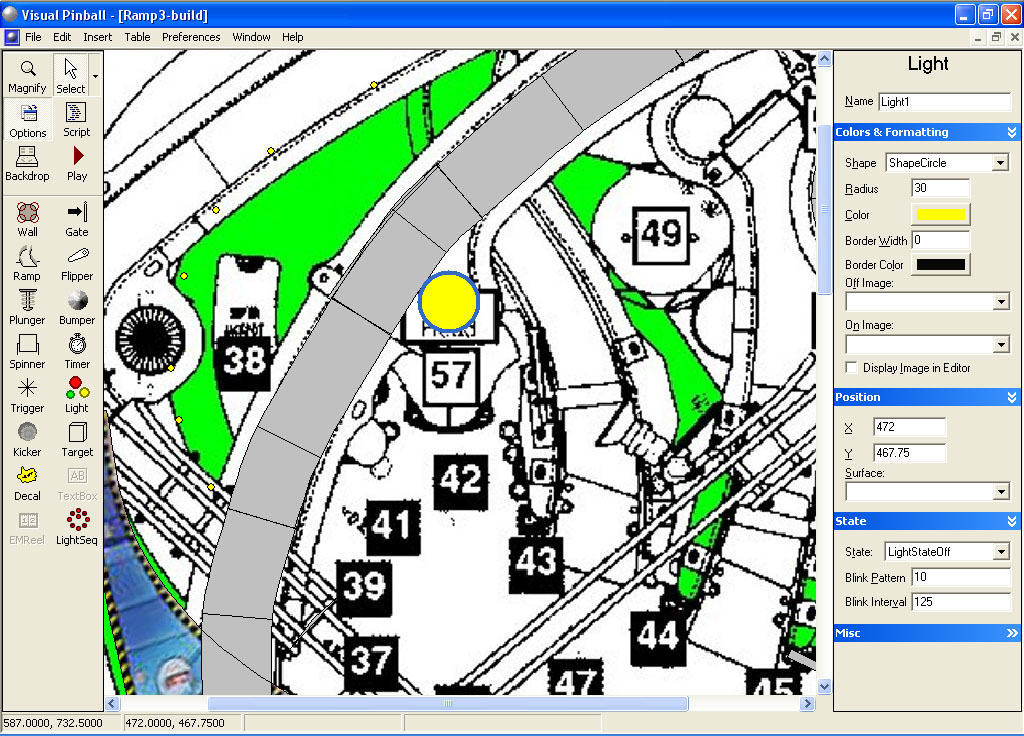
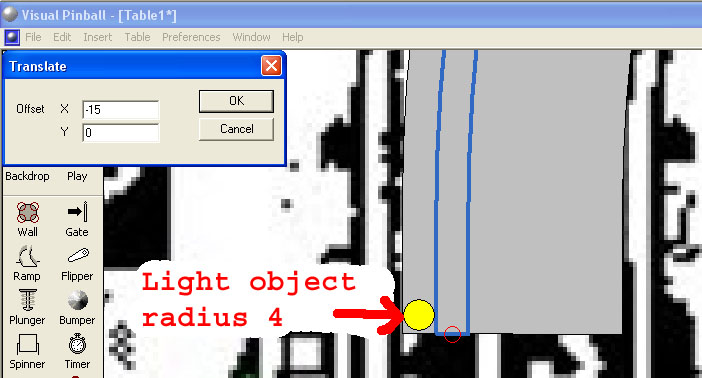
Now right click on this new ramp and translate it -15. If you add a light object of radius 4 to the left edge of the first wide ramp object, your new narrow ramp should line up on the right edge of that light object:

Now scroll to the top of the ramp and move the control point down to the end of our wide ramp:

Make another copy of the thin ramp and translate it in the X direction by 30. It should now line up on the left edge of a radius 4 light object on the right side of our ramp:

Scroll to the top portion of our ramp and adjust the control point to match the end of our ramp floor:

Now add a light object of radius 35 to the end of the ramp (this will be our guide for the ramp end):
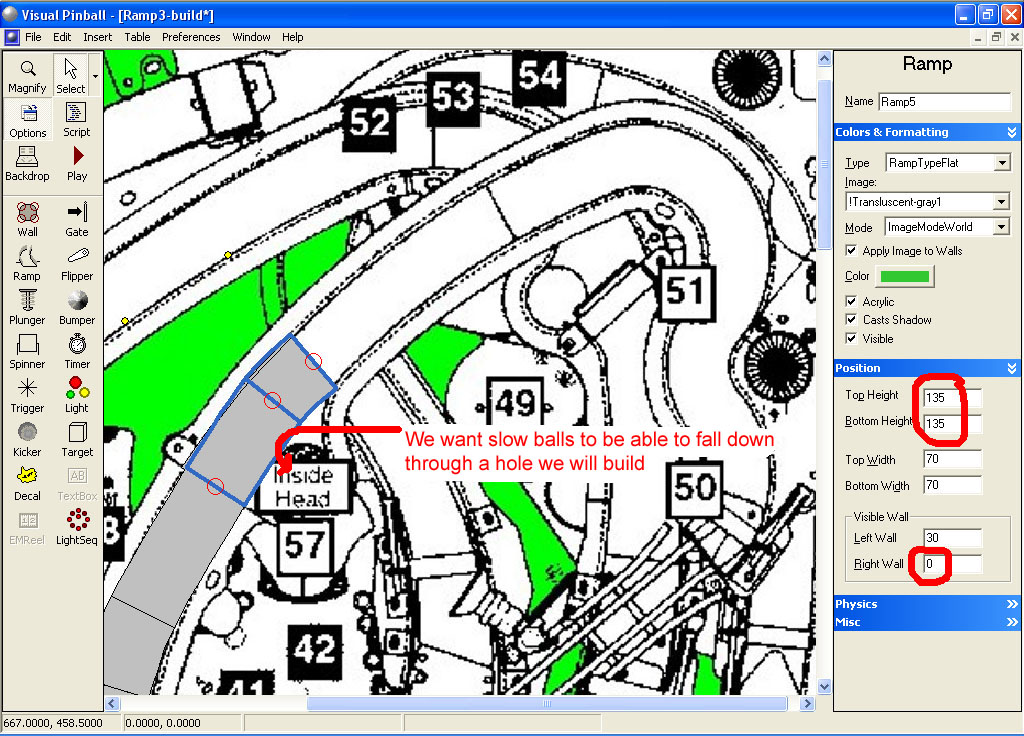
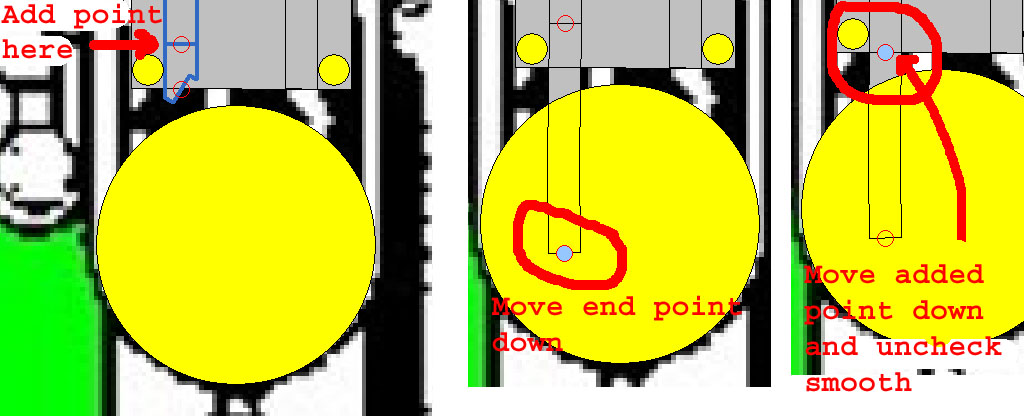
Now sect the left narrow ramp and add a point a little above the end. Move the end point down then move the added point down to match the end of the ramp floor. Right click on the control point and uncheck smooth:

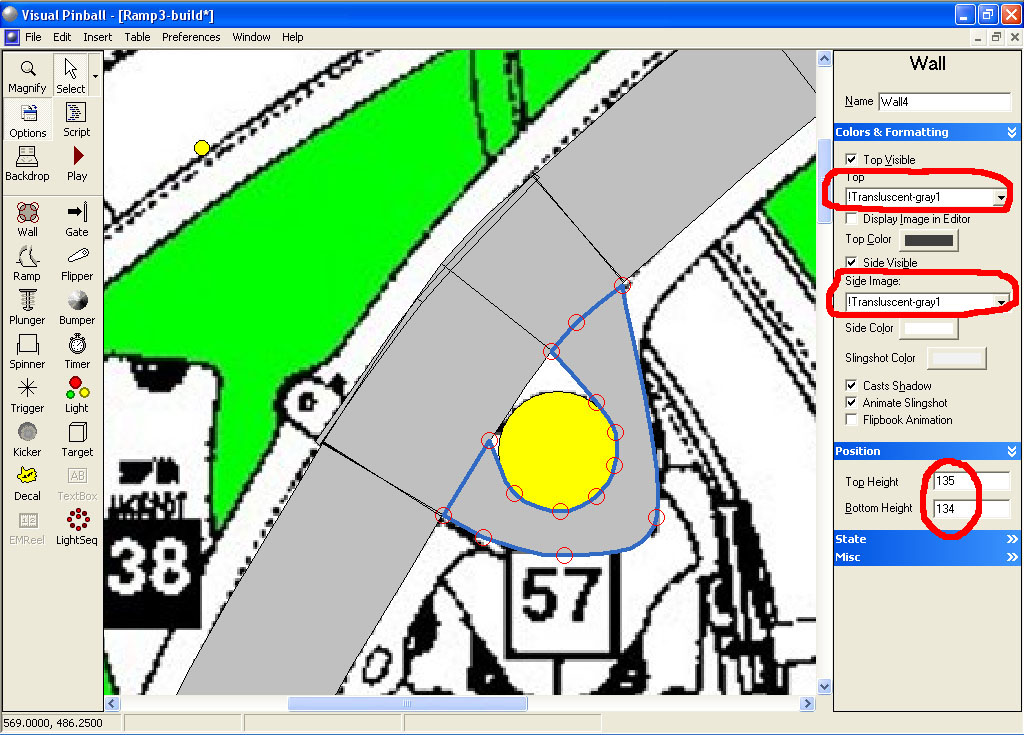
Now move the control points to match the outline of the light object. Add extra control points if needed:

Now repeat for the right side. Make sure the end points of both ramps have the same X and Y position values:

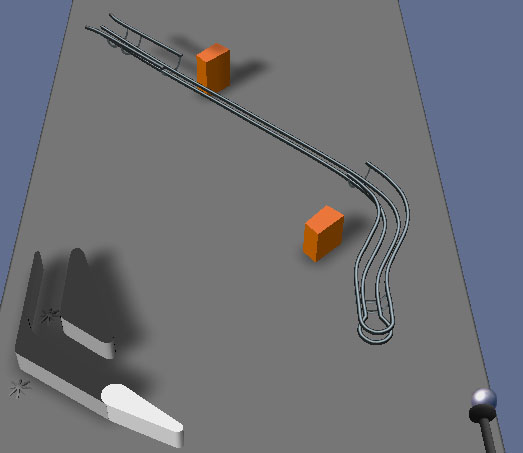
Add a left flipper and wall object where the left sling is. Change the table image to none and click play to see how the ramp is looking:

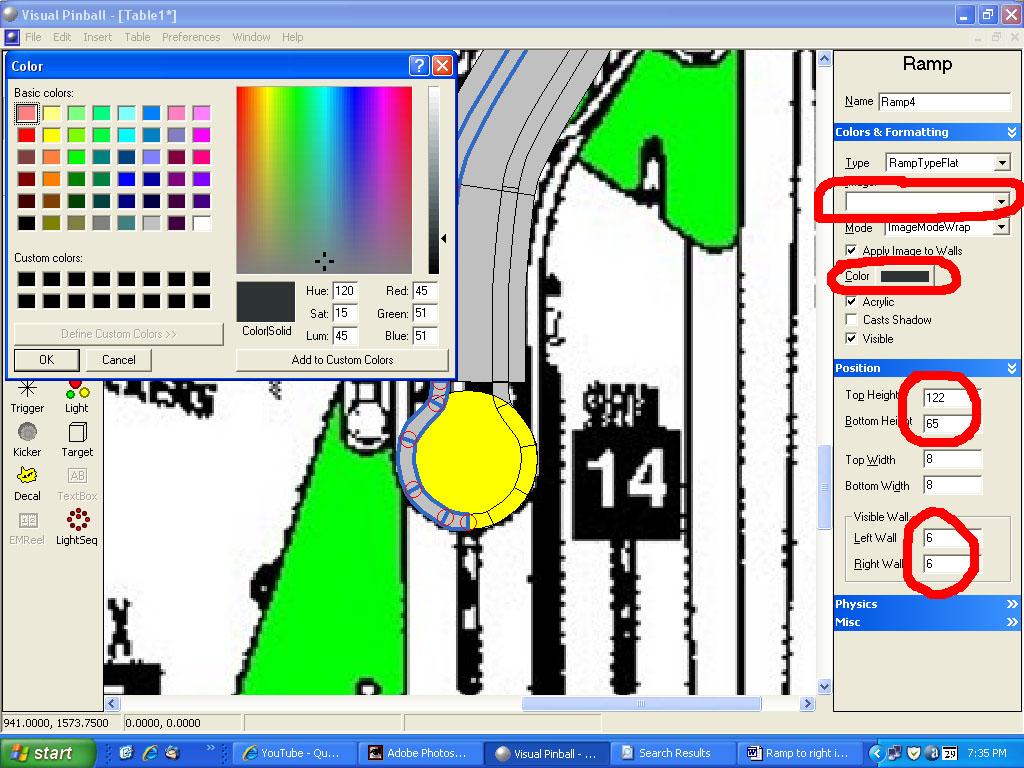
Now make a copy of the left narrow ramp. Change the Visible Wall to 6 for both left and right, change the bottom height to 65, top height to 122. Select None for the image and click on the color button and change the Red value to 45, Green to 51 and Blue to 51:

Repeat for the right narrow ramp. This will give the bottom of the wire a black shadow:
Thats all I have for now. I will post the next part this coming weekend


 . i may not have been as active as i'd like lately on this project but am still following and working on the table as the steps are posted.


 Contributor


 are all trademarks of VPFORUMS.