The "coin door", part one.The aim of the coin door will be to make something that looks like a coin door, but it will really be a mechanism that will have all the controls hidden (volume control, some auxiliar buttons, an USB port, etc). Let's see some images.
First I get a CD case. Its one of these that you push and opens, push back until you hear "click" and it is closed:

I dismounted to see the mechanism that leads into:

The mechanism dismounted to see it better

The black piece moves towards the small blach lane. It has a spring inside that makes the strength to move out. When reaches the bottom there is a small plastic piece that holds the mechanism. The way to get rid of the closure is pushing a little click and the black piece is released (sorry if you don't understand it well, my english level is not so good to explain this kind of things)
Well, I have to attach it to the cabinet, so I make a little support:

Now I srew the mechanism:

I also make a small MDF piece to hold the small plastic piece that holds the mechanism:

So, the result is this:

I guess you know what I want to achieve...
I cut more MDF pieces to get the front of the coin door attached to the mechanism:

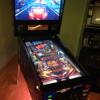
And this is the thing I have at the moment. The coin door closed:

If I want to change the volume, or use some auxiliar control (exit the game, reset the game, or whatever wich doesn't mean play) i only have to push it until I hear 'click'...

... and it opens, showing what will be a complete auxiliar control panel:

Well, that's all for now. Now I want to rest a bit, I want to finish my Fish Tales table before I continue making this.
Hope you like it.


 Contributor


 are all trademarks of VPFORUMS.