I just need the accelerometer functionality.
I guess you're just looking for a way to have analog nudging... if so, take a look at this thread.


 7 votes
Pinball Wizard


Hobbyist


Posted 14 September 2023 - 11:10 AM
Hello everyone,
Hello MJR,
@MJR you really helped me out ordering my chime board at elecrow. It works fine. Thank you.
I want to build on the positive experiences and now order a pinscape main board and power board.
Unfortunately, there is a question from elecrow and I really don't know much about the topic.
Can you please help me again?
They ask:
- FQP13N06L is out of stock now and do you have any replacement?
I am not sure if the stock will be filled up and how long it will take.
Thank you.
Please let me know if you need further information.
Greetings
Mr. Coffee
Edited by MisterCoffee, 14 September 2023 - 11:15 AM.
Hobbyist
Posted 11 October 2023 - 07:16 AM
Hi Mike,
meanwhile the FQP13N06L is back in stock again.
But now elecrow has two more questions. I guess I can only answer one of them myself.
1. Pinscape Expansion Board R37 to R67: 47 ohm resistor (5mm lead spacing)
The mouser part you suggest is 1/4w. This one is not available. They offer me 1/8w.
I guess, this would be fine as well, because you did not mention a specific wattage. Am I right?
2. This one is difficult for me.
Main Board:
In the Main Board Gerbers, C2 spacing is 2.6mm while the 581-SR595E154MARTR1 pitch is 5.08mm.
Elecrow is simply asking what they should do, without any suggestion.
Sorry to bother you but it doesn't work without you :-)
Thanks so much.
Mr.Coffee
Pinball Wizard

Posted 11 October 2023 - 06:11 PM
Mr.Coffee - I'm guessing you're talking about the power board for the first question about the resistors R37-R67. Right, 1/8 W is fine for that one.
For the main board C2 leading spacing, I'm not sure. I don't recall it being a problem fitting the part, but the part does show 5mm lead spacing in the data sheet. You might want to substitute SR29xxxxx (fill in the rest with the same numbers), which is the same part with 2.54mm lead spacing. (Or just any other 150nF ceramic disc capacitor that'll fit the footprint.)
Edited by mjr, 11 October 2023 - 06:15 PM.
Hobbyist
Posted 11 October 2023 - 08:03 PM
Thank you mjr.
Yes, I was talking about the power board and I will take the 1/8w.
Concerning the C2... there is no SR29 with the same numbers. That would be SR295E154MARTR1. But there is only a SR295E224MARTR1 with 0.22uf. I guess this wont fit.
But nevermind. If I can take any 150nf ceramic disc capacitor I will recommend 81-RDER71H154K1P1H3B to elecrow.
regards
Pinball Fan


Posted 26 October 2023 - 01:32 AM
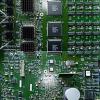
Would you happen to have a high-resolution pic of how the Standalone-KL25Z should look after the headers are installed?
Not off-hand. Just use reasonable care to keep the headers pressed flat against the board while you solder the first couple of pins. Once the first couple of pins are soldered it will be effectively immovable, so soldering the rest is pretty much trivial.
Edited by Tesla, 26 October 2023 - 02:01 AM.
Enthusiast
Posted 26 October 2023 - 09:16 AM
Im think MJR has that part very well documented in his Build guide: http://mjrnet.org/pi...5zHardwareSetup
When used with expension boards, the pin headers must sit on the bottom side of the KL25z , of cause the shorter part of the pins must solder in the KL25-PCB, the longer ones fit in the approriate sockets of the expension-board-pcb
Pinball Fan
Posted 26 October 2023 - 07:09 PM
Im think MJR has that part very well documented in his Build guide: http://mjrnet.org/pi...5zHardwareSetup
When used with expansion boards, the pin headers must sit on the bottom side of the KL25z , of cause the shorter part of the pins must solder in the KL25-PCB, the longer ones fit in the appropriate sockets of the expansion-board-pcb
Perfect, thanks. I knew I had to just be missing it.
I'm reminded that when considering my final "header direction choice" ... I should probably also consider how it will be re-mounted. Like now, it's just mounted (right-side up) inside a plastic project box, which is in-turn mounted to the underneath of the ALP cabinet toward the front. Pretty sure that needs to change ... and get the KL25z finally more permanently mounted inside.
Edited by Tesla, 26 October 2023 - 07:10 PM.
Pinball Fan
Posted 27 October 2023 - 03:14 AM
So after all that and me bothering everyone ... I've come to the conclusion that I really should install the KL25z pin-headers in the Standalone configuration (pins facing upward) after-all. I suppose that makes sense as that is how it's being used.
Since I had hoped to now mount the KL25z to the inside floorboard with common 0.5-inch stand-offs ... I think it will be easier to connect and service the custom-wiring-hardness from pins on the top of the KL25z instead.
To solve the problem of possibly needing a KL25z (suitable for installation into an expansion board) sometime in the future ... I just ordered a spare-one.
Pretty sure I had some 2.54mm headers in my Arduino stuff, but this looked like an good assortment. I'll be using old-school 60/40 Rosin Core Leaded Solder.
Looks like it is time to fire-up the soldering-station. I hope it's solder-sucker gun is still operational. It was always a bit finicky, but way-cool when it worked.
Edited by Tesla, 27 October 2023 - 03:15 AM.
Pinball Fan
Posted 02 November 2023 - 04:04 PM
Im think MJR has that part very well documented in his Build guide: http://mjrnet.org/pi...5zHardwareSetup
When used with expension boards, the pin headers must sit on the bottom side of the KL25z , of cause the shorter part of the pins must solder in the KL25-PCB, the longer ones fit in the approriate sockets of the expension-board-pcb
Thanks again everyone.
I got the 4-headers soldered into my (NXP) KL25z board ... in "Standalone" config. I used common thin 60/40 rosin-core solder. Fine-tip soldering-tip element with soldering station set to 360c. Plenty of light helps. I did most of the actual pin-soldering through a low-power bench-top magnifying glass.
After I get it mounted inside the cabinet's floor-board, I plan to start working on my initial wiring-harness (for the basic switches and flippers).
Edited by Tesla, 10 November 2023 - 12:50 AM.
Pinball Fan
Posted 11 November 2023 - 05:15 AM
In case anyone was wondering ... I got my first buttons working with no major-problems.
https://www.vpforums...=52387&p=529327
A big thanks to all who had a hand in this little Pinscape-controller and supporting software.
Edited by Tesla, 11 November 2023 - 05:59 AM.


Community Forum Software by IP.Board
Licensed to: VPForums.org
 are all trademarks of VPFORUMS.
