Jump to content


Photo
- - - - -

MinPin Mash-Up Build Notes 24/17 Hyperspin Future Pinball


  • Please log in to reply
10 replies to this topic

#1 MTPPC

MTPPC

    Enthusiast

  • Members
  • PipPipPip
  • 352 posts
  • Location:Big Sky, Montana USA

  • Flag: ---------

  • Favorite Pinball: Mata Hari .directB2S

Posted 28 June 2012 - 03:00 AM

I'm starting my own thread to document my first attempt at building a digital pinball machine:

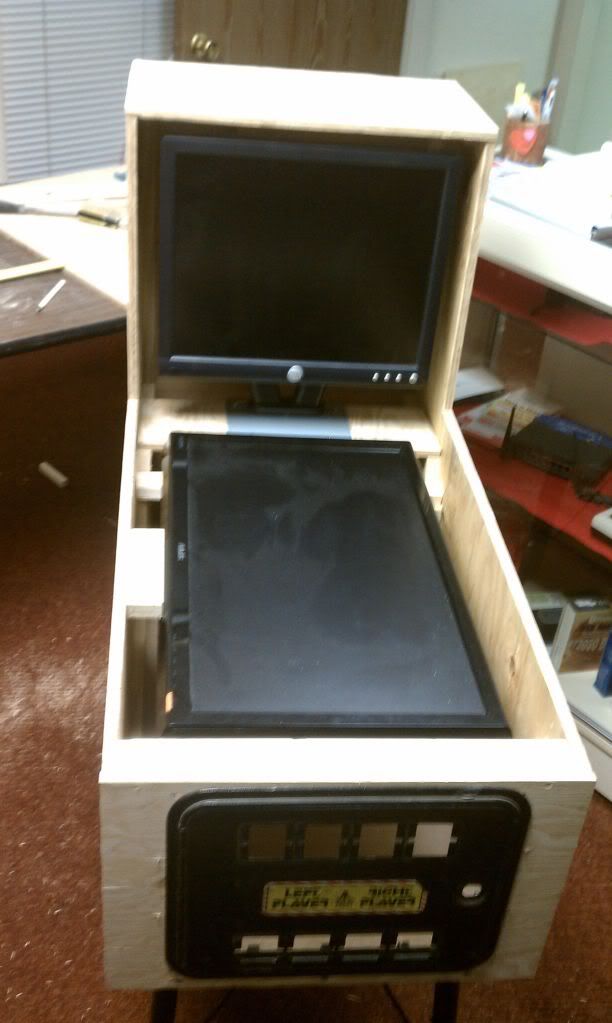
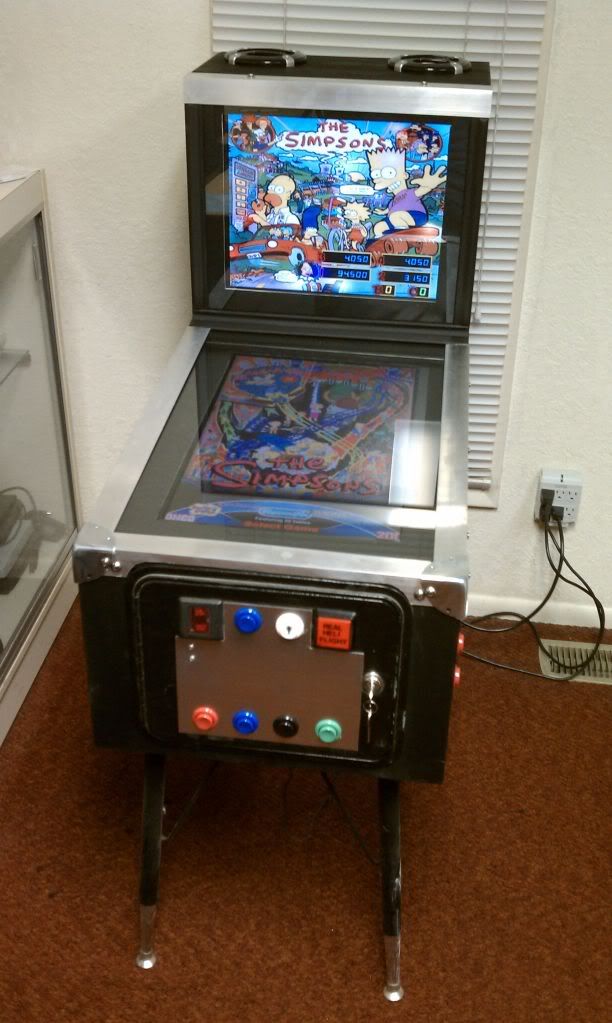
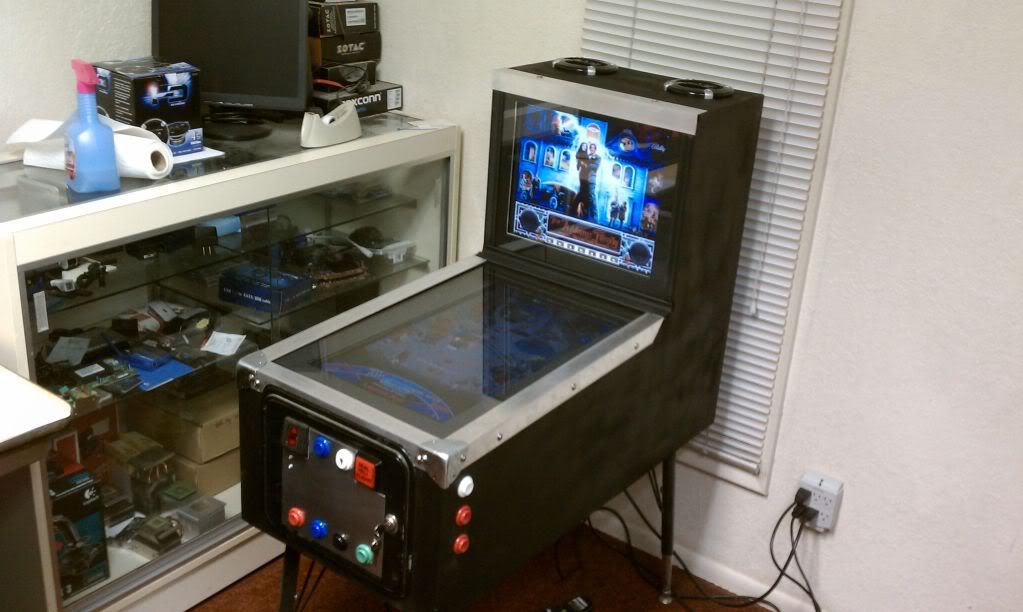
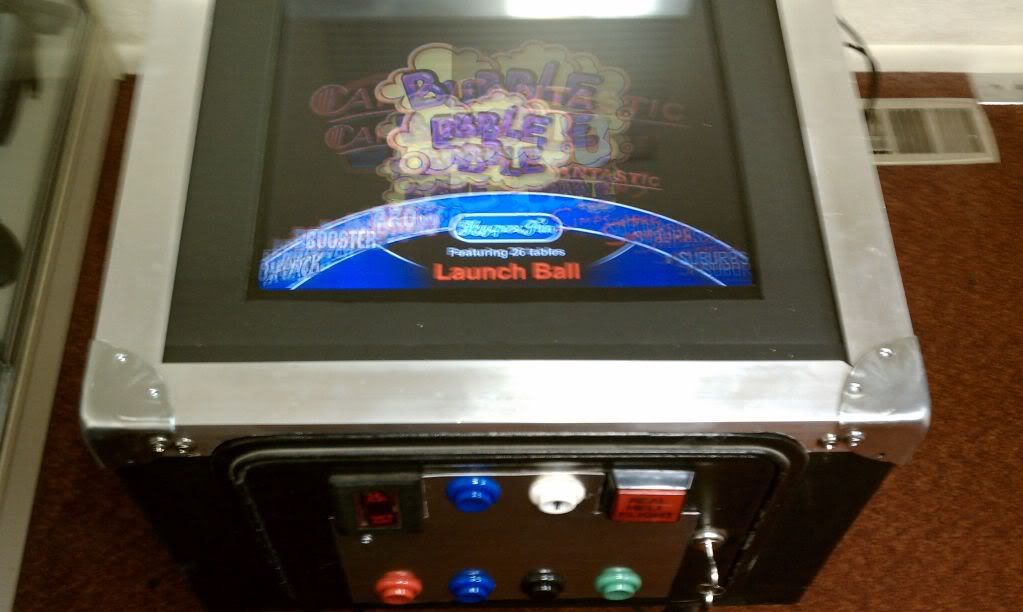
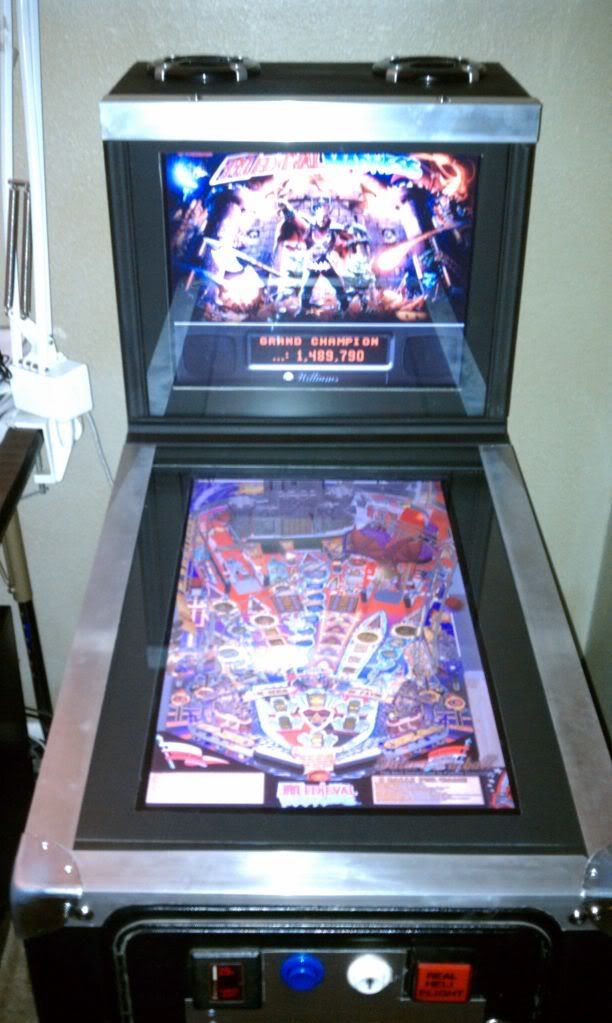
This is a made from scratch project using a 24" asus widescreen and a 17" dell 4:3 monitor. My buddy gave me an HP dual core 2.5. I'm going to use hyperpin, a xinmo 1-player encoder and joy2keys to run future pinball tables. I don't know anything about visual pinball, but I might try that in the future. For now, I have all my software running good and about a dozen tables set up and working nicely.

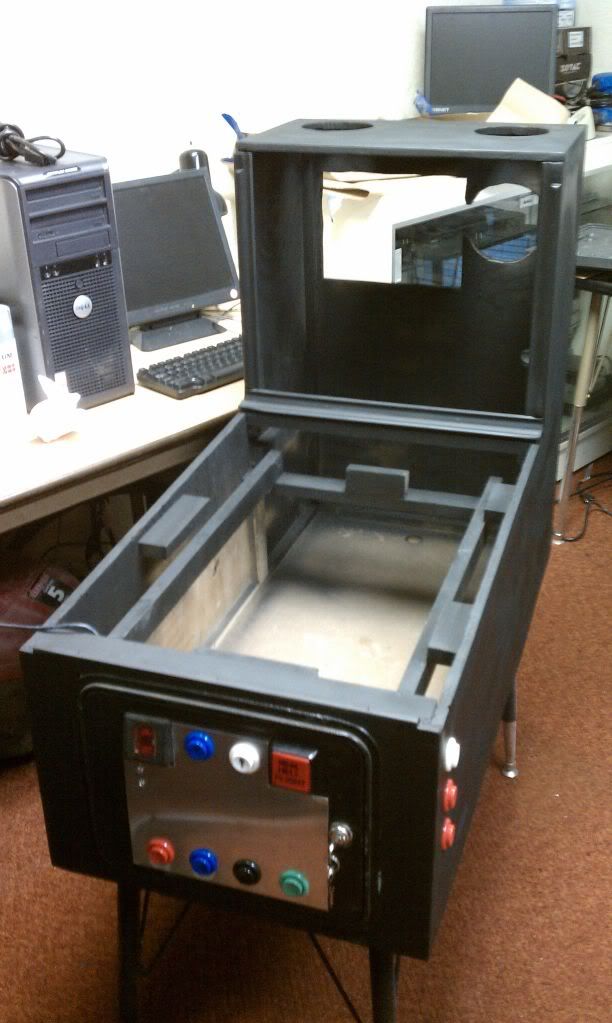
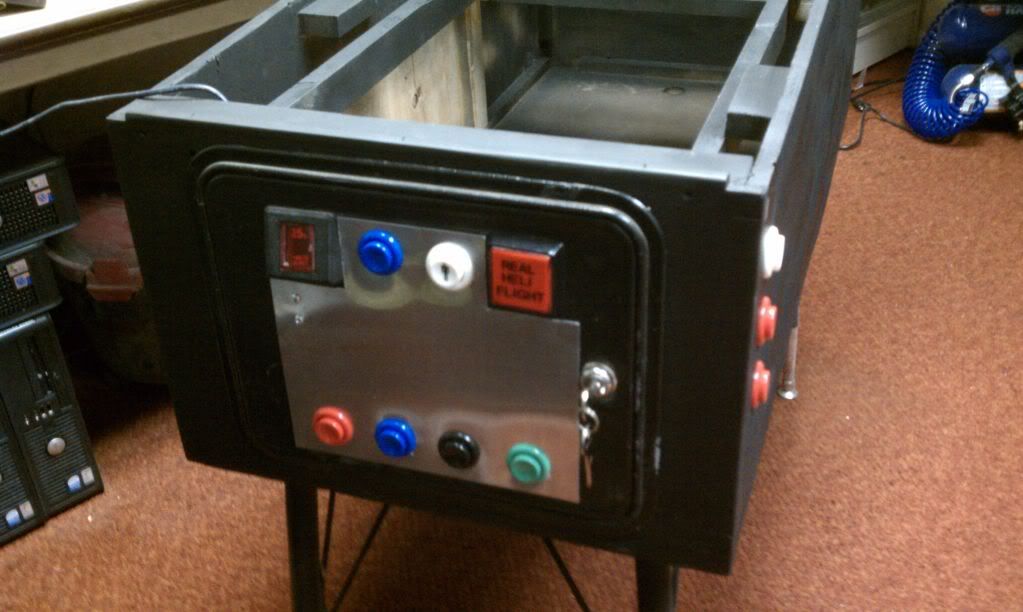
I'll have flipper and left nudge buttons on the left side and flipper, right nudge, and bottom nudge on the right side. My coindoor came off a Steel Talons arcade machine and has room for eight buttons. So far, I'm thinking:

Coin
Start (shifted pause)
Plunger
Escape or Back
Instruction Card (shifted Flyer)
Effects Volume Up (shifted Music Volume Up)
Effects Volume Down (shifted Music Volume Down)
Shift (via joytokeys)

The PC power button will just be a standard arcade button on the back of the machine. The playfield will be covered w/ 3/16" glass and the backglass will be 1/8". It's built on a 1-1/4" Fiberboard adjustable leg table cut to 36" x 18". The box is made of 7/16" fir exterior plywood.

A buddy lent me an air brad nailer and I used 1" brads, 3/4" nailers and glue to assemble it. What a life saver!

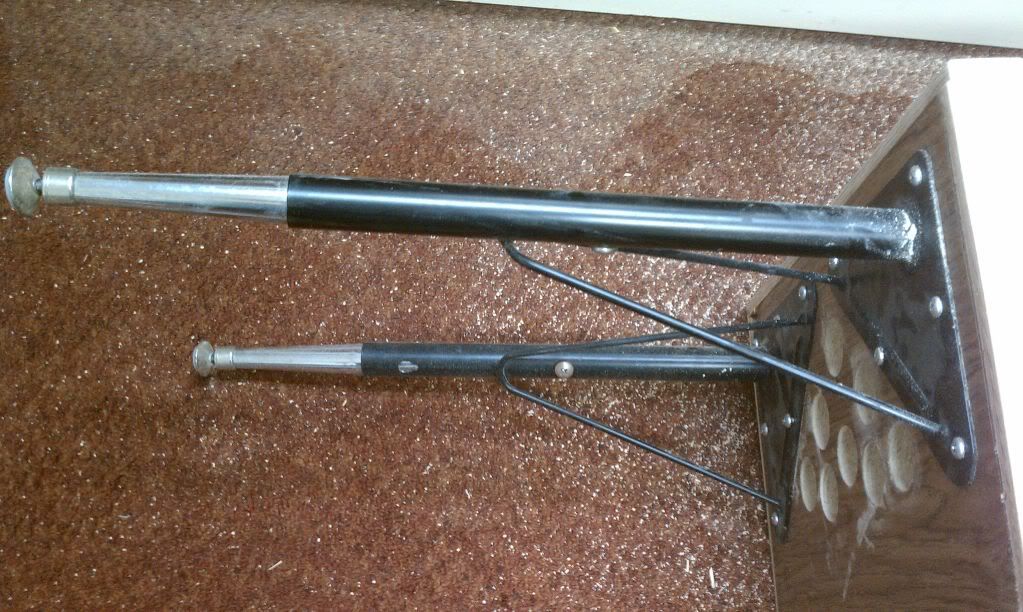
I'm using 1.5" light aluminum angle for side rails and lock bar and using Large Flat ATA Flight Road Trunk Case Corners where the chamfered angles meet. (http://www.ebay.com/...=item3349f3a1e9). There is a 16" x 8" eave vent and fan in the back. There are two 4" speakers mounted in the roof of the backbox.

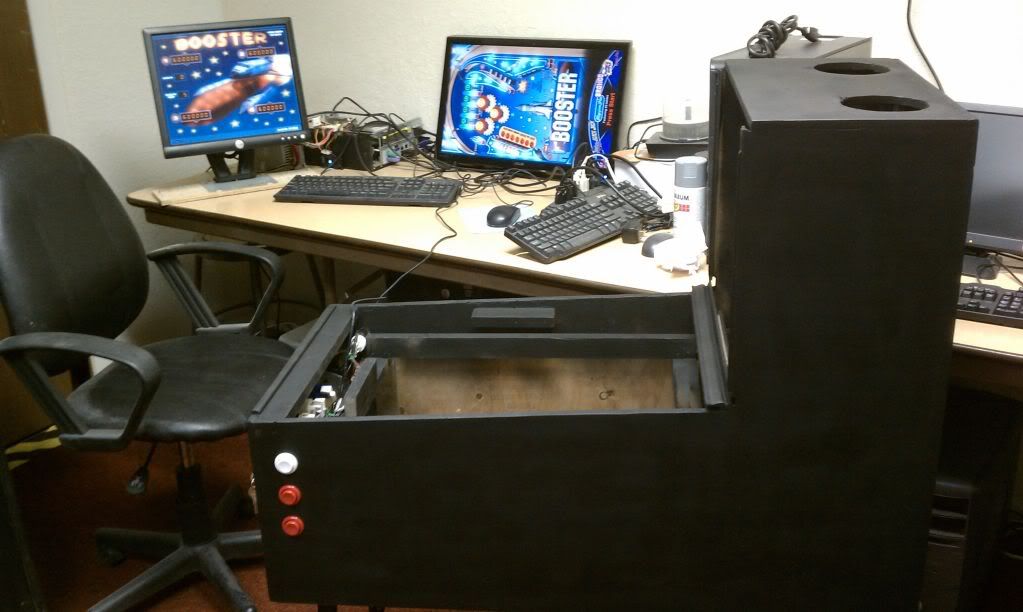
I'm leaving it flat black for now, but have a line on some Tron upright arcade game side art that I might buy to cut up and wrap this with.

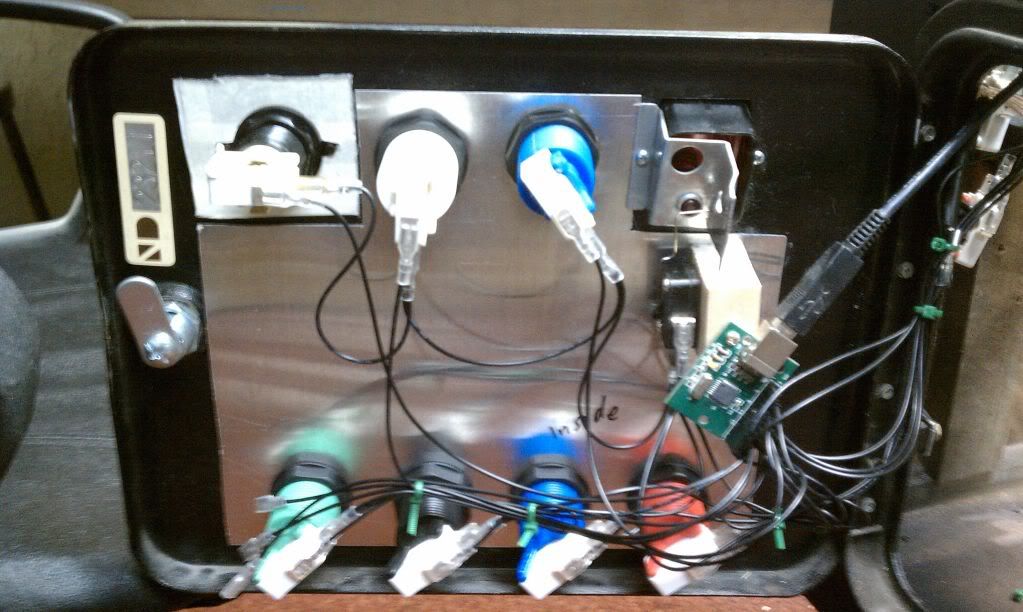
Today I wired up the controls and Xin Mo joystick encoder. I will have to remap the right shift because hyperpin doesn't like that command from joytokey. Otherwise, the controls are complete. Here are some pictures:


It looks like the total build will come in under $400, but I have to tally it up yet. So much for now. Next is speakers, power and final assembly. More pics to follow.


#2 swaffar

swaffar

    Enthusiast

  • Members
  • PipPipPip
  • 141 posts
  • Location:Spangdahlem, Germany

  • Flag: United States of America

  • Favorite Pinball: BBB, MM, CV

Posted 28 June 2012 - 10:43 AM

What's with the strange hole in the backbox? Are you putting the PC up there? I'm just wondering about ventilation.

Check out my mini-cab project

Signature_zps03cd408c.jpg


#3 MTPPC

MTPPC

    Enthusiast

  • Members
  • PipPipPip
  • 352 posts
  • Location:Big Sky, Montana USA

  • Flag: ---------

  • Favorite Pinball: Mata Hari .directB2S

Posted 28 June 2012 - 02:53 PM

QUOTE (swaffar @ Jun 28 2012, 04:43 AM) <{POST_SNAPBACK}>
What's with the strange hole in the backbox? Are you putting the PC up there? I'm just wondering about ventilation.

A 120mm fan goes in the circular hole and the rectangular area is for natural draft. The whole area will be covered from behind with a "Air Vent 16" x 6" Mill Aluminum Undereave Vent":

http://www.lowes.com...product_price|0

#4 swaffar

swaffar

    Enthusiast

  • Members
  • PipPipPip
  • 141 posts
  • Location:Spangdahlem, Germany

  • Flag: United States of America

  • Favorite Pinball: BBB, MM, CV

Posted 28 June 2012 - 10:31 PM

QUOTE (MTPPC @ Jun 28 2012, 02:53 PM) <{POST_SNAPBACK}>
QUOTE (swaffar @ Jun 28 2012, 04:43 AM) <{POST_SNAPBACK}>
What's with the strange hole in the backbox? Are you putting the PC up there? I'm just wondering about ventilation.

A 120mm fan goes in the circular hole and the rectangular area is for natural draft. The whole area will be covered from behind with a "Air Vent 16" x 6" Mill Aluminum Undereave Vent":

http://www.lowes.com...product_price|0


Then you're prolly gonna want/need more airflow through the bottom cab.

Check out my mini-cab project

Signature_zps03cd408c.jpg


#5 MTPPC

MTPPC

    Enthusiast

  • Members
  • PipPipPip
  • 352 posts
  • Location:Big Sky, Montana USA

  • Flag: ---------

  • Favorite Pinball: Mata Hari .directB2S

Posted 29 June 2012 - 06:30 AM

QUOTE (swaffar @ Jun 28 2012, 04:31 PM) <{POST_SNAPBACK}>
QUOTE (MTPPC @ Jun 28 2012, 02:53 PM) <{POST_SNAPBACK}>
QUOTE (swaffar @ Jun 28 2012, 04:43 AM) <{POST_SNAPBACK}>
What's with the strange hole in the backbox? Are you putting the PC up there? I'm just wondering about ventilation.

A 120mm fan goes in the circular hole and the rectangular area is for natural draft. The whole area will be covered from behind with a "Air Vent 16" x 6" Mill Aluminum Undereave Vent":

http://www.lowes.com...product_price|0


Then you're prolly gonna want/need more airflow through the bottom cab.

Well I'm letting it burn in overnight. I guess we'll see how hot it gets. There is a 120 mm fan above the CPU cooler that blows into the playfield LCD so It might be OK. I'll take your advice under serious advisement none-the-less.

Got a little further:


What's left:

Remap left flipper
Wire lights behind coin and plunger buttons
Final finish the exterior (might wrap with Tron art or vinyl)
Determine final button mapping
Wire up the electrical jack
Set up about 100 more tables, info cards, flyers, etc. It's been a pretty good push to get this far so I'm ready to take a little break for a while and just enjoy playing some pinball.


#6 Hollywdbri

Hollywdbri

    Neophyte

  • Platinum Supporter
  • 7 posts

  • Flag: United States of America

  • Favorite Pinball: Star trek tng

Posted 30 June 2012 - 05:44 AM

"I'm using 1.5" light aluminum angle for side rails and lock bar"

Where did you get it and how did you cut it? huh.gif

#7 swaffar

swaffar

    Enthusiast

  • Members
  • PipPipPip
  • 141 posts
  • Location:Spangdahlem, Germany

  • Flag: United States of America

  • Favorite Pinball: BBB, MM, CV

Posted 30 June 2012 - 12:09 PM

QUOTE (Hollywdbri @ Jun 30 2012, 06:44 AM) <{POST_SNAPBACK}>
"I'm using 1.5" light aluminum angle for side rails and lock bar"

Where did you get it and how did you cut it? huh.gif


Hardware store and a metal cutting hand saw? Just a guess.

Check out my mini-cab project

Signature_zps03cd408c.jpg


#8 MTPPC

MTPPC

    Enthusiast

  • Members
  • PipPipPip
  • 352 posts
  • Location:Big Sky, Montana USA

  • Flag: ---------

  • Favorite Pinball: Mata Hari .directB2S

Posted 30 June 2012 - 02:54 PM

QUOTE (swaffar @ Jun 30 2012, 06:09 AM) <{POST_SNAPBACK}>
QUOTE (Hollywdbri @ Jun 30 2012, 06:44 AM) <{POST_SNAPBACK}>
"I'm using 1.5" light aluminum angle for side rails and lock bar"

Where did you get it and how did you cut it? huh.gif


Hardware store and a metal cutting hand saw? Just a guess.

Lowe's and a jig saw with a 32 tpi blade. First put masking tape on the angles so the saw doesn't ruin the finish.

Edited by MTPPC, 30 June 2012 - 02:55 PM.


#9 Hollywdbri

Hollywdbri

    Neophyte

  • Platinum Supporter
  • 7 posts

  • Flag: United States of America

  • Favorite Pinball: Star trek tng

Posted 01 July 2012 - 06:31 AM

QUOTE (MTPPC @ Jun 30 2012, 07:54 AM) <{POST_SNAPBACK}>
QUOTE (swaffar @ Jun 30 2012, 06:09 AM) <{POST_SNAPBACK}>
QUOTE (Hollywdbri @ Jun 30 2012, 06:44 AM) <{POST_SNAPBACK}>
"I'm using 1.5" light aluminum angle for side rails and lock bar"

Where did you get it and how did you cut it? huh.gif


Hardware store and a metal cutting hand saw? Just a guess.

Lowe's and a jig saw with a 32 tpi blade. First put masking tape on the angles so the saw doesn't ruin the finish.


Awesome, thanks!


#10 MTPPC

MTPPC

    Enthusiast

  • Members
  • PipPipPip
  • 352 posts
  • Location:Big Sky, Montana USA

  • Flag: ---------

  • Favorite Pinball: Mata Hari .directB2S

Posted 01 July 2012 - 02:24 PM

I placed the machine in its final location yesterday. I didn't get the lights hooked up on the coin and plunger and I'm going to get the wireless going so I can remote desktop into it. It has 3 power wires coming out the back and I have yet to finish the exterior. At this point, I'm going to take a break and just enjoy the game for a while. I'll probably dig back into it in another month or two, but for now I'm just going to enjoy it! In the meantime, I'm going to start collecting pieces for my next project: READY, FIRE, AIM!


#11 MTPPC

MTPPC

    Enthusiast

  • Members
  • PipPipPip
  • 352 posts
  • Location:Big Sky, Montana USA

  • Flag: ---------

  • Favorite Pinball: Mata Hari .directB2S

Posted 17 July 2012 - 03:32 PM

I replaced the 3 power wires with a 3-into-1 dell server power cable. I also tapped 5 volts of the PC power supply to power the launch ball button aka "REAL HELI FLIGHT". It's a button I salvaged from a steel talons machine.

My nvidia 210 card is barely enough to play, but I can get 25 frames at low settings for MM and Amazing Spiderman. It's certainly playable, but not ideal. Having started down the slippery slope, I'm beginning to accumulated parts for my full-size build.